All our Cloud servers with Windows operating system have a customized disk partitioning structure so that, once you have created your Cloud Windows server, you can easily decide whether you want your O.S. to have a single disk volume C:/ or you also want to have a second disk volume E:/
Below, we explain, for each version of Windows OS available for your Cloud, the two methods for your server to have a single C:/ disk volume or two C:/ + E:/ disk volumes
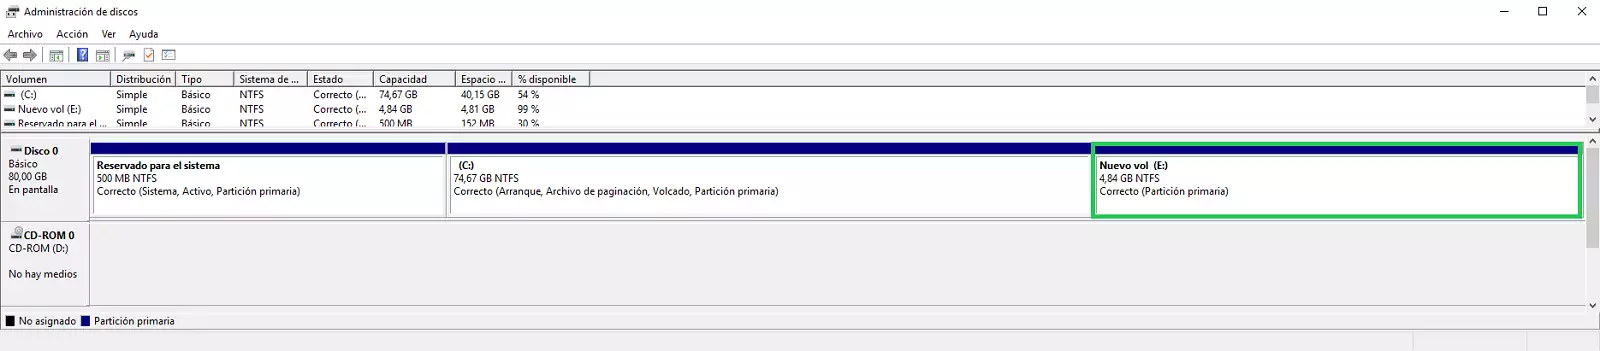
The original 80GB disk structure of your Cloud server with Windows Server 2012 is as follows:

A) Server with a single disk volume C:/
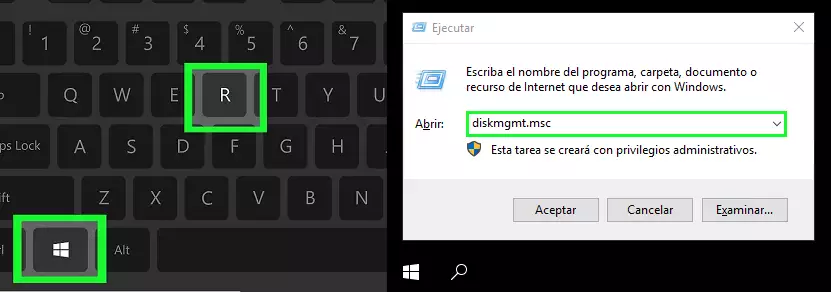
Press the "Windows + R" keys to open Run, type diskmgmt.msc and press the "Enter" key.

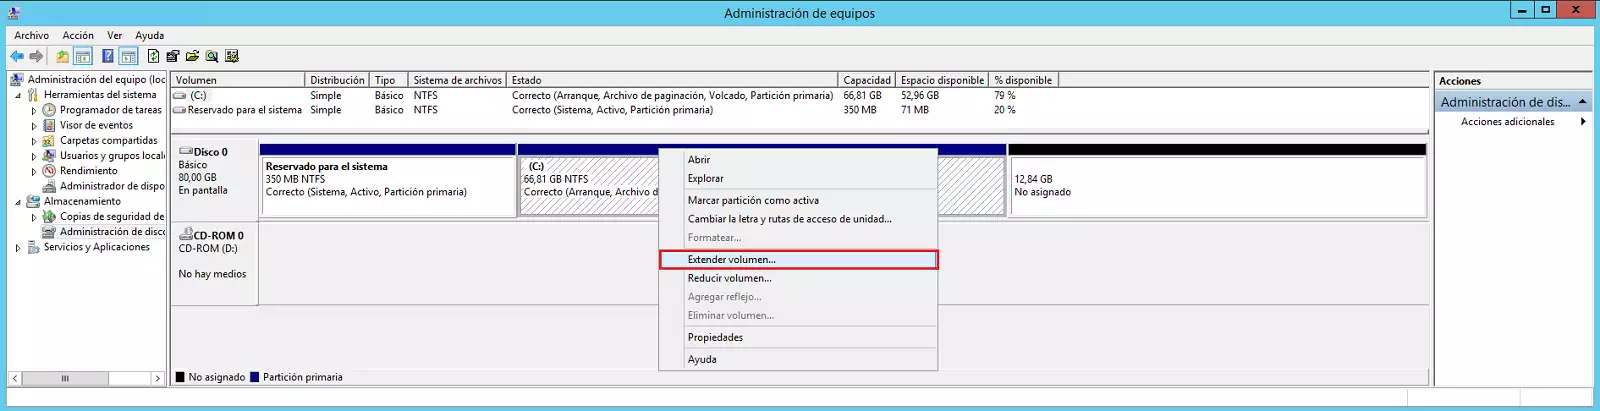
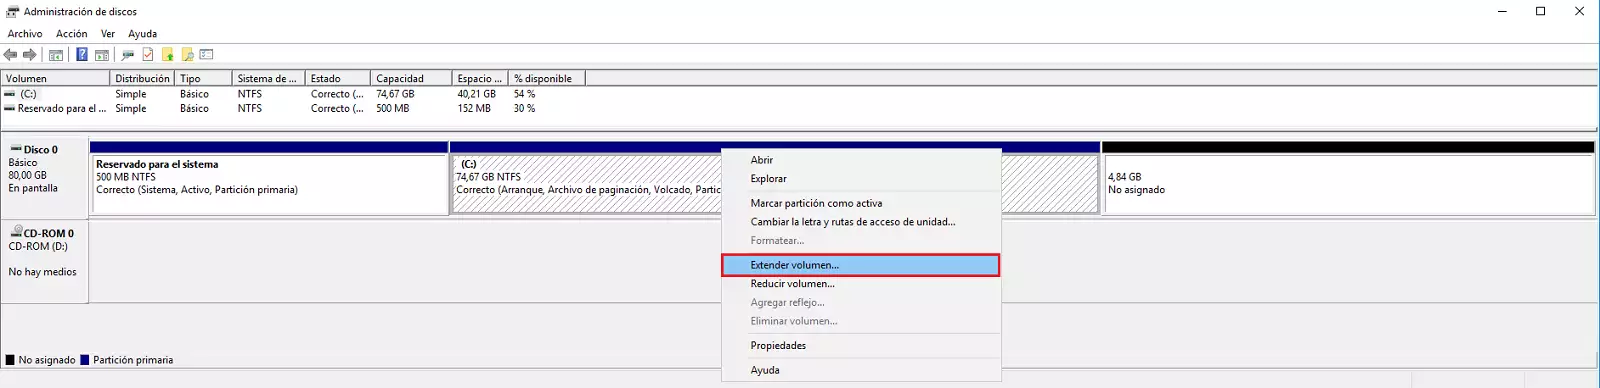
Once the Windows Disk Manager is open, place the mouse over the C: drive, right click on the drive and in the menu click on the option "Spread Volume..."
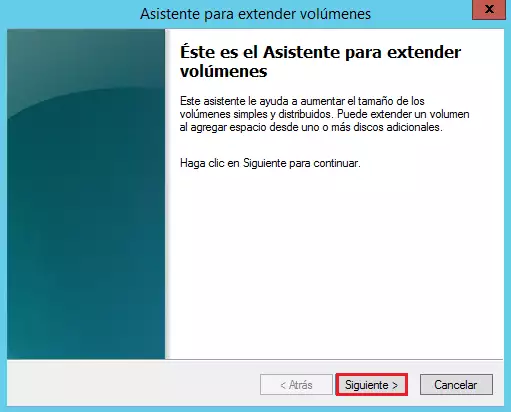
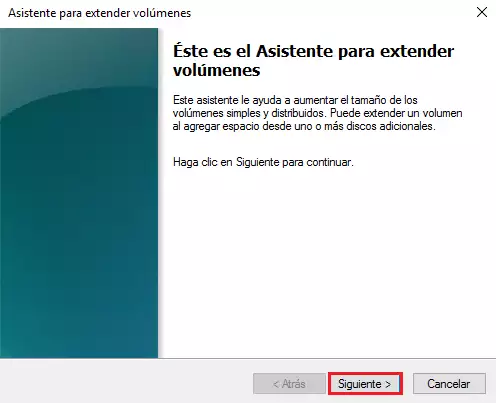
In the wizard for extending volumes click on the "Next >" button
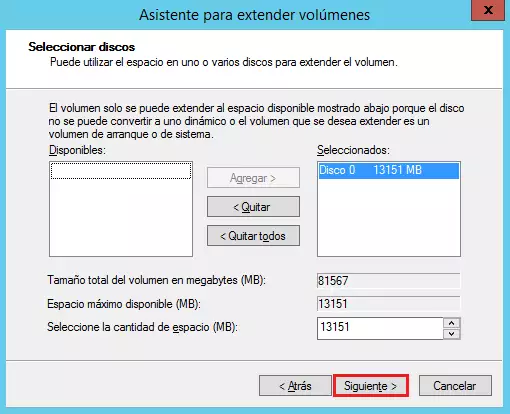
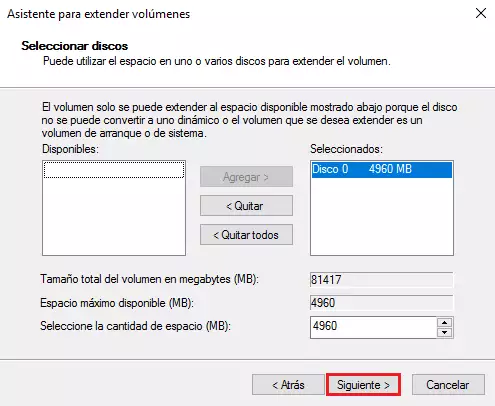
In the "Select disks" window click on the "Next >" button.
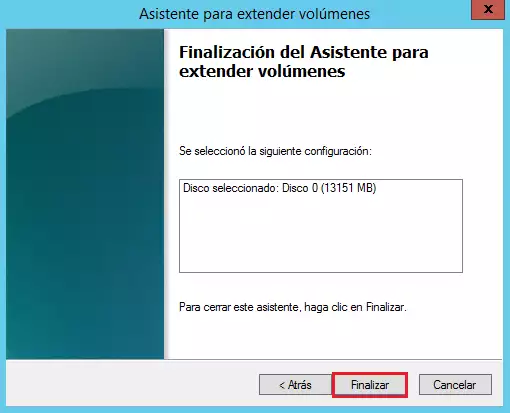
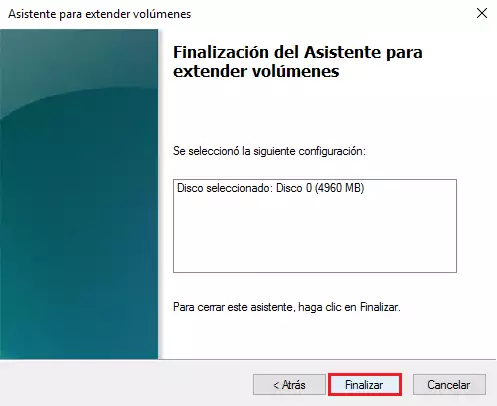
In the next window click on the "Finish >" button.
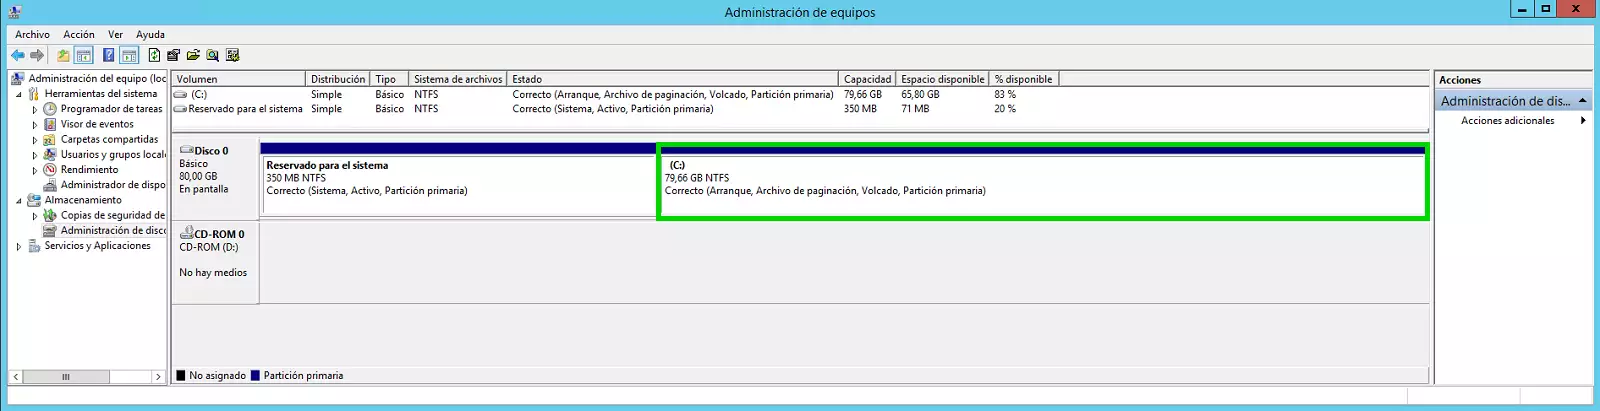
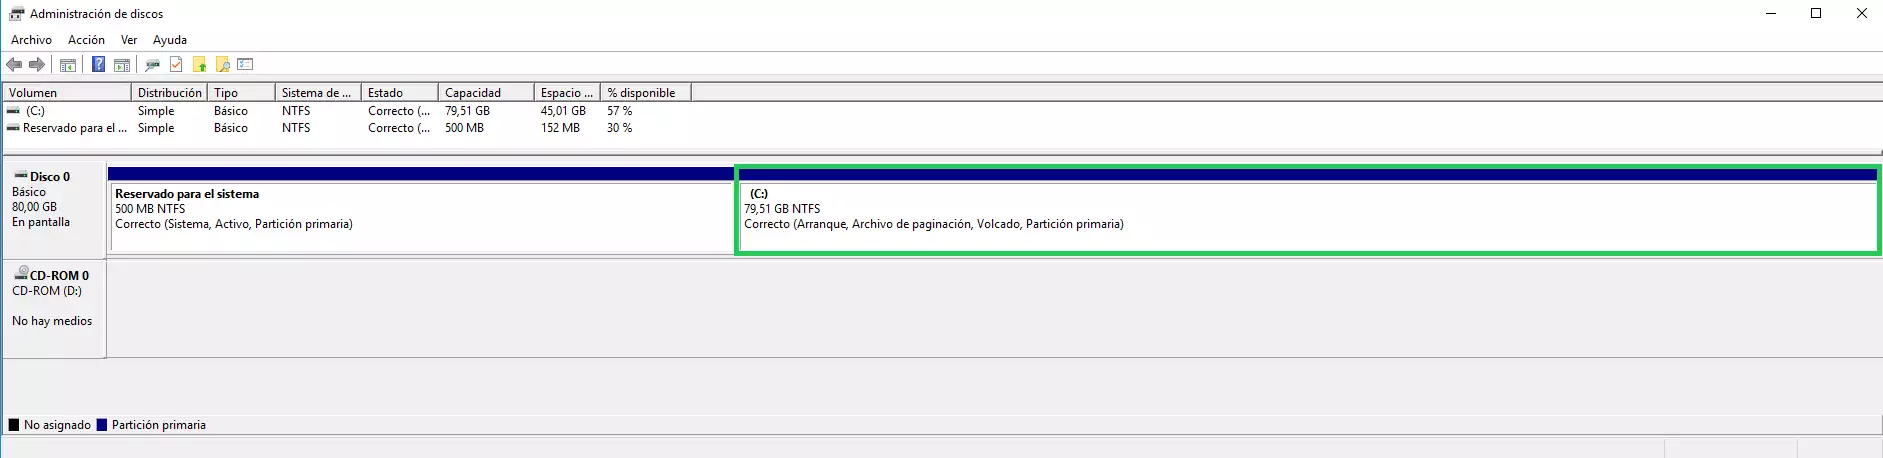
Then you can see how the disk volume C:/ has been extended and occupies all the available disk space of your Cloud server.
B) Server with one disk volume C:/ and a second disk volume E:/
Press the "Windows + R" keys to open Run, type diskmgmt.msc and press the "Enter" key.
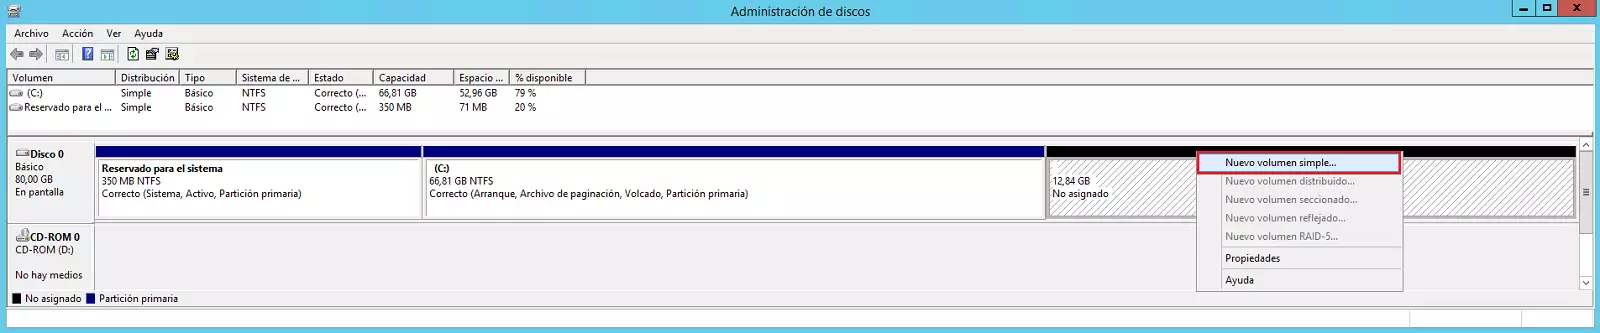
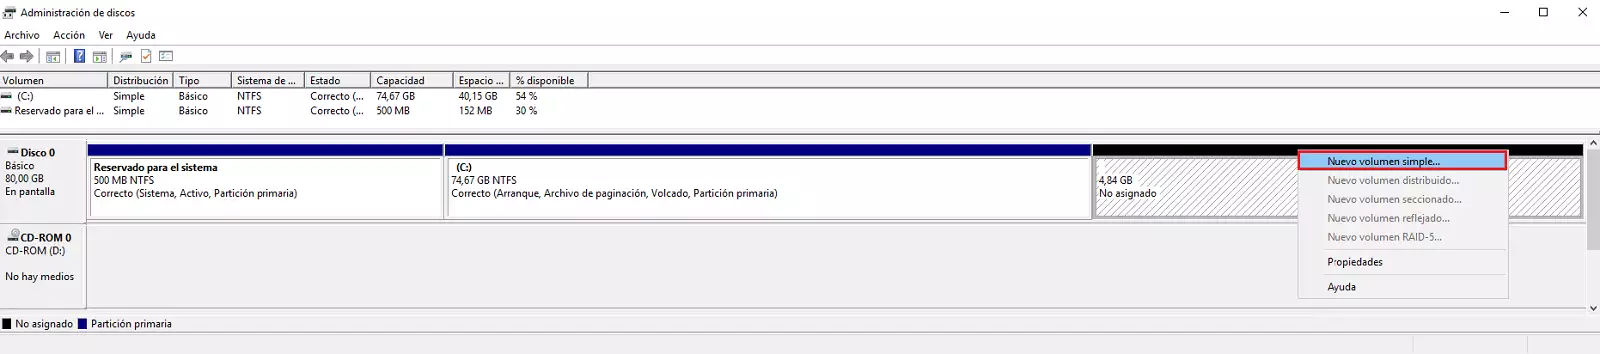
Once the Windows Disk Manager is open, place the mouse over the unallocated disk space, right click on it and in the menu click on the "New Simple Volume..." option
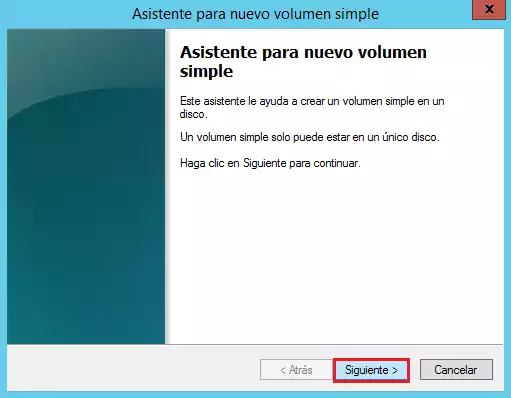
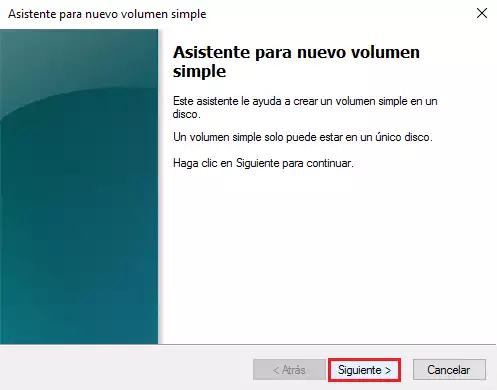
In the new simple volume wizard click on the "Next >" button
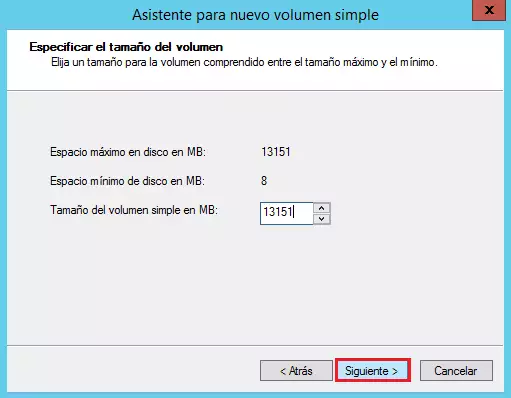
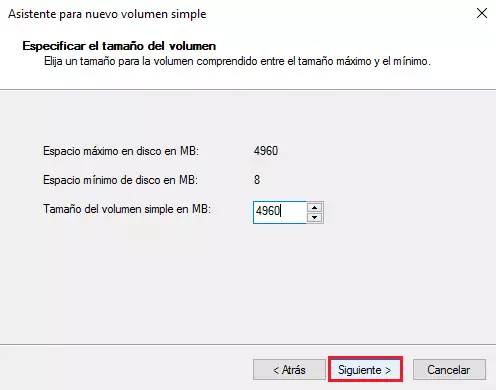
In the "Specify volume size" window click on the "Next >" button.
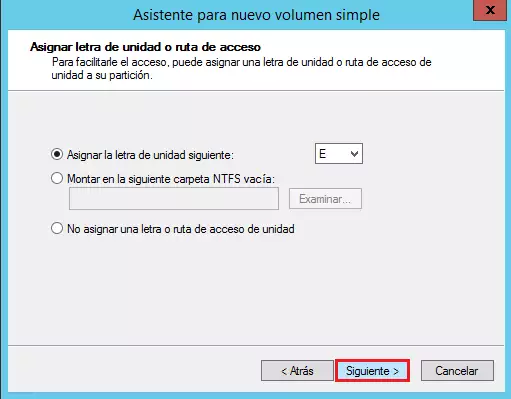
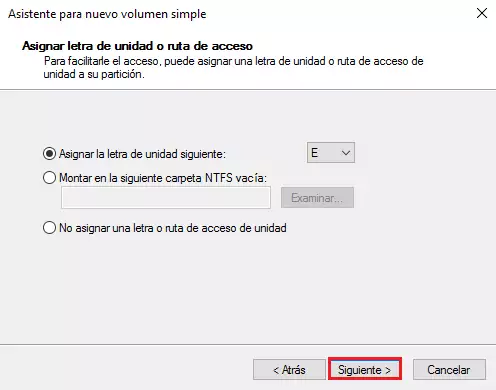
In the window for "Assign drive letter..." click on the "Next >" button.
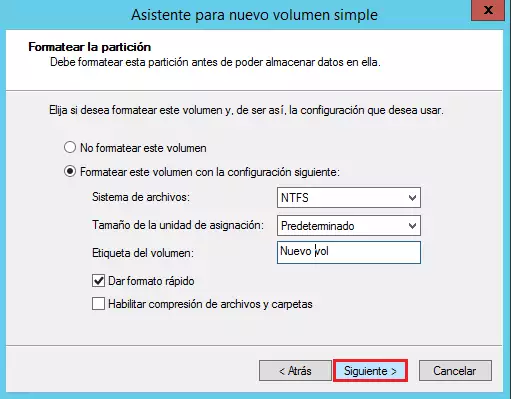
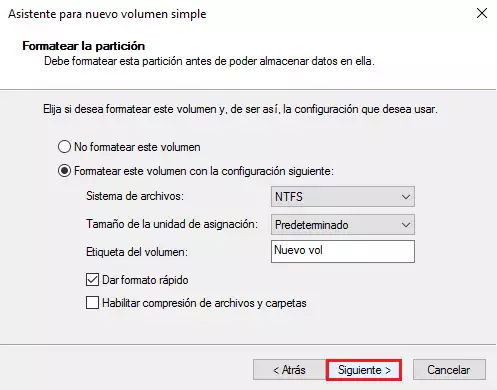
In the window for "Format partition" click on the "Next >" button.
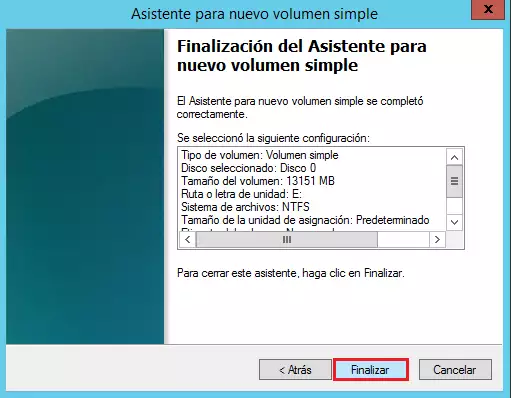
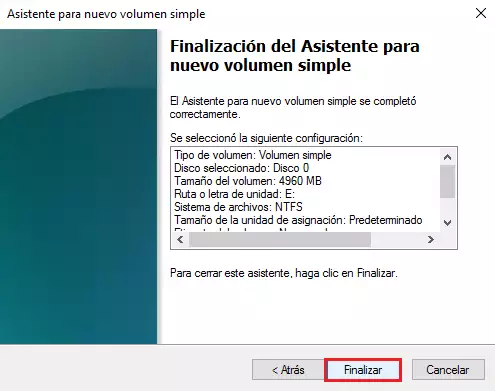
Then accept the changes for the creation of the new volume by clicking on the "Finish " button
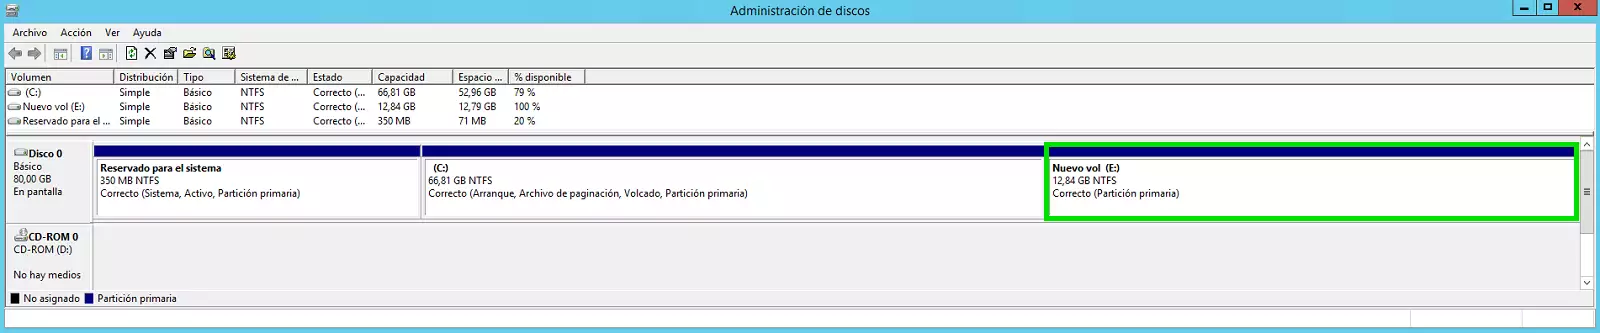
You will then be able to see how an E:/ disk volume has been created and occupies all the available disk space of your Cloud server.
The original 80GB disk structure of your Cloud server with Windows Server 2016/2019 is as follows:

A) Server with single disk volume C:/
Press the "Windows + R" keys to open Run, type diskmgmt.msc and press the "Enter" key.
Once the Windows Disk Manager is open, place the mouse over the C: drive, right click on the drive and in the menu click on the option "Spread Volume..."
In the wizard for extending volumes click on the "Next >" button
In the "Select disks" window click on the "Next >" button.
In the next window click on the "Finish >" button.
Then you can see how the disk volume C:/ has been extended and occupies all the available disk space of your Cloud server.
B) Server with one disk volume C:/ and a second disk volume E:/.
Press the "Windows + R" keys to open Run, type diskmgmt.msc and press the "Enter" key.

Once the Windows Disk Manager is open, place the mouse over the unallocated disk space, right click on it and in the menu click on the "New Simple Volume..." option
In the new simple volume wizard click on the "Next >" button
In the "Specify volume size" window click on the "Next >" button.
In the window for "Assign drive letter..." click on the "Next >" button.
In the window for "Format partition" click on the "Next >" button.
Then accept the changes for the creation of the new volume by clicking on the "Finish " button
You will then be able to see how an E:/ disk volume has been created and occupies all the available disk space of your Cloud server.