Load balancing is a mechanism that allows to distribute the consumption of cpu, network, storage, ... resources in order to be able to serve a given service without the limitations that a single device would offer. A typical example is the web traffic received by a certain URL, which can saturate the resources available on a single machine. If instead of offering that web service from a single machine, we do it by distributing the traffic and load among several servers, the capacity of that service can grow to much greater limits. This is what load balancing is all about, distributing the traffic or processing among several servers in order to be able to attend more requests, reduce response times, ...
Therefore, load balancing allows us to offer a service with better availability and allows us to grow by handling a greater demand of requests.
Web load balancing: this is one of the most common cases, based on the previous example, where we receive a certain amount of traffic (e.g. web traffic), which we distribute among several web servers to be able to handle many more visits than a single server could support, even if we could increase the resources to the maximum. The latter is known as vertical scaling, i.e. maximizing the resources of a machine, for example in CPU and RAM, as opposed to horizontal scaling where new servers are added when the system needs to grow to handle more HTTP requests.

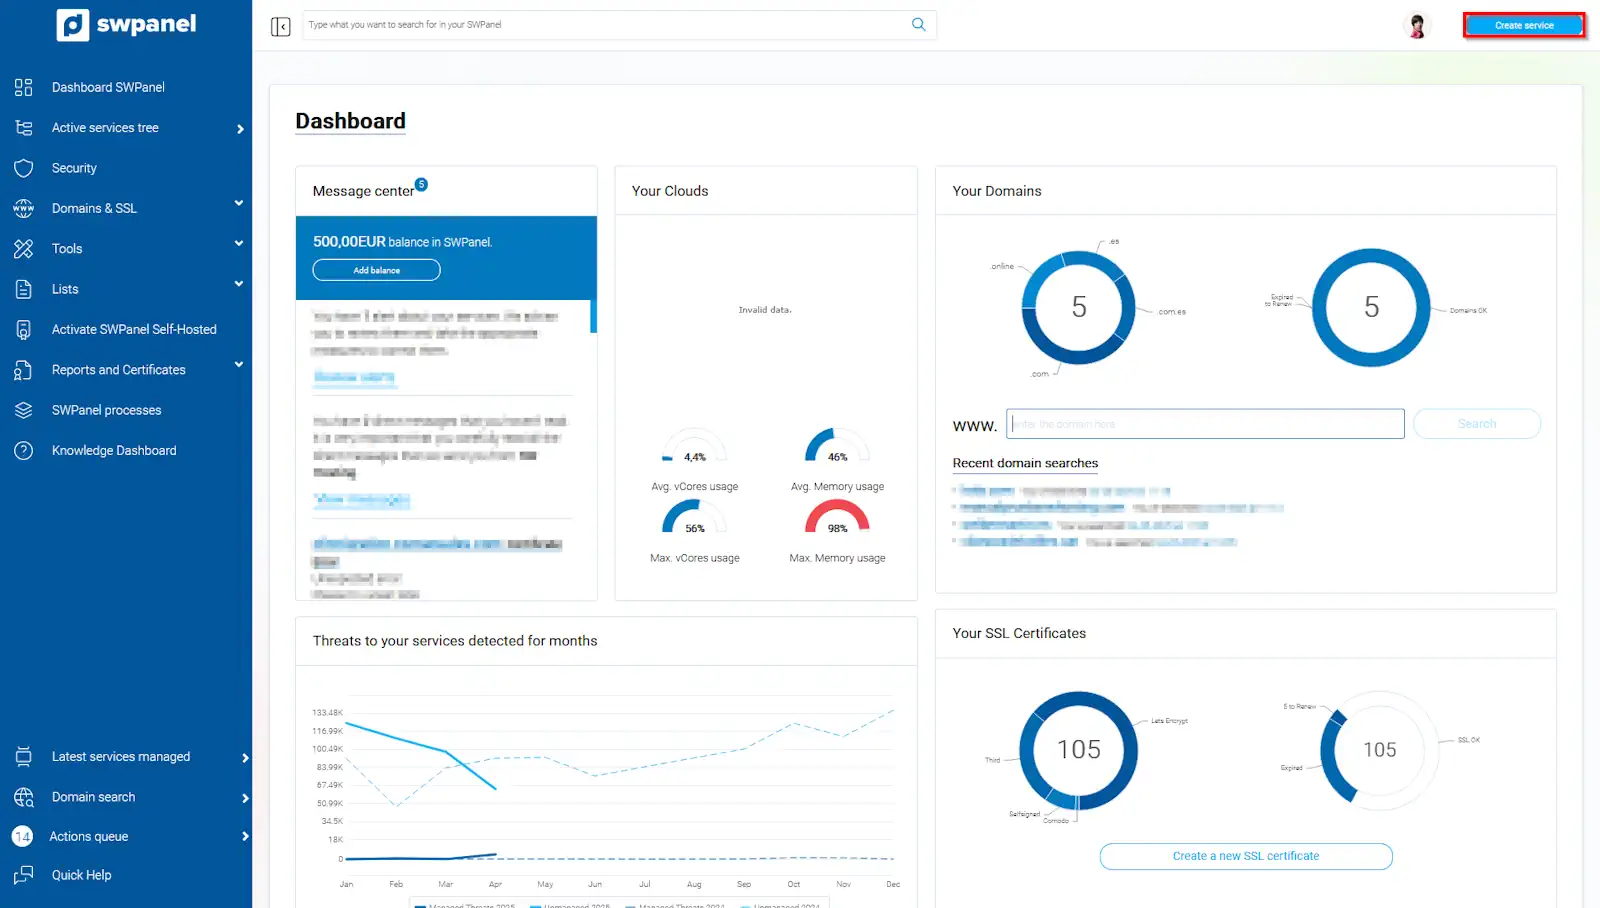
a) On the top right hand side of the SWPanel click on the "Create Service" button **.
info_capture The screenshot is for reference only. It was taken from version 2025.03.0007 on 25/04/2025. It may differ from what the current version of SWPanel displays.
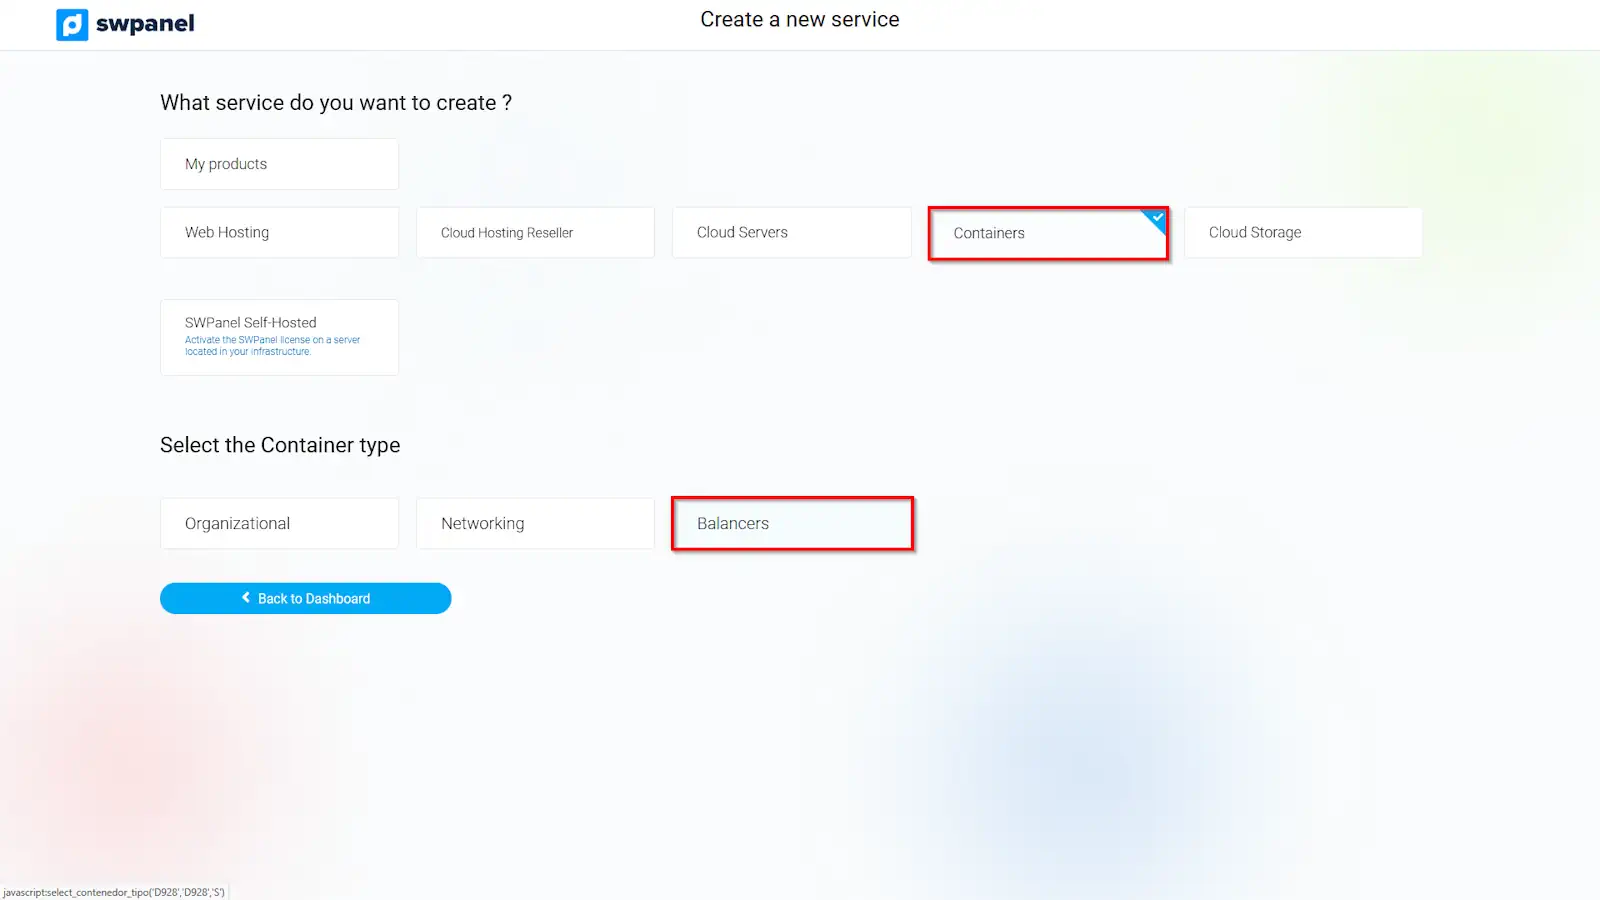
b) In the following window we go to the "Containers" tab and then choose the "Balancers " option.
info_capture The screenshot is for reference only. It was taken from version 2025.03.0007 on 25/04/2025. It may differ from what the current version of SWPanel displays.
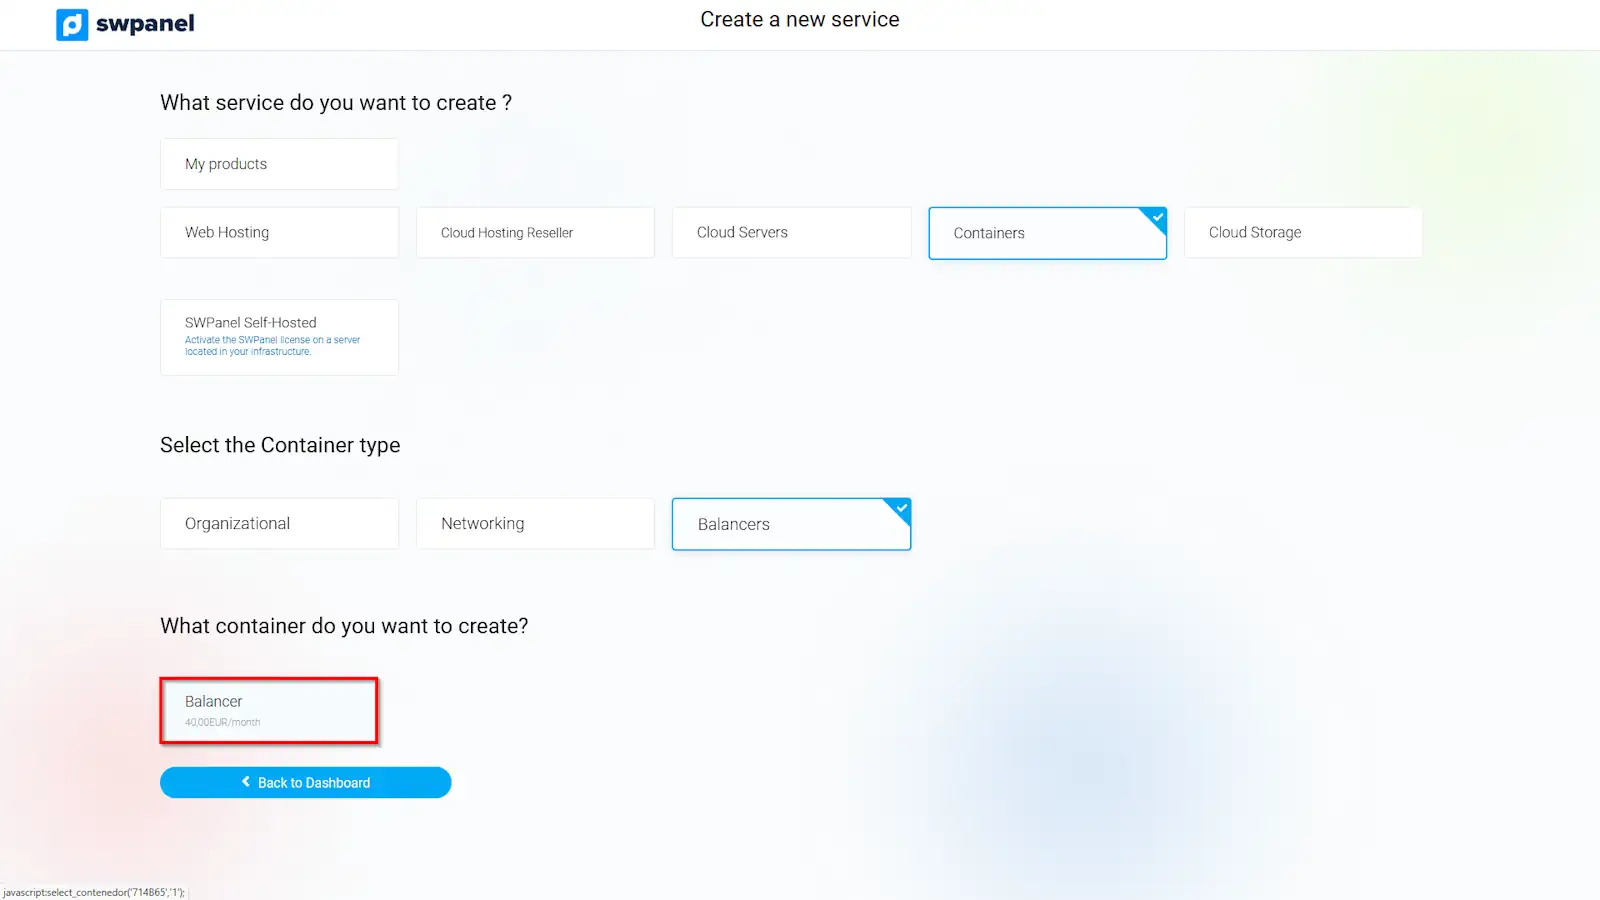
c) In the next step we check the option "Balancer ".
info_capture The screenshot is for reference only. It was taken from version 2025.03.0007 on 25/04/2025. It may differ from what the current version of SWPanel displays.
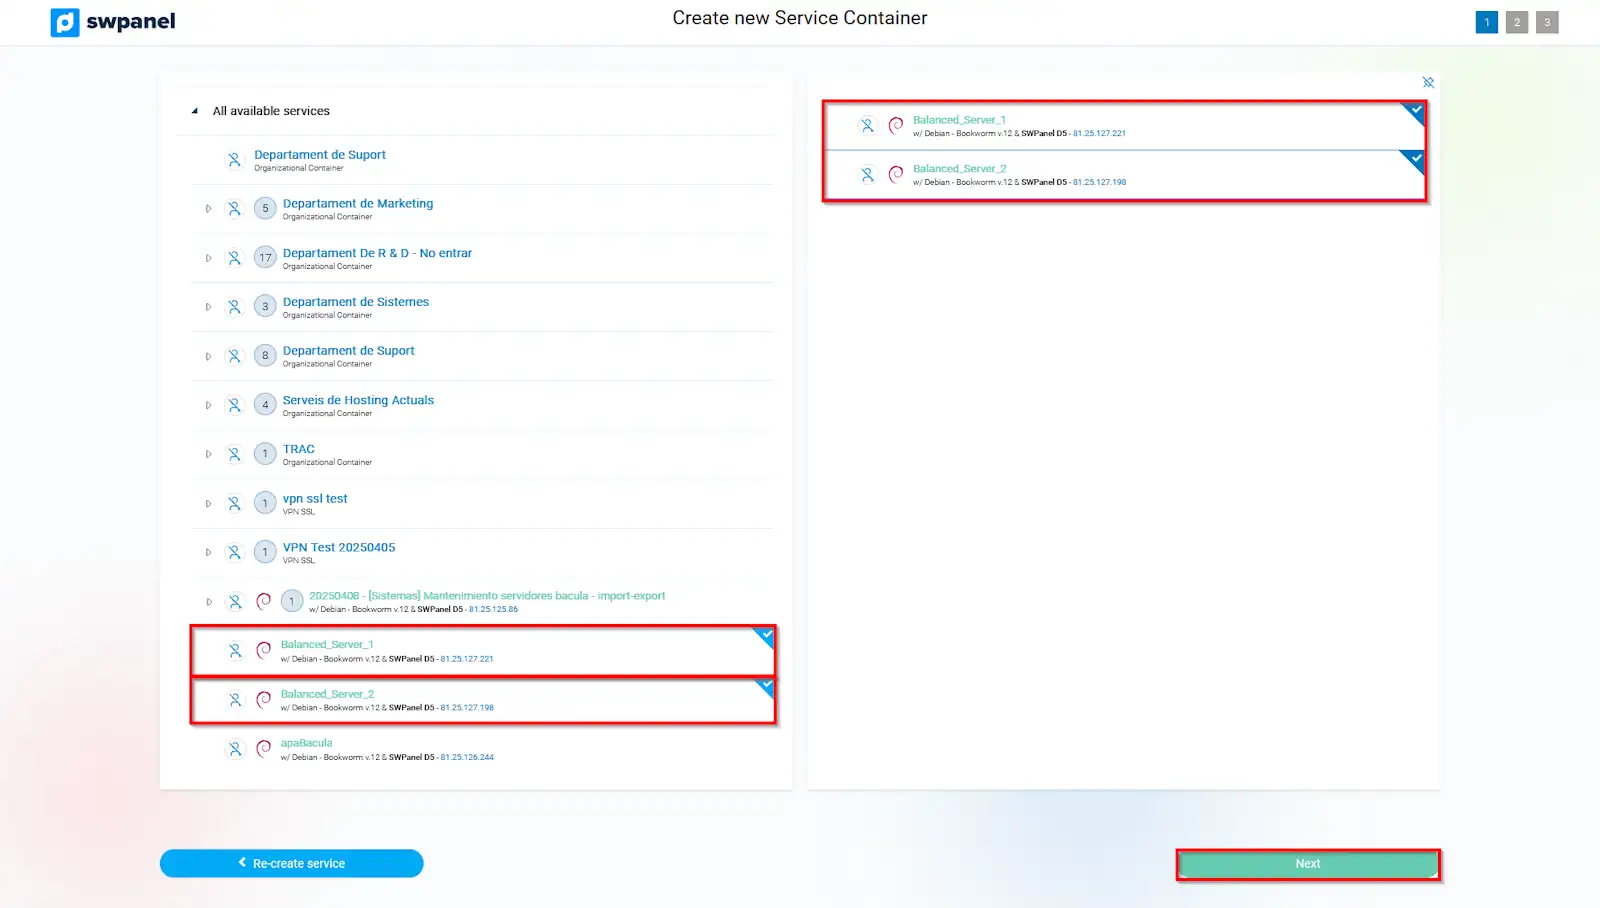
d) In the following window we will define the servers that we want to include in the load balancing system. Check the checkbox of the servers that will be part of the load balancing container and click the "Next " button.
info_capture The screenshot is for reference only. It was taken from version 2025.03.0007 on 25/04/2025. It may differ from what the current version of SWPanel displays.
a) We will customize the Swing container by indicating:
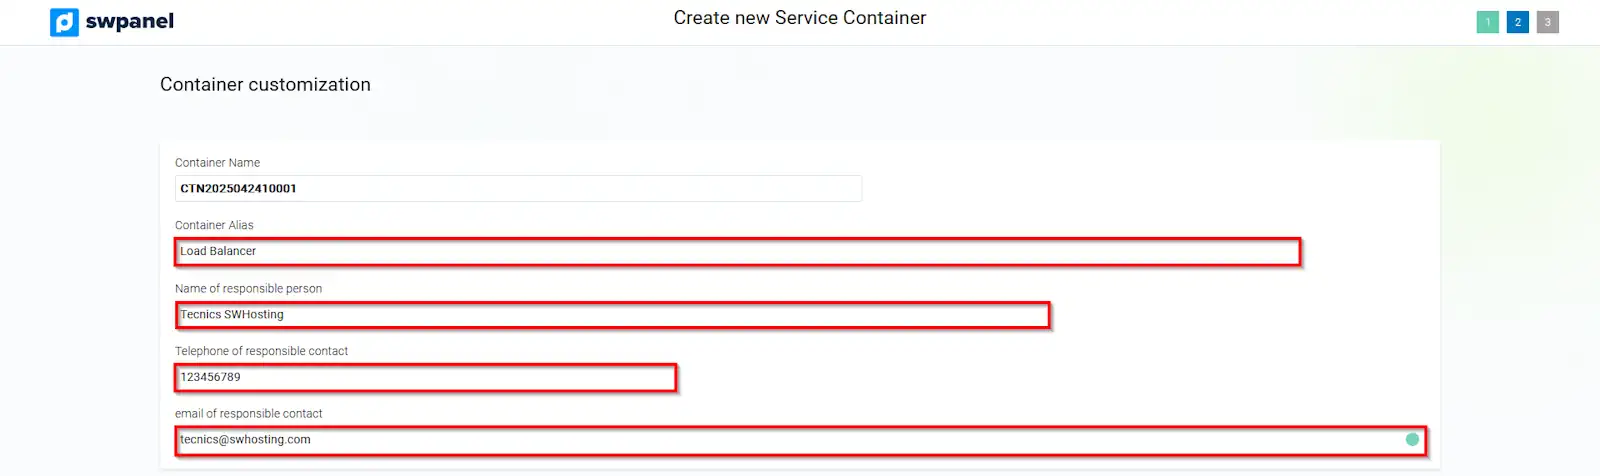
info_capture The screenshot is for reference only. It was taken from version 2025.03.0007 on 25/04/2025. It may differ from what the current version of SWPanel displays.
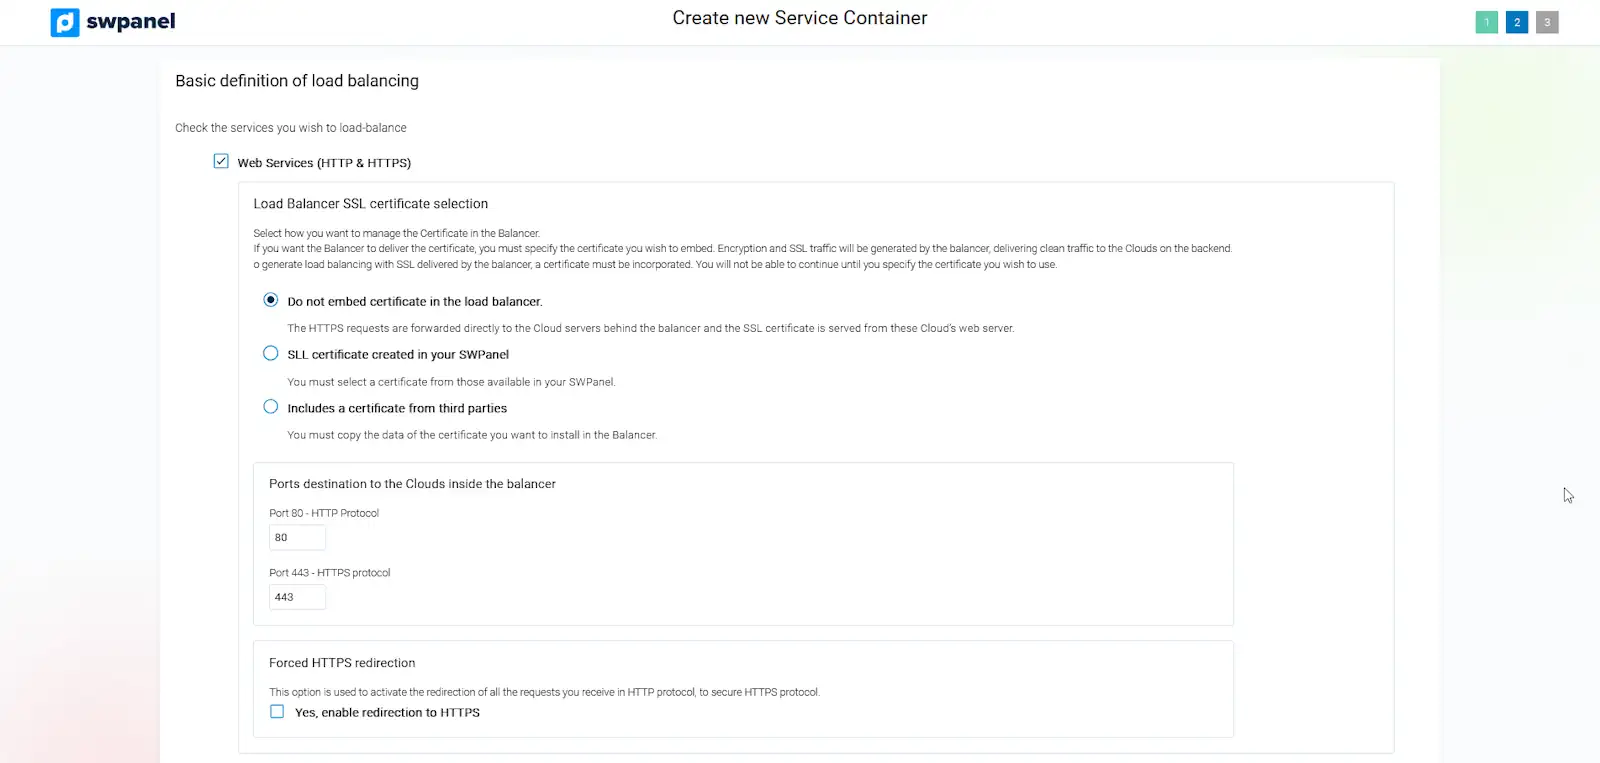
We will find the default options on the services we want to balance
A) Web services (HTTP and HTTPS)
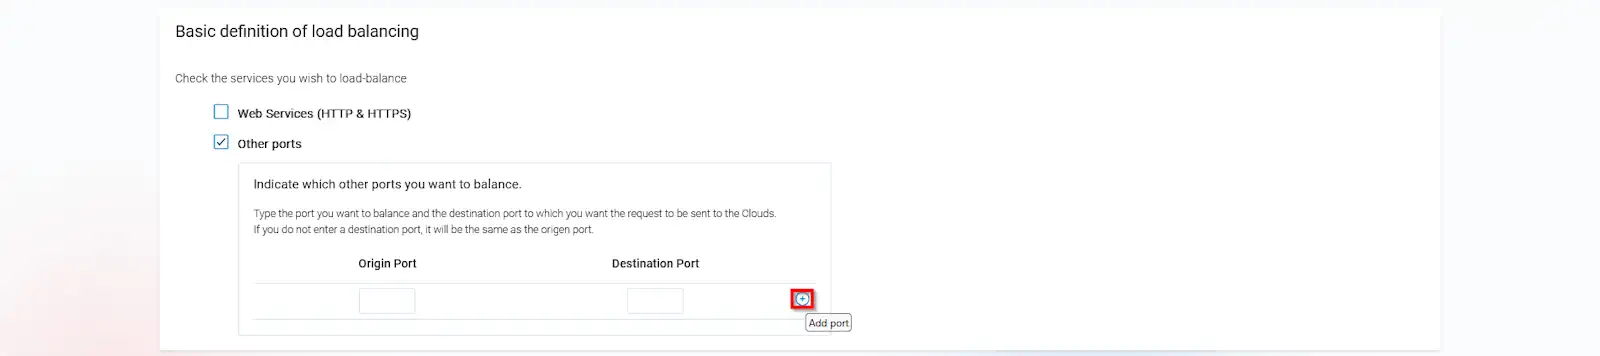
B) Other ports
A) Web Services (HTTP and HTTPS)
info_capture The screenshot is for reference only. It was taken from version 2025.03.0007 on 25/04/2025. It may differ from what the current version of SWPanel displays.
Selection of the SSL certificate to embed in the Balancer.
The options you will be able to choose are:
- Do not embed certificate in the balancer: No SSL certificate is installed in the load balancer.
- SSL certificate created in your SWPanel: An SSL certificate available in your SWPanel is installed.
- Embed third-party certificate: An SSL certificate purchased from another SSL certificate provider is installed.
Ports destination to the Clouds inside the balancer.
You will be able to define to which ports of the servers included in the balancing system the traffic received by the balancer on its communication ports 80 and 443 should be sent.
By default the traffic received by the balancer on port 80 is sent to port 80 of the balanced Web servers and the traffic received on port 443 of the balancer is sent to the same port 443 of the balanced Web servers.
Forced HTTPS redirection.
By activating this option all requests received in HTTP protocol will be redirected to secure HTTPS protocol.
B) Other Ports
info_capture The screenshot is for reference only. It was taken from version 2025.03.0007 on 25/04/2025. It may differ from what the current version of SWPanel displays.
If you activate this option you will be able to define the port you want to be balanced and the destination port of your servers to which you want the traffic to be sent. If you want to add more source and destination ports you can add them with the + icon to add more ports.
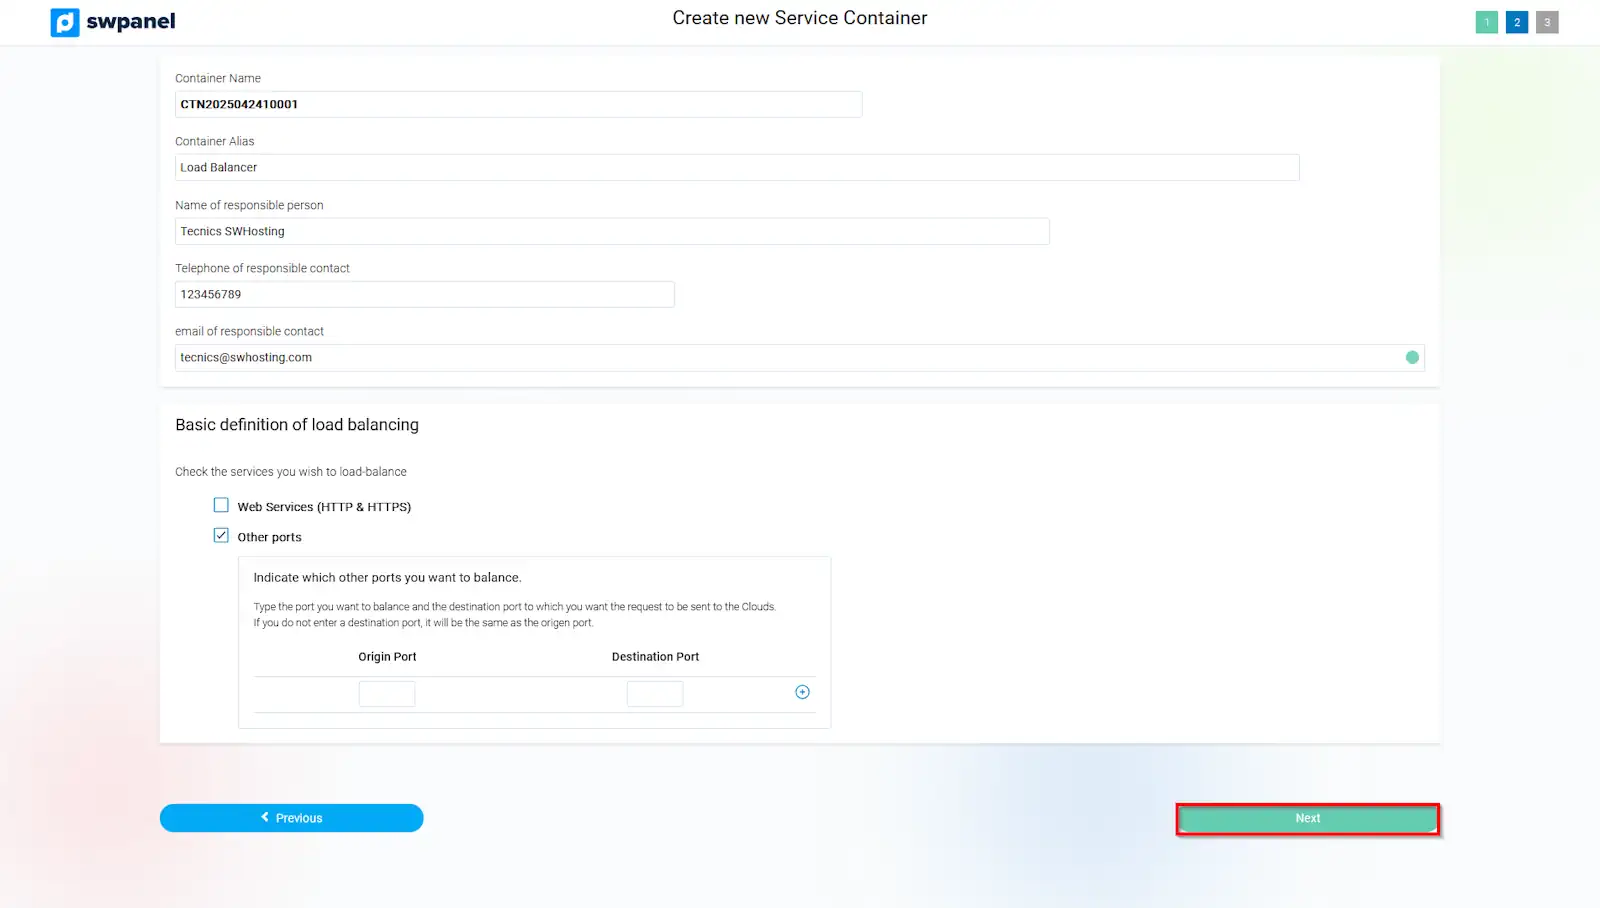
Once you have finished the basic load balancing definition, click on the Next button.
info_capture The screenshot is for reference only. It was taken from version 2025.03.0007 on 25/04/2025. It may differ from what the current version of SWPanel displays.
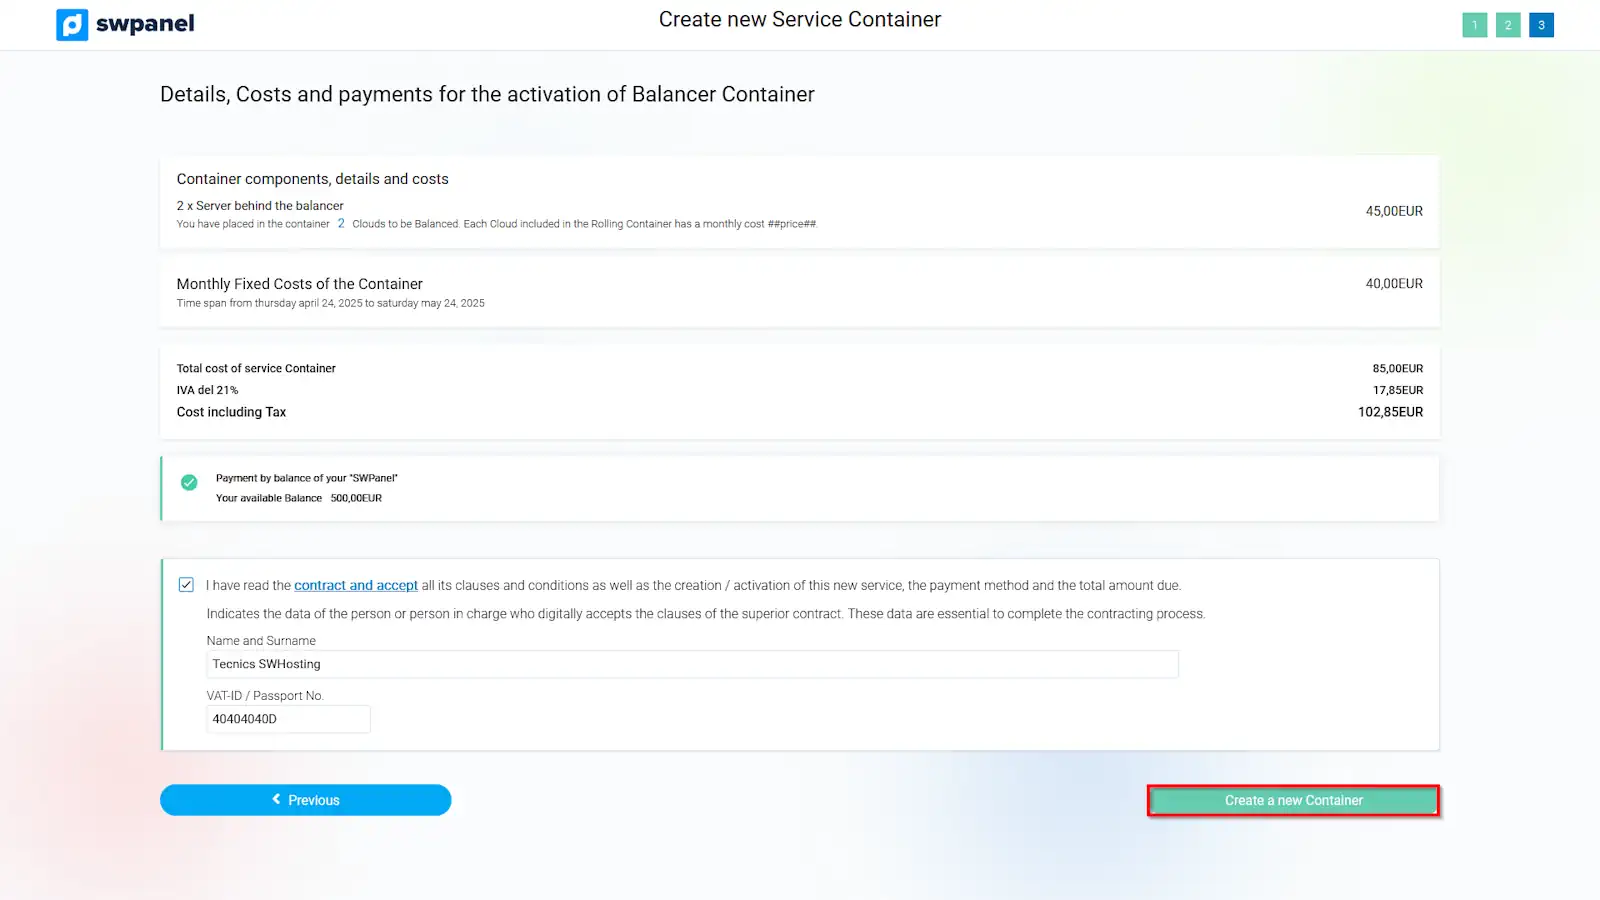
The following window will show a summary of the monthly fixed costs corresponding to the load balancing system that will be contracted and subsequently created when you accept with the button "Create new container ".
info_capture The screenshot is for reference only. It was taken from version 2025.03.0007 on 25/04/2025. It may differ from what the current version of SWPanel displays.
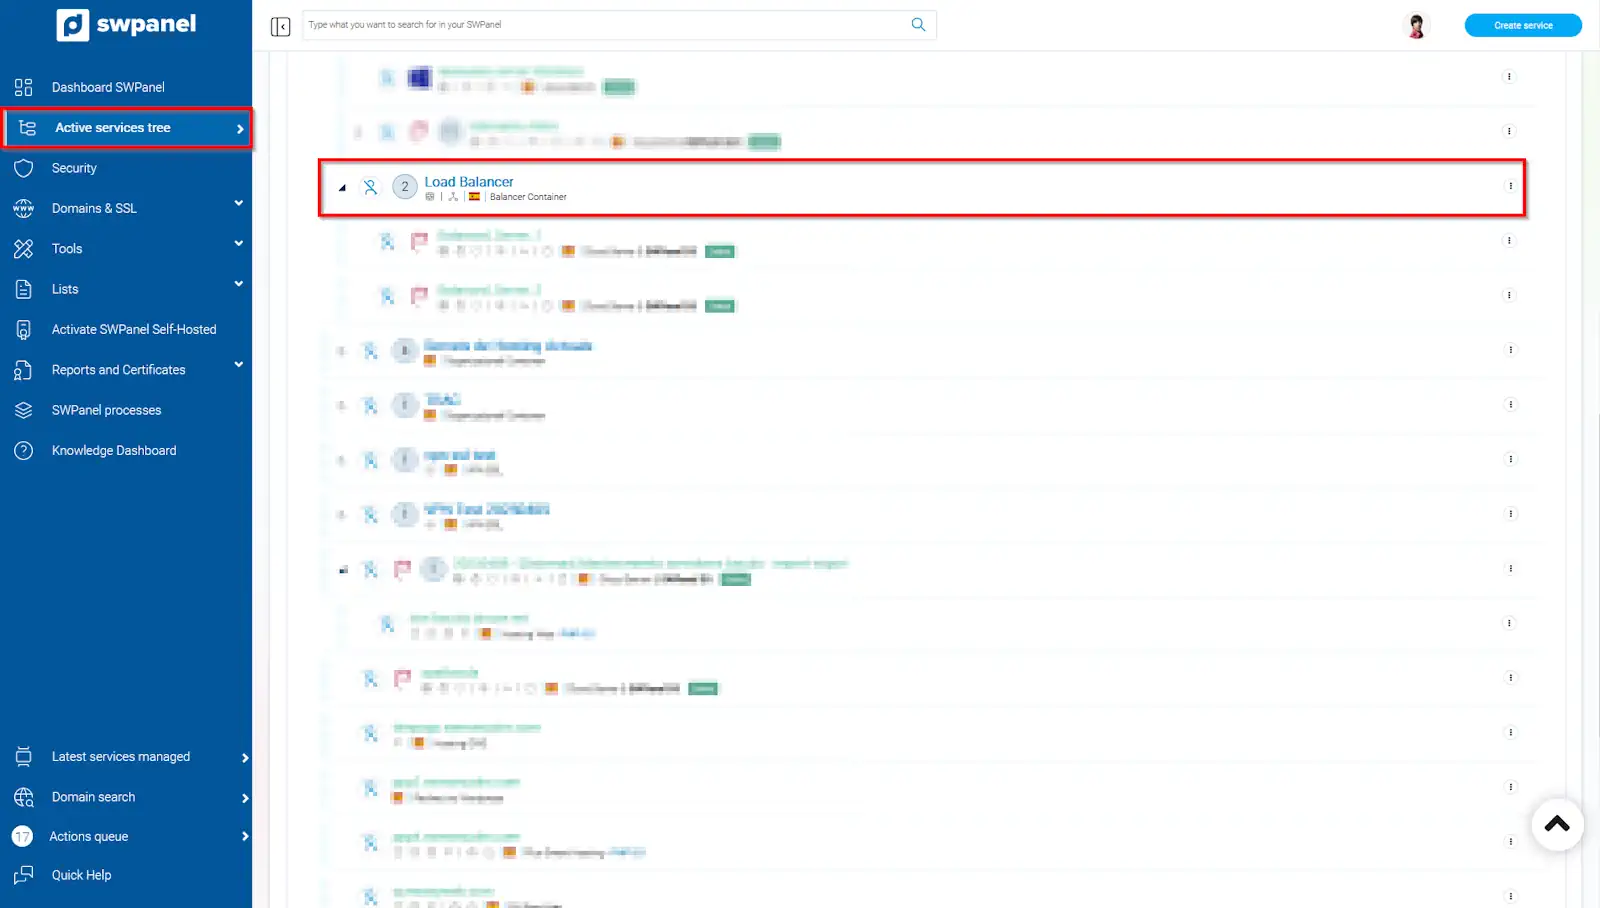
Once the balancing container has been created you will be able to view it in the Active Services Tree in your SWPanel customer account. You will be able to access the Balancing Container management dashboard by clicking on the container name.
info_capture The screenshot is for reference only. It was taken from version 2025.03.0007 on 25/04/2025. It may differ from what the current version of SWPanel displays.
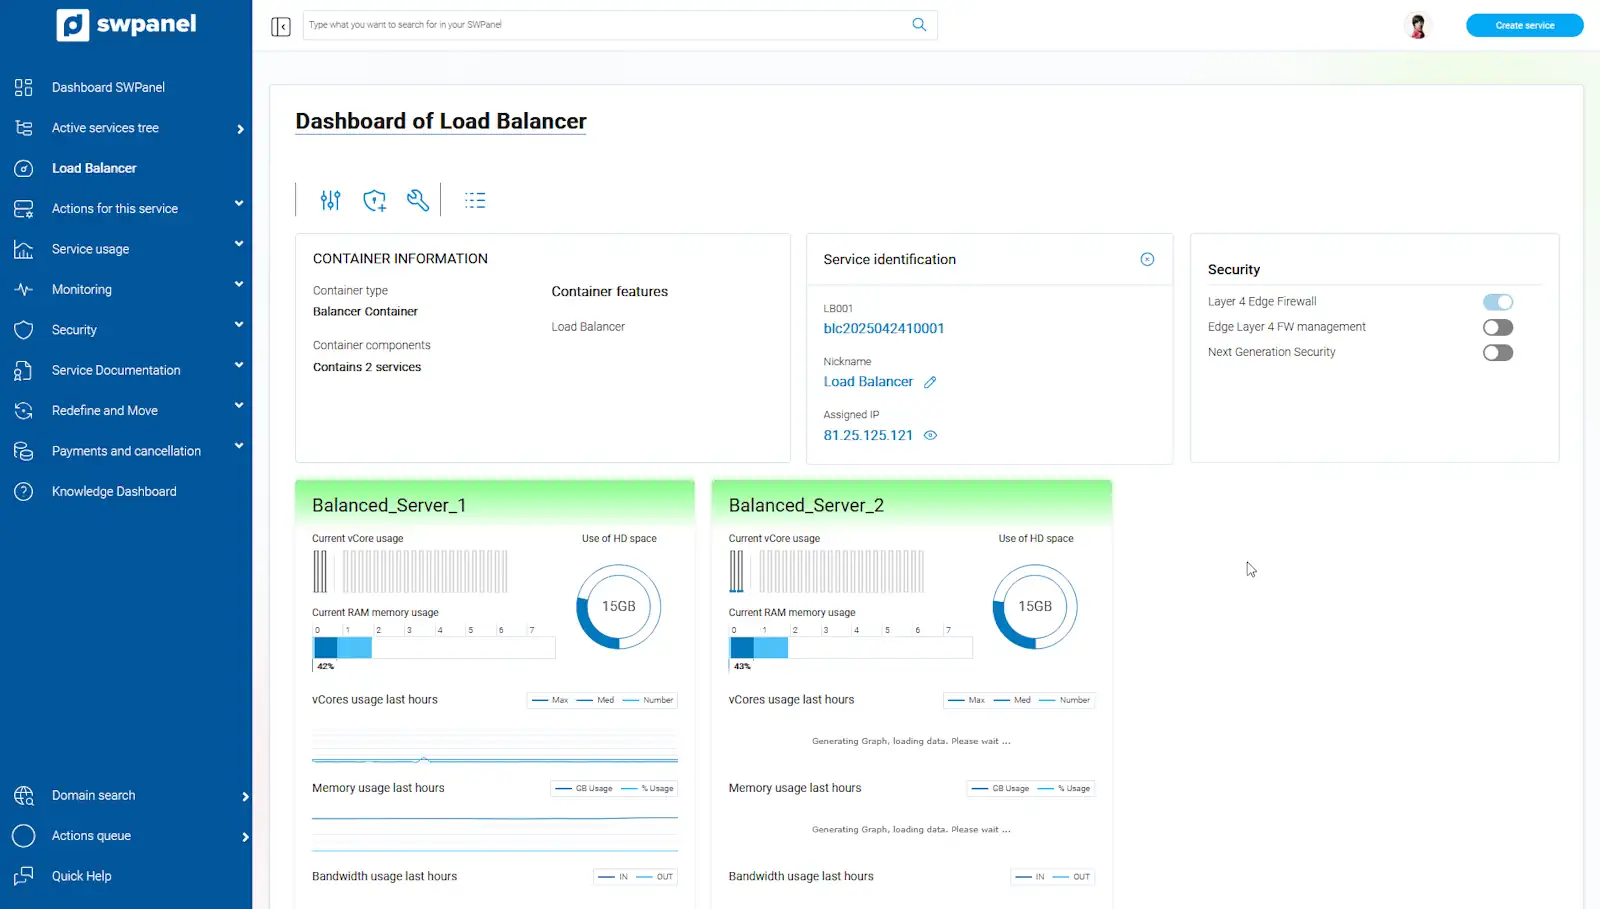
From the balancing container dashboard you can review the active balanced servers, add new additional balanced servers, change the general configuration of the balancing container (SSL, ports, ....), access the event log of the balancing system, as well as add value-added services such as Layer 4 Firewall management or Next Generation Security.
info_capture The screenshot is for reference only. It was taken from version 2025.03.0007 on 25/04/2025. It may differ from what the current version of SWPanel displays.