A VPN, an acronym for Virtual Private Network**, is a network technology that enables a secure extension of a local area network (LAN) over a public or non-public, controlled network such as the Internet.
It allows a device connected to the local area network to send and receive data over shared or public networks as if it were a private network with all the functionality, security and management policies of that private network.
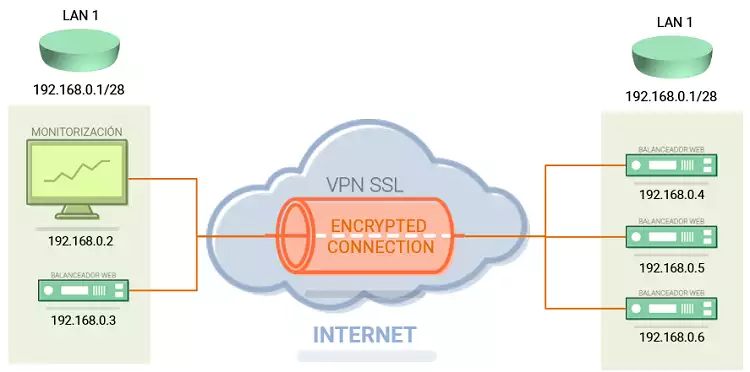
Thanks to a VPN connection, we can establish contact with machines that are hosted on our local network -or other local networks- in a totally secure way, since the connection established between the two machines travels fully encrypted. It is as if from our computer connected to the Internet we were to establish a private and secure tunnel to our home or office, with which we can communicate without fearing that our data will be vulnerable.
The main advantages of using VPNs can be summarized as follows:
At SW Hosting you can create a VPN to communicate the various devices connected to your local area network with your Cloud servers.
To create a VPN, you must first include your Cloud server(s) in a VLAN (Virtual Local Area Network) through SWPanel.
The steps to create a VLAN with your Cloud servers are described in the following manual:
? How to create a VLAN with my Cloud servers
Once you have created the VLAN between your Cloud servers, you will need to follow the following steps to create your SSL VPN:
1. Create the Networking container and add the Private VLAN to your SSL VPN.
At the top right of your SWPanel you must click on the blue button "Create a Service ".

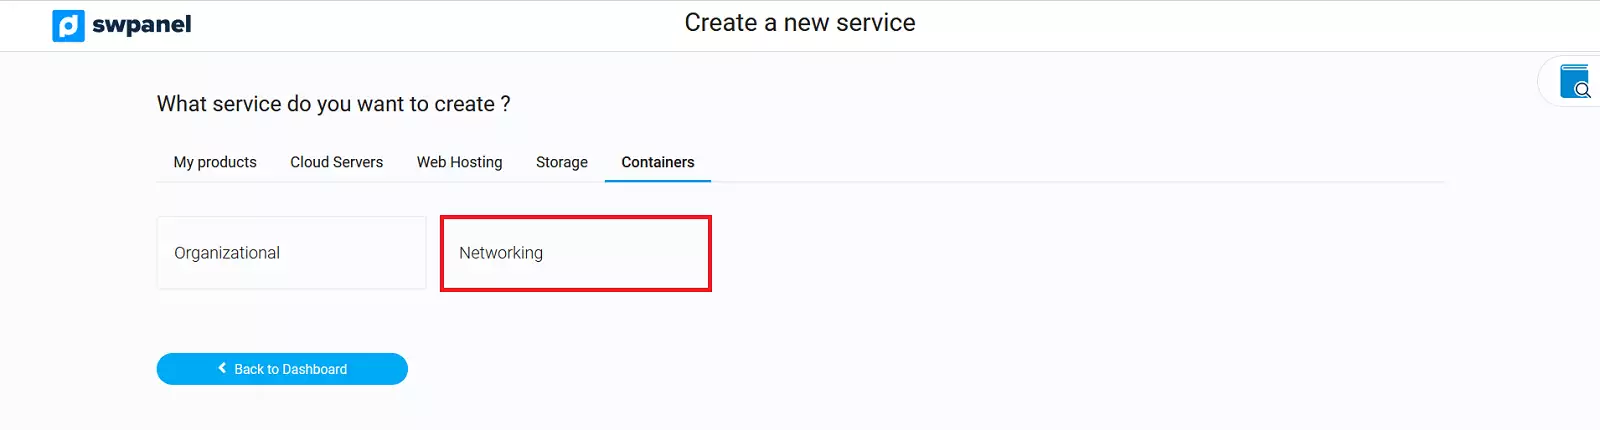
Among all the possible services you can create with your SWPanel, choose "Containers ".

Then click on the option ”Networking”
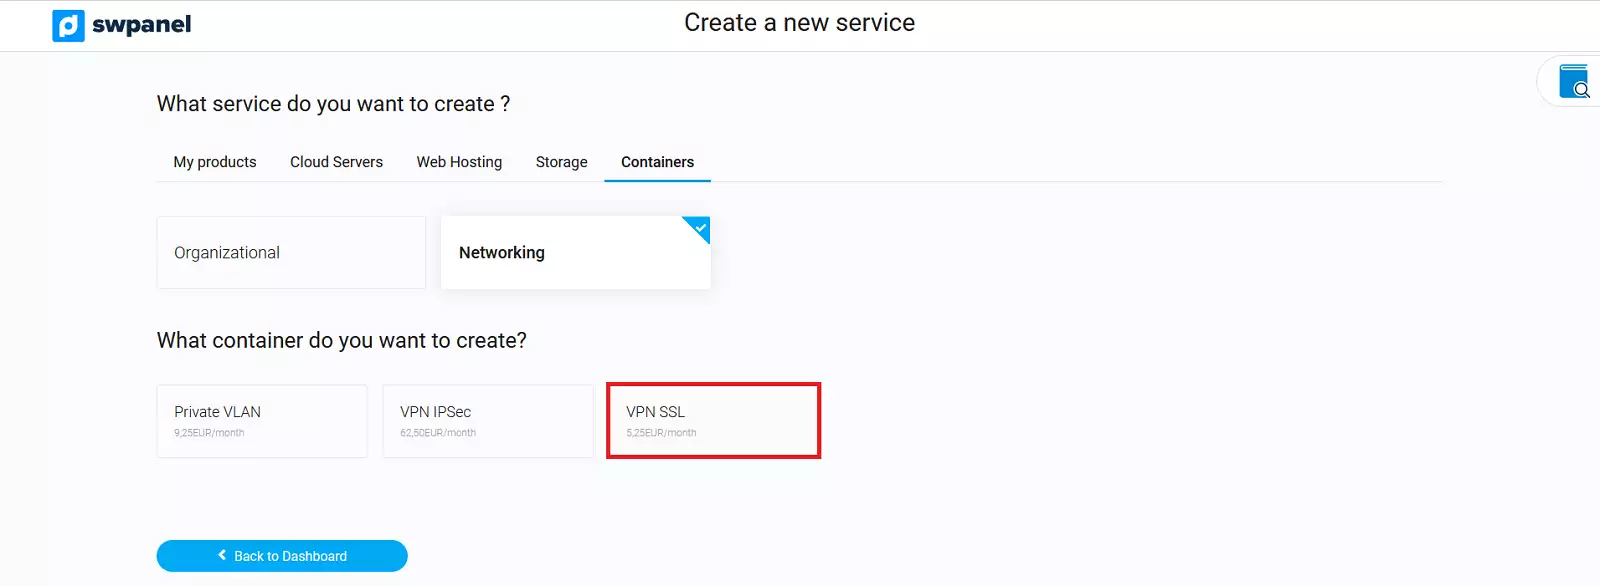
In the next window you must choose the option "SSL VPN ".
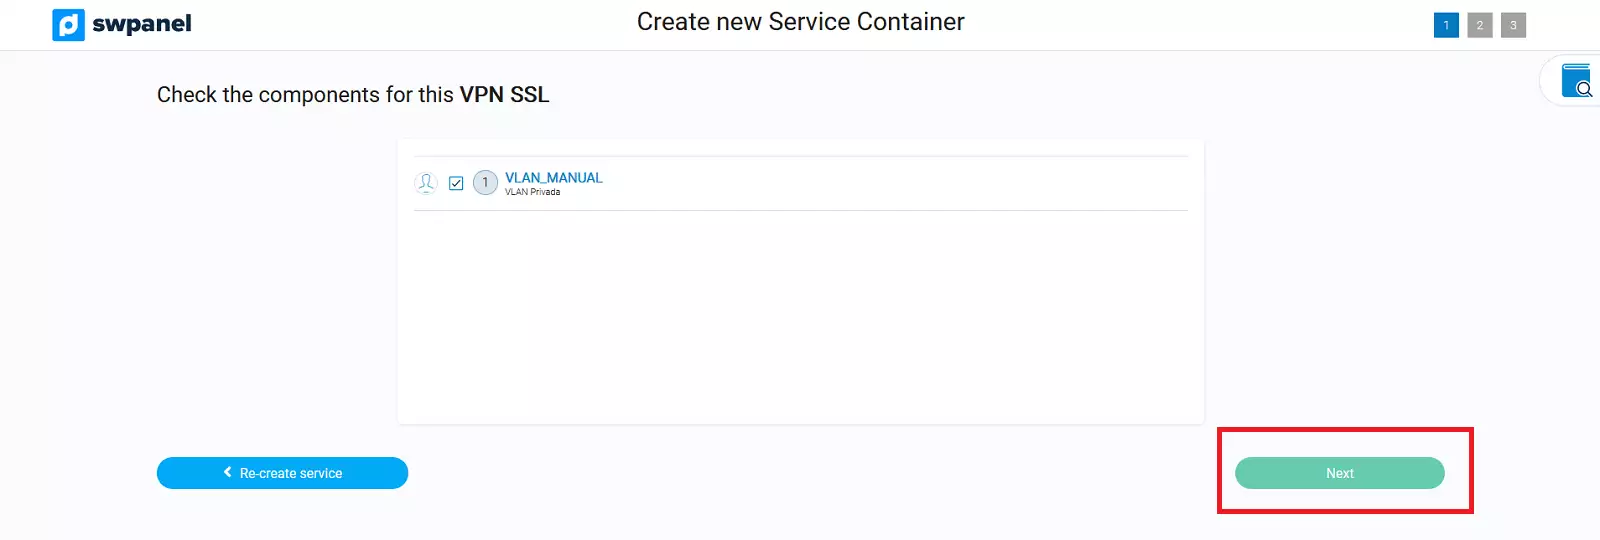
On the left side of the new window you will see a list of all your available VLANs, where you can check the checkbox of those VLANs you want to use with your SSL VPN. Once you have selected the VLAN, you must click on the "Next" button.
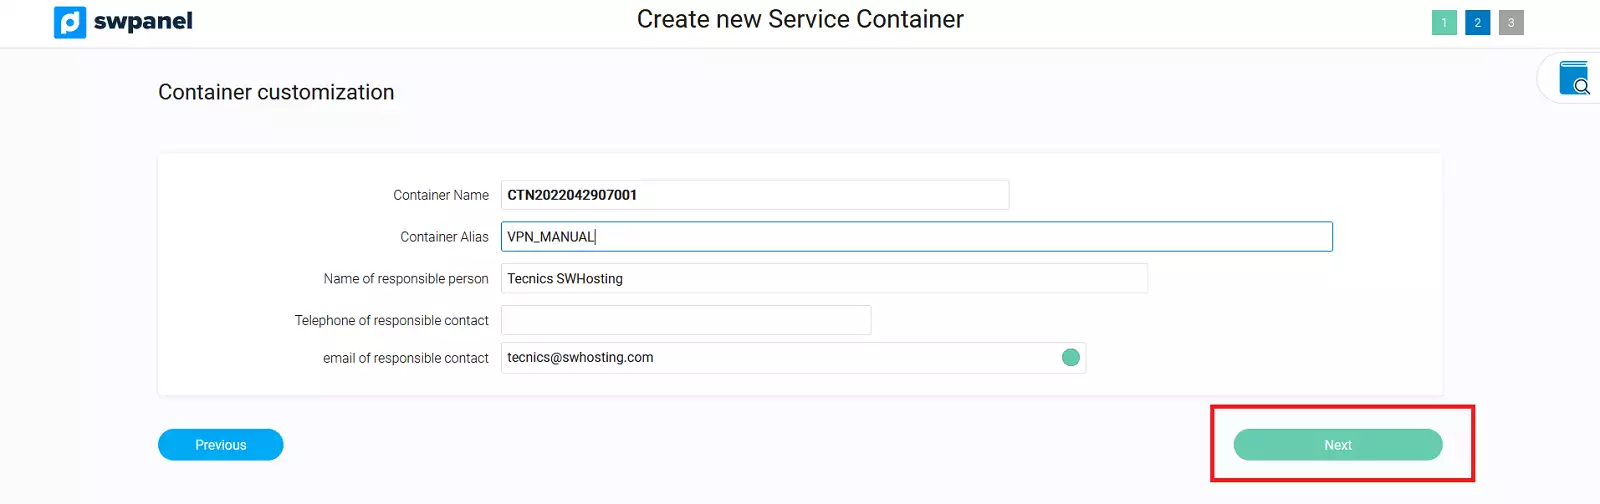
In the following window you will be able to define the nickname of the VPN container by which it will be identified in your SWPanel. You will also be able to indicate the name of the person in charge, as well as his or her telephone number and email address.
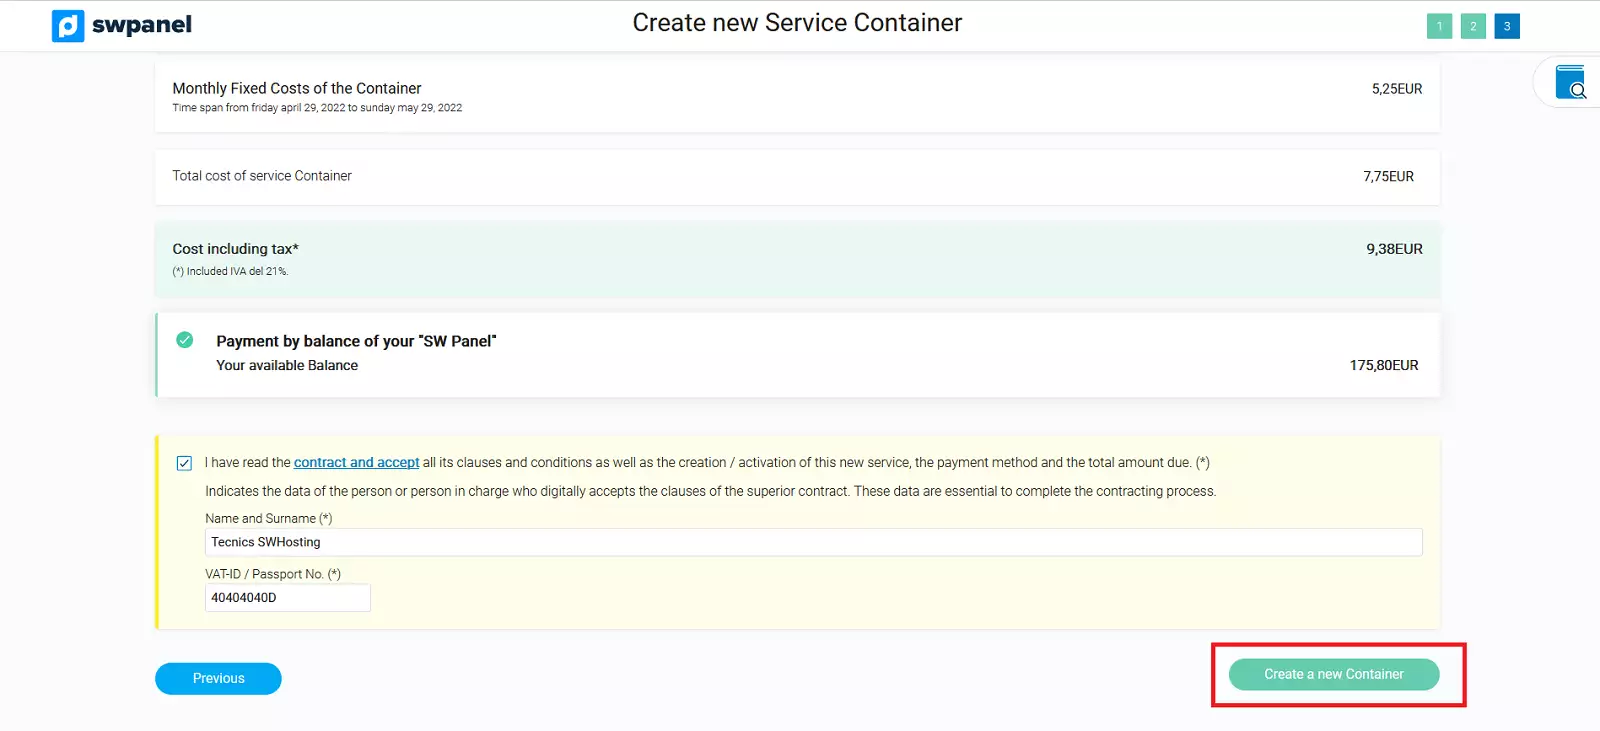
The following window will summarize the costs corresponding to the creation of the SSL VPN, according to the number of VLANs you have added to it. To accept the creation of the SSL VPN, you must click on the "Create New Container " button.
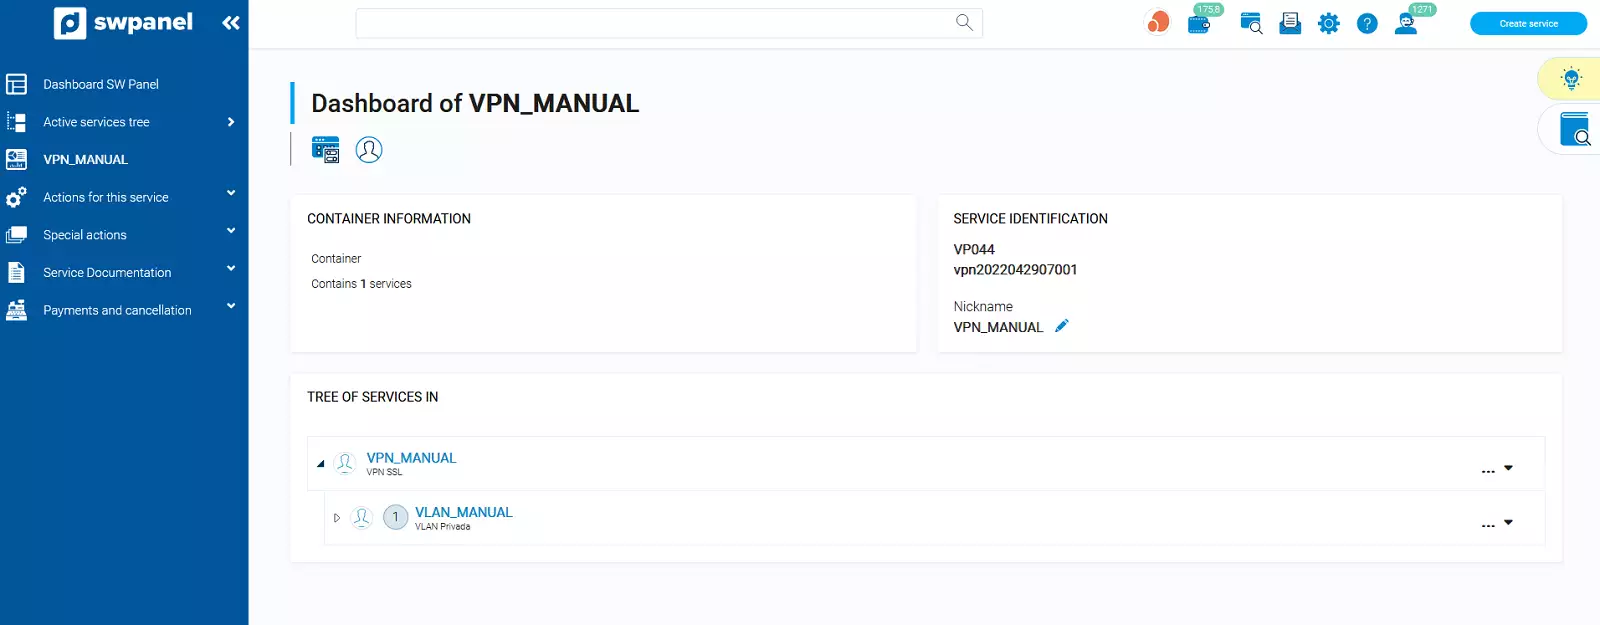
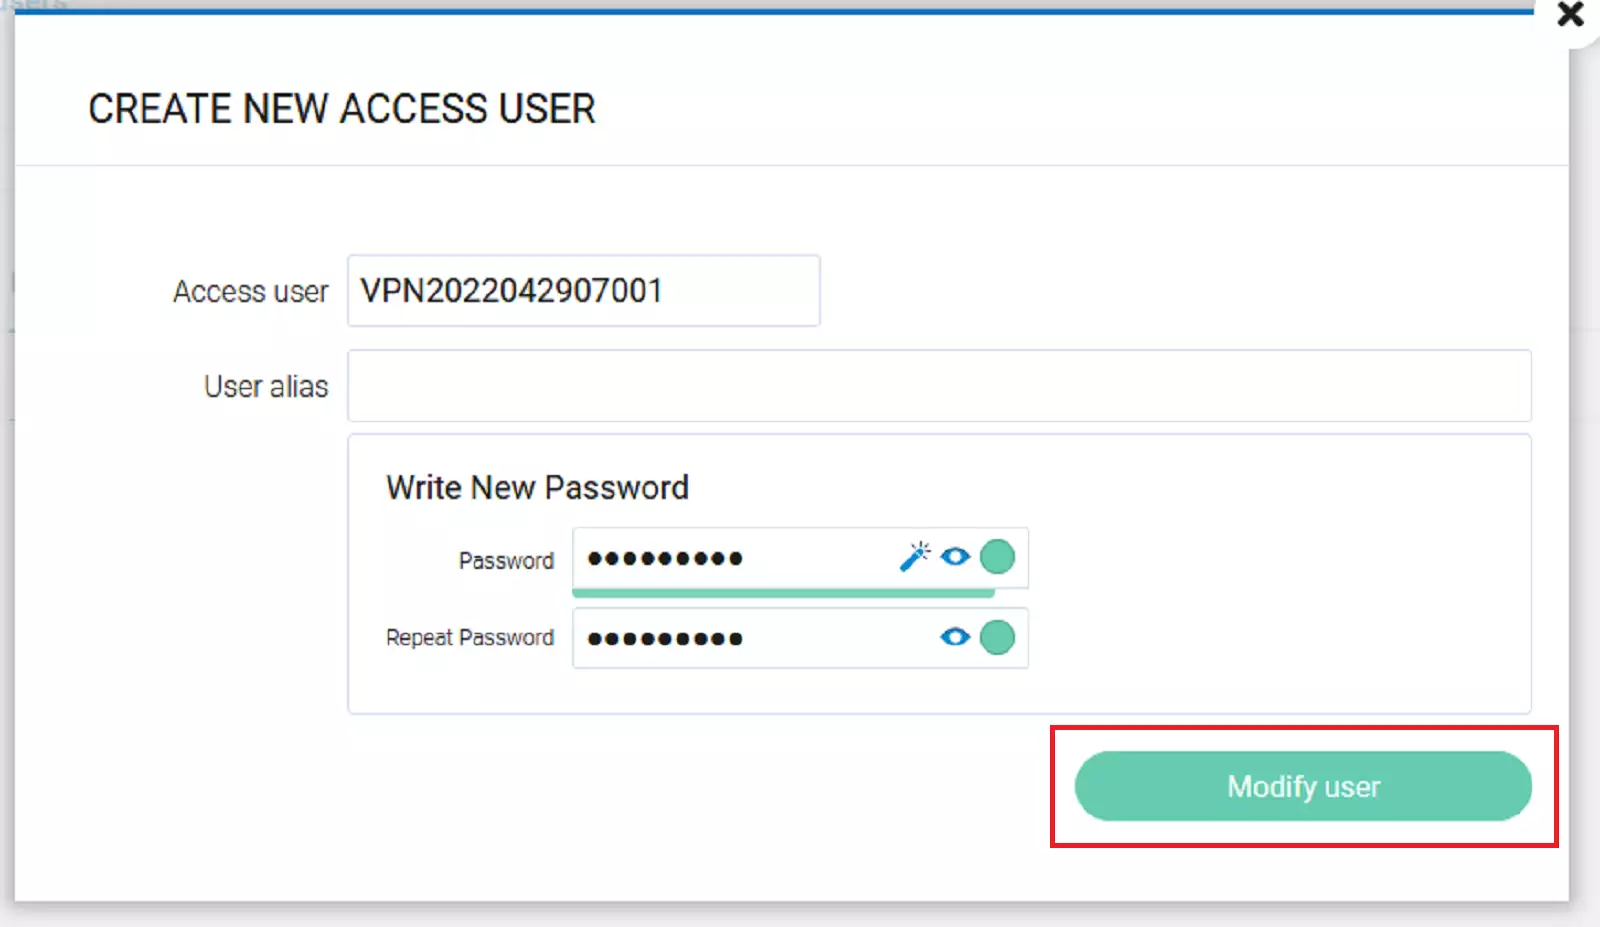
Once your SSL VPN has been created, you will be able to manage the VLANs included in it and their access users from the Dashboard in your SWPanel.
In the section corresponding to the access data, take note of your VPN access user and enter the password of your choice. Once you have defined the data, click on the "Next " button.


2. Configure the devices on my LAN to connect to my Cloud servers via SSL VPN.
We help you configure the SSL VPN connection on Windows and mobile (Android / iOS) devices.
Download links
Installation and configuration on Windows.
To connect to the SSL VPN from Windows, you must first install the VPN client "Pulse Secure" (or use, if you have it, the old "Junos Pulse").
Once installed, you can configure the SSL VPN connection:
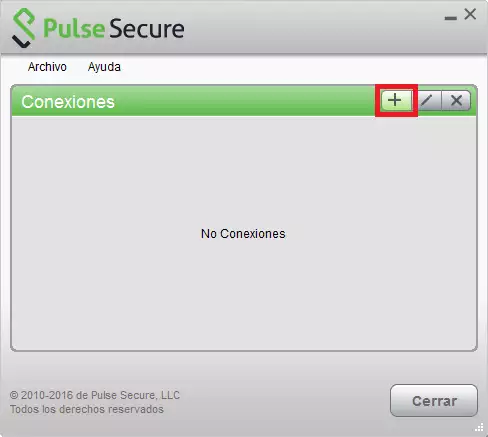
Go to the Start menu and select Pulse Secure.
Then click the "+" button to configure a new SSL VPN connection:
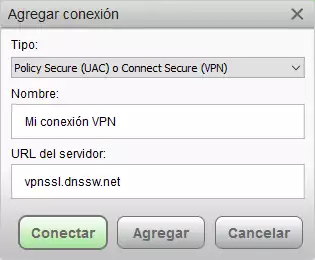
Name: Assign any name of your choice.
Server URL: vpnssl.dnssw.net
Click Connect to save the changes and make a test connection.
A window will appear asking for login credentials:
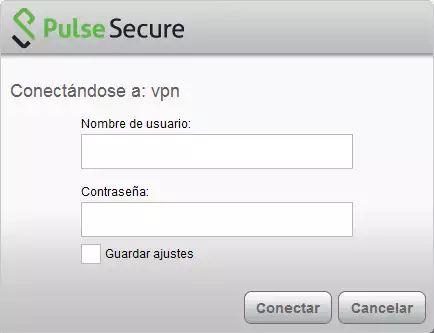
Username: This corresponds to the username you entered in the previous section when registering the SSL VPN.
Password: Enter the password chosen in the previous section, at the time of registering the SSL VPN.
Save settings: Optional. The credentials will be saved, so you will not be asked for them again.
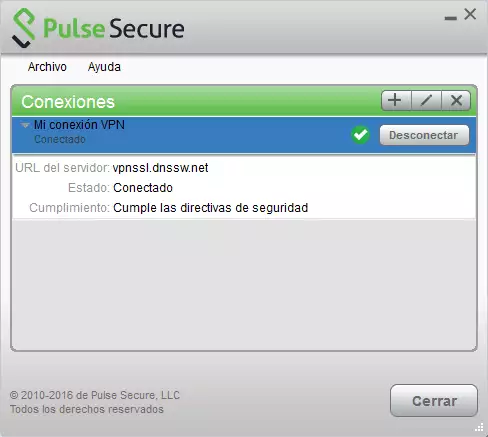
Click Connect and, if everything went well, your new connection will appear in a few moments with the status "Connected". By clicking on the "⯈" arrow to the left of the connection name, the details will be displayed:
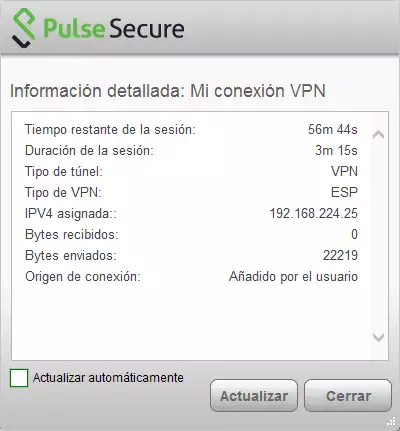
You can consult the assigned IP as well as other connection data by accessing File > Connections > Advanced connection data...:
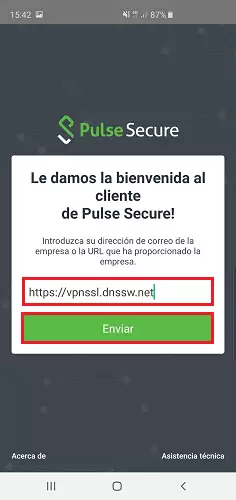
Installation and configuration on Android / iOS mobile devices.
The setup process is virtually identical on Android and iOS devices:
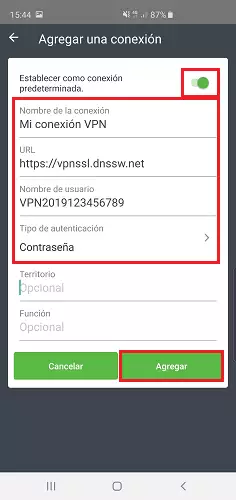
Set as default connection: If you are only going to use this SSL VPN connection, we recommend enabling this option.
Connection name: Assign a name of your choice.
URL: https://vpnssl.dnssw.net
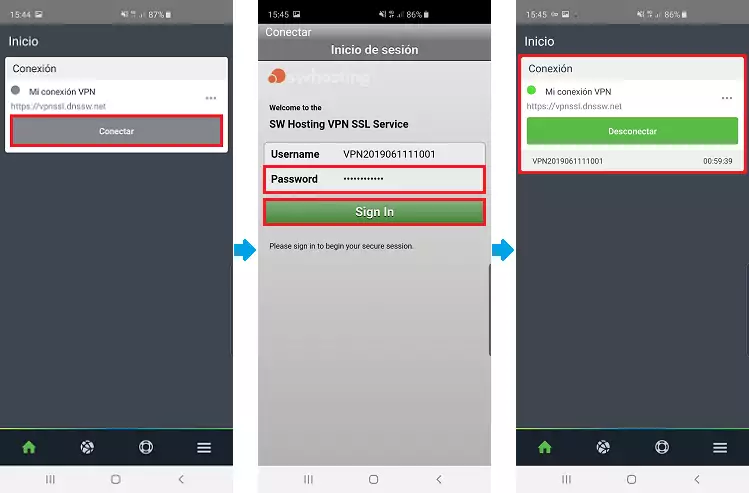
Username: It corresponds to the one you wrote down in the previous section, when registering the SSL VPN.
Type of authentication: We leave the option that appears by default ("Password").
Territory: Blank.
Role: Blank.
The new SSL VPN connection is created:
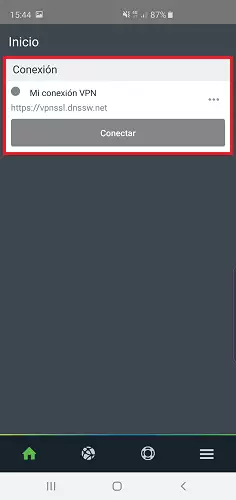
On some mobile devices you will be asked for permission to configure this VPN connection, you must allow it by pressing Accept or the corresponding option.
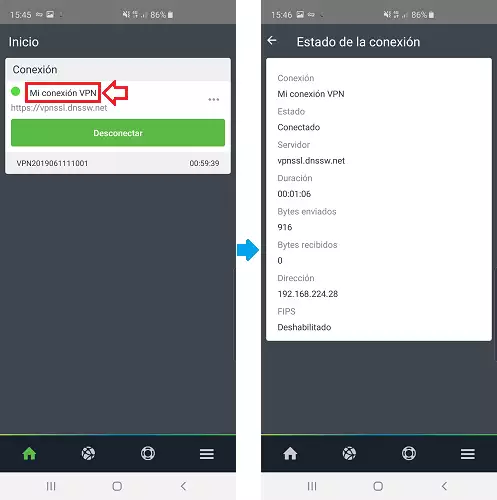
The new connection appears in green, indicating that we are connected to the SSL VPN.
You can check the assigned IP and other connection data by clicking on the connection name (in this example, "My VPN connection"):