When making our website with WordPress is necessary to have configured the sending of forms from the page itself, so that users can contact us quickly and effectively.
This method allows us to give an extra way of communication to the usual ones or even not having to provide corporate emails or phone numbers that we may prefer to keep private.
Methods of sending forms by e-mail
Currently, to send the forms of a web page, the most used methods are to use the Mail function of PHP or to use a SMTP server.
The first method (Mail function) is an insecure method that can cause you more problems than solutions because it sends the emails without the need to authenticate against the mail server, for this reason all our servers have the Mail function disabled by default guaranteeing an extra point of security.
The second method is to use an SMTP server to send the form. This is the most recommended method, since all mail that is sent is authenticated against the mail server, which allows us to create a specific account for this purpose, channeling all the forms through that account in a secure way.
Configuration of SMTP sending
In our company we like to make things easy and that is why all WordPress comes with the "WP Mail SMTP" plug-in preinstalled and configured with the mail server corresponding to your hosting service and with the email account you have created with your WordPress (if you do not specify any this is created with the name "admin@yourdomain").
This way you only need a form creation plug-in that allows you to define the SMTP sending so that the form uses this configuration to be sent. For example, if we install the free plug-in "WPFOMS" we will only have to create the form and drag it to all the pages where we want it to appear, since the two plug-ins understand each other and there is no need to configure anything.
Let's see how to perform this process step by step:
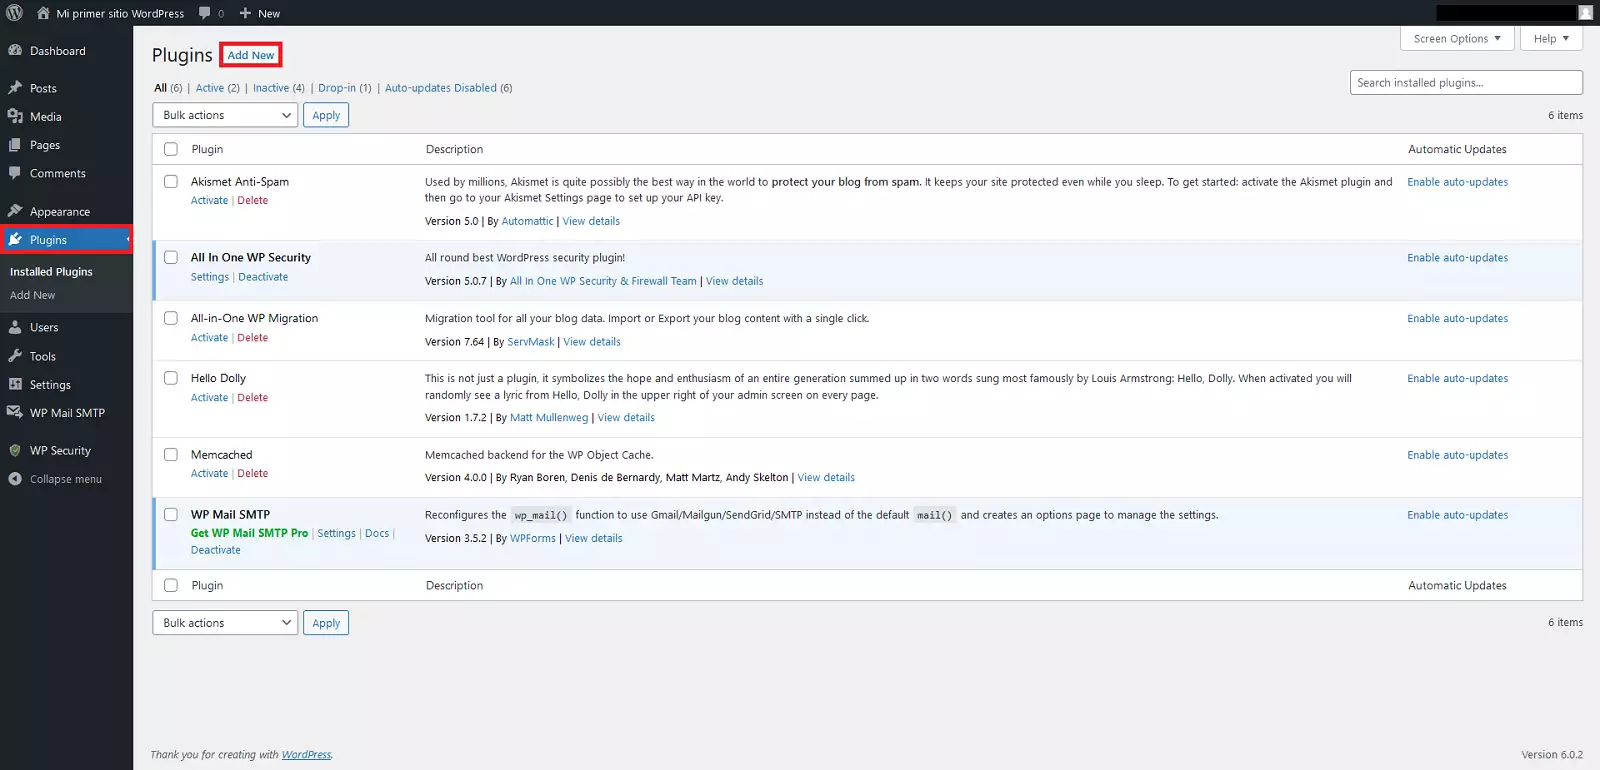
-Go to the backend of your WordPress, click on "Plugins > Add New".
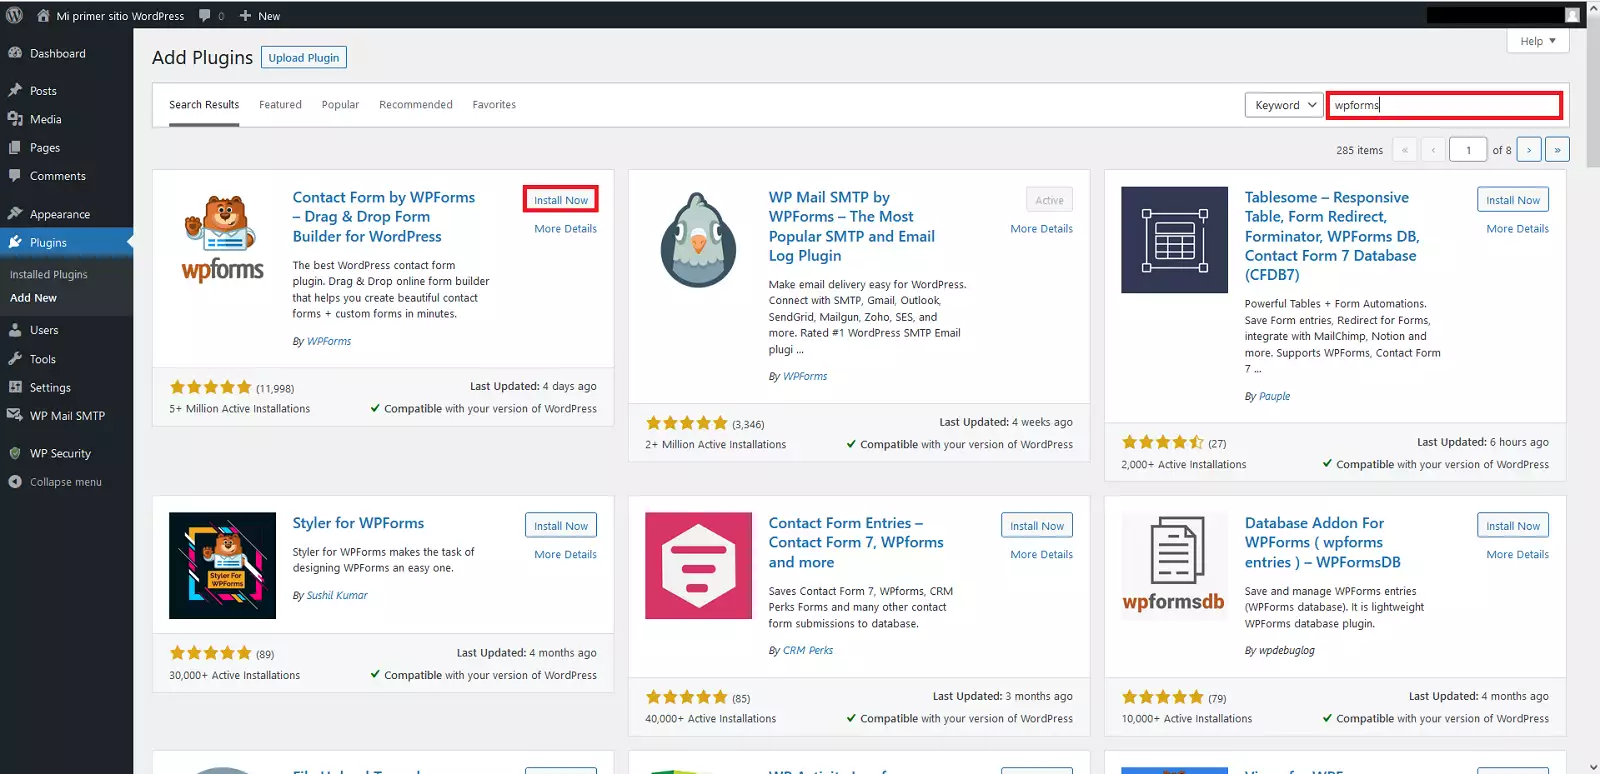
-Once the page loads, search for "wpforms" in the search box at the top right and click "Install Now".
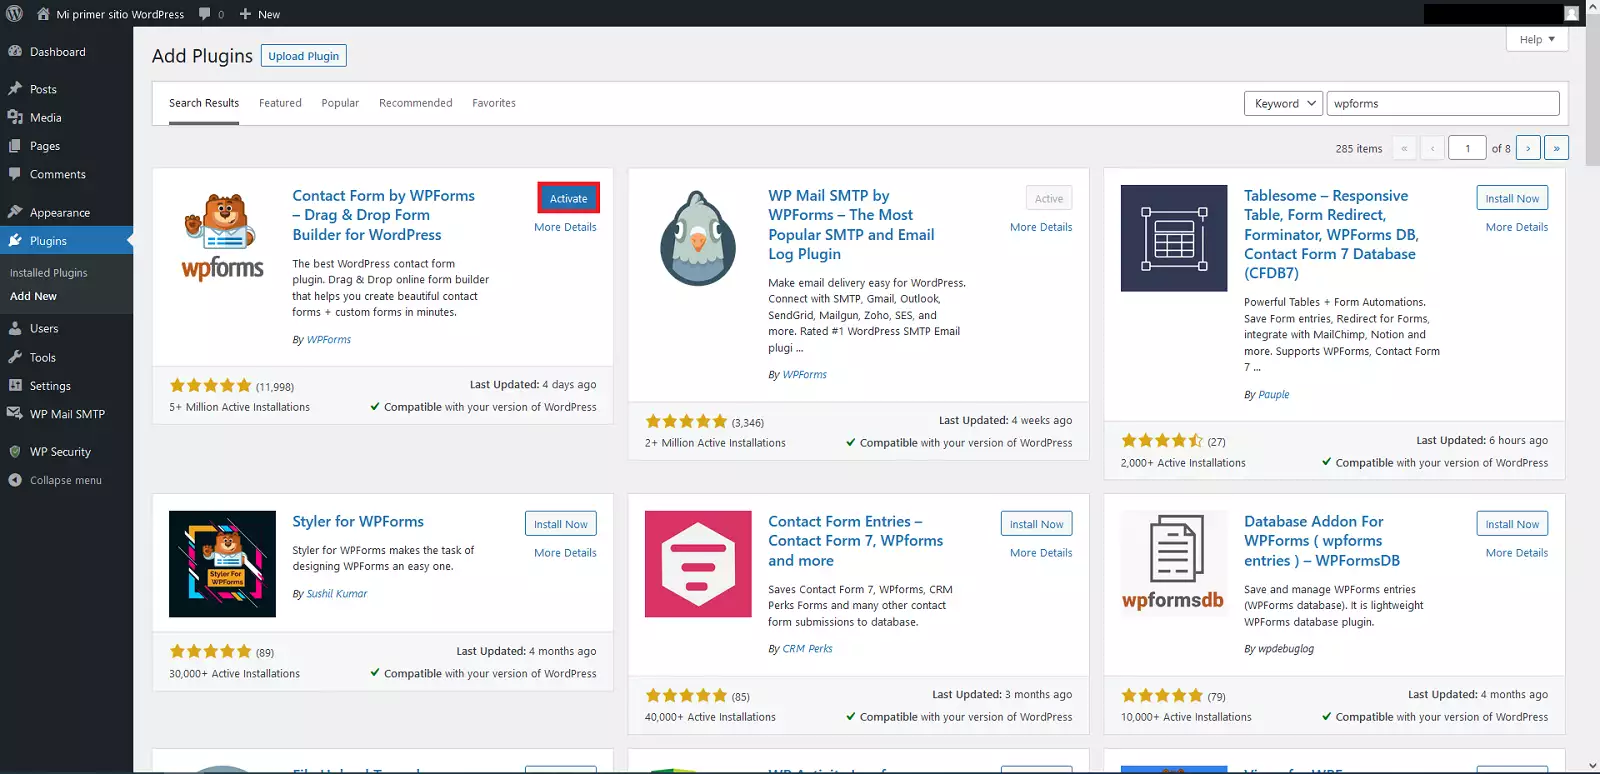
-Once the plug-in is installed, click "Activate" on the search page itself.
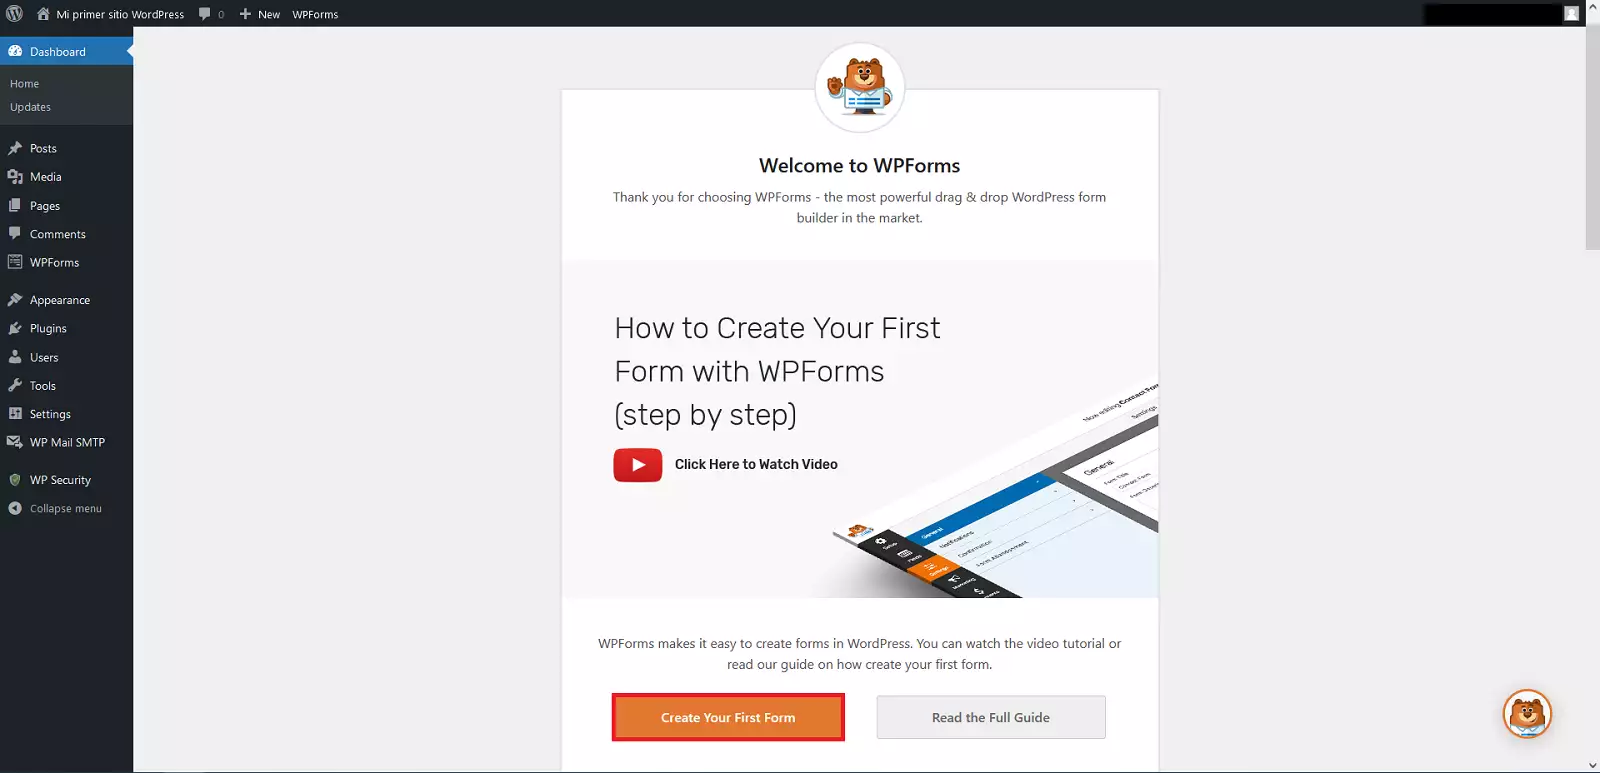
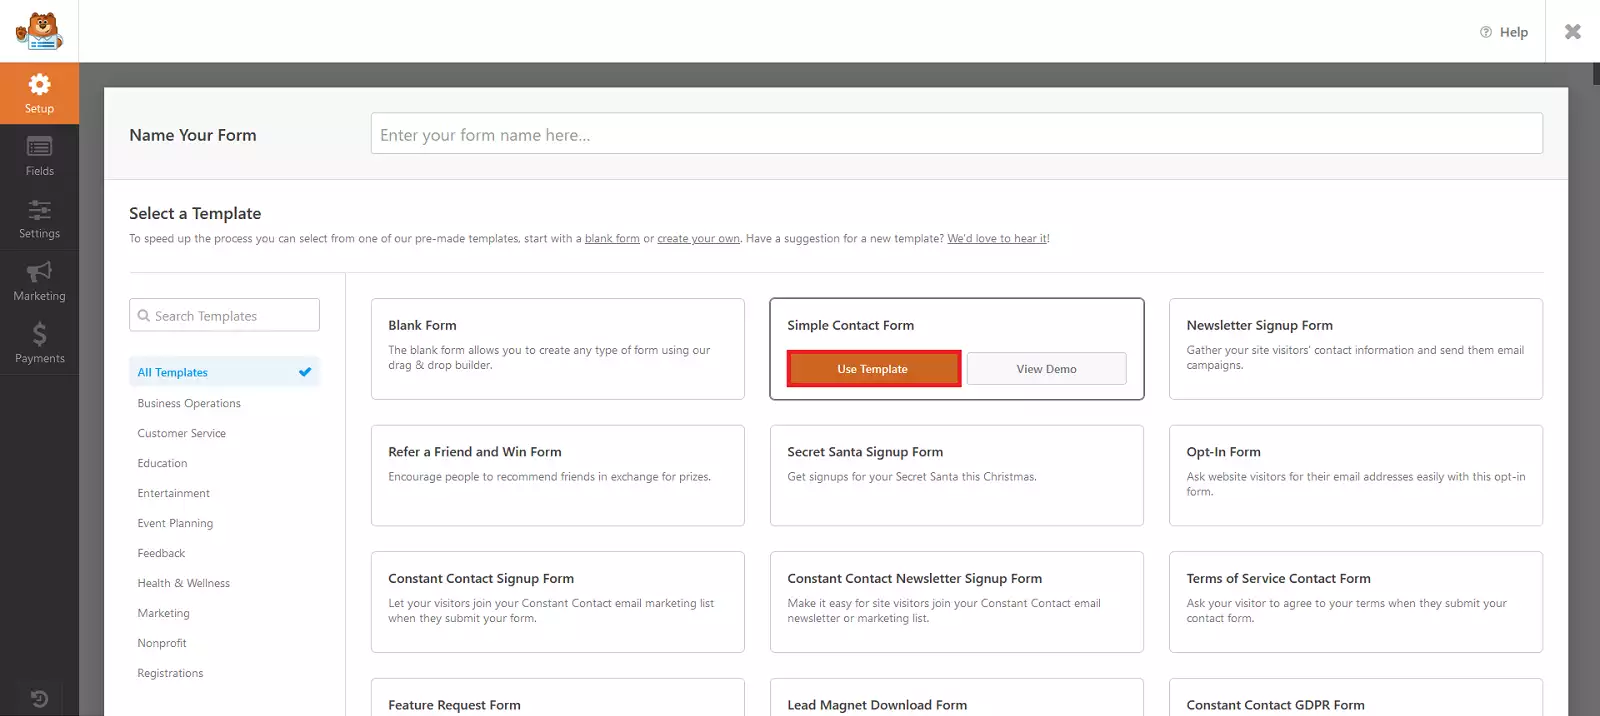
-Then the welcome page of the plug-in will open, click on "Create Your First Form" !
-Then select "Use Template" within the "Simple Contact Form" template.
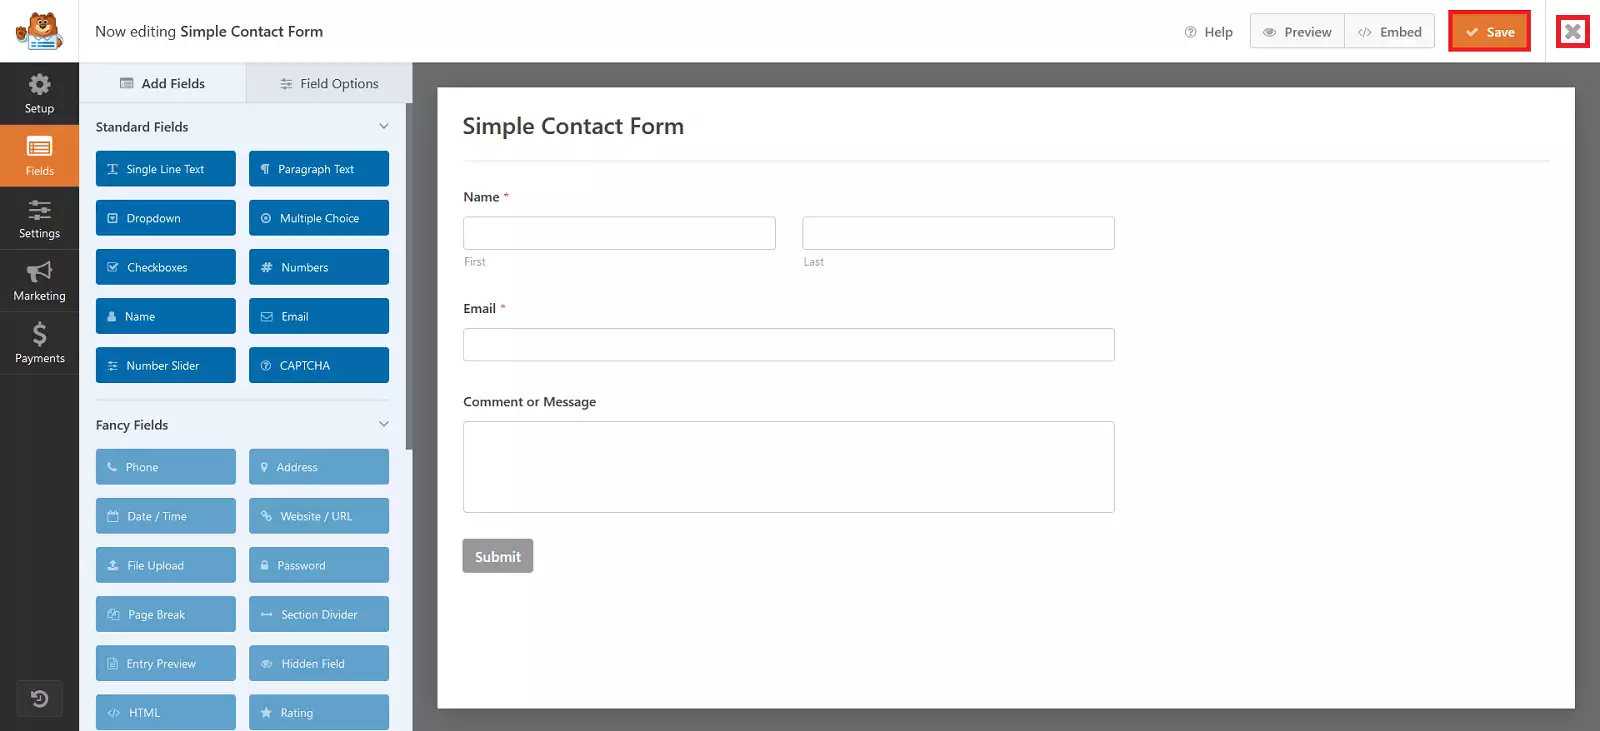
-We will see an example form that we can customize, in our case we will click on "Save" and once saved in the cross "Exit".
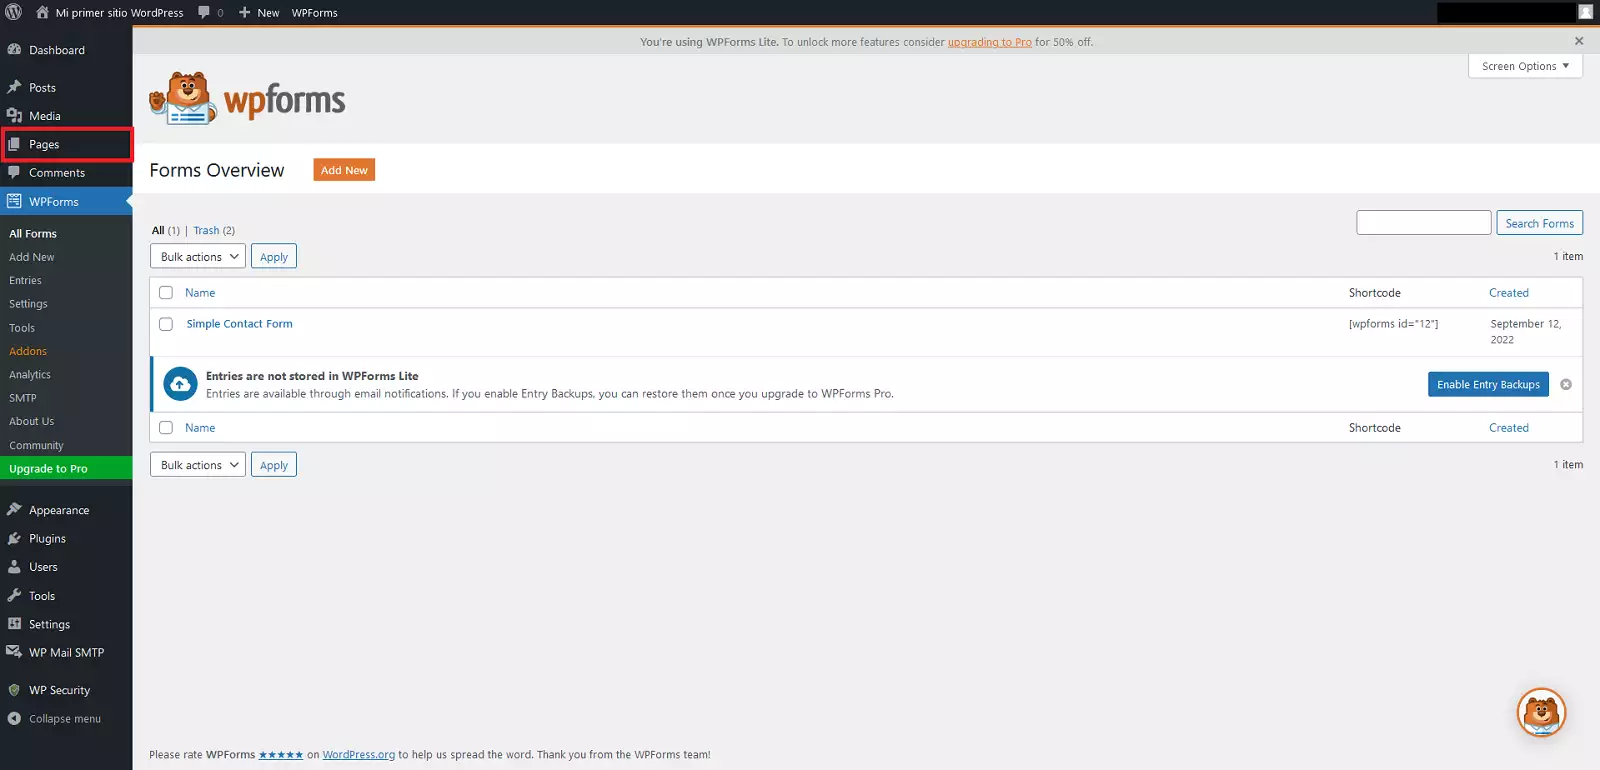
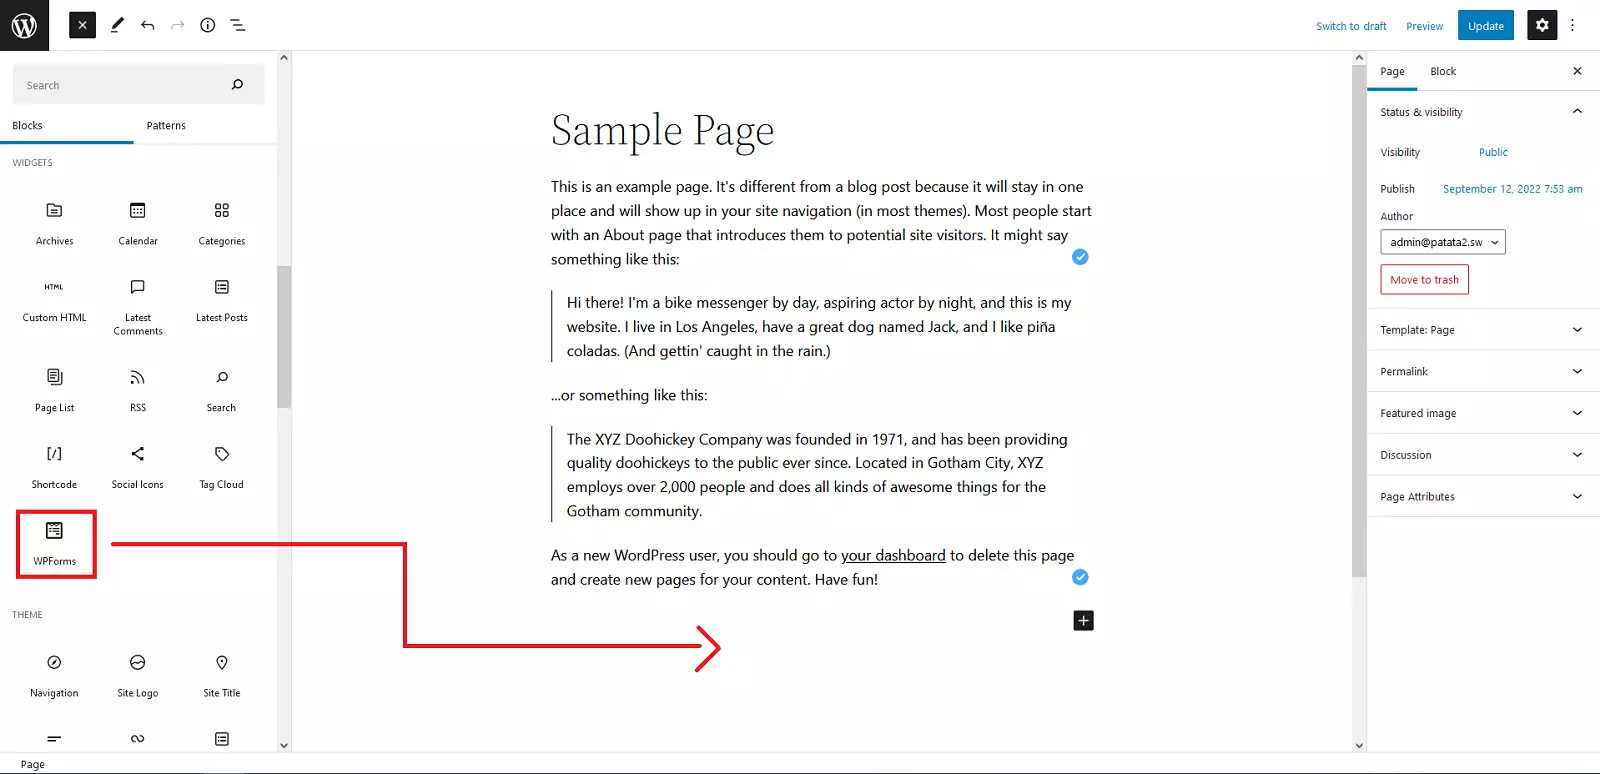
-Now it remains to apply the form to the page that we want to appear, click on "Pages".
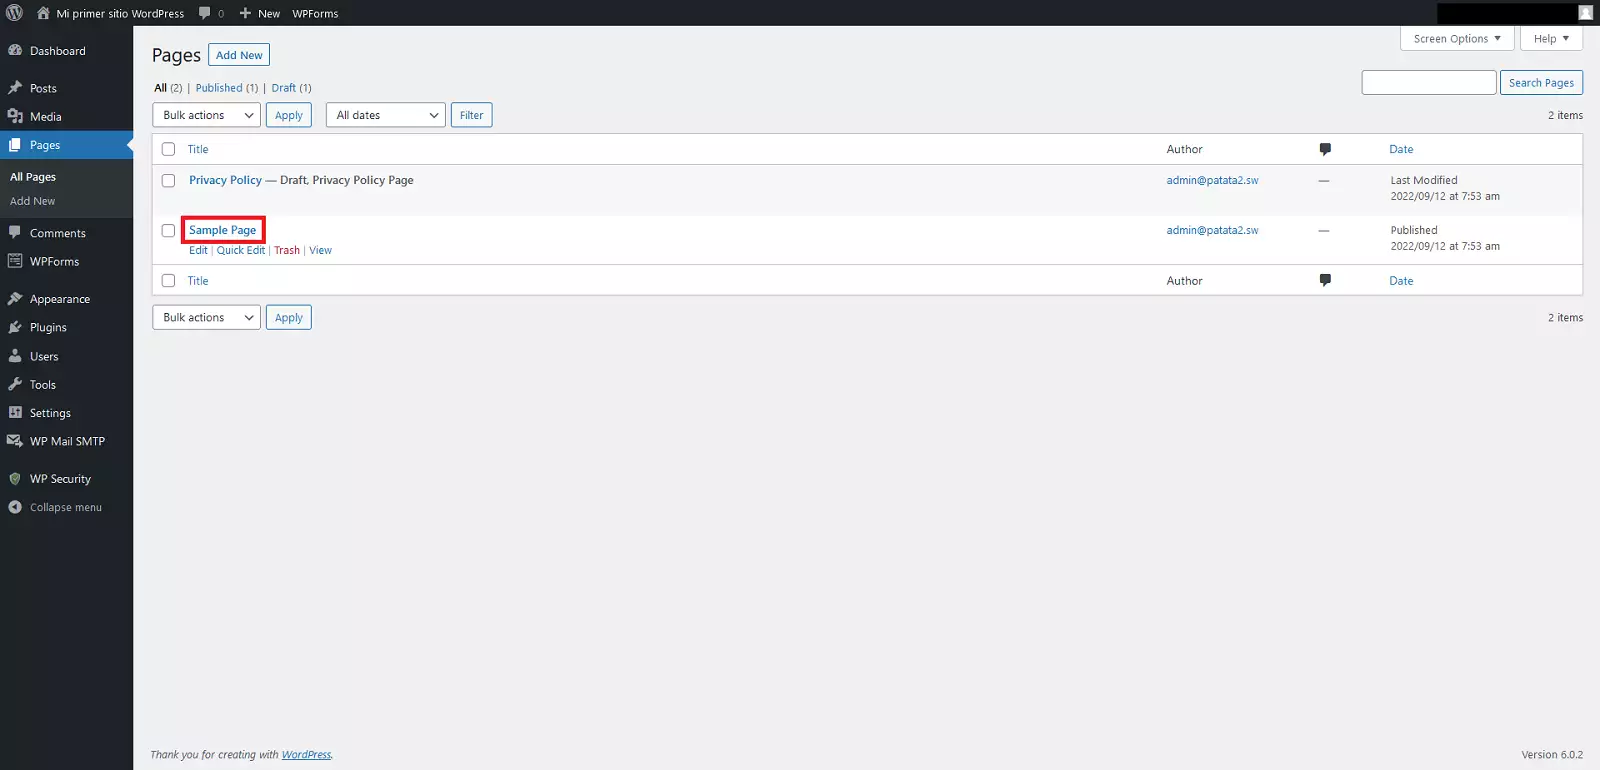
-We will select for example "Sample Page" !
-Click on the "+" symbol at the top left to display all the possible objects to insert
-Locate inside the "WIDJETS" section the "WPForms" option and drag it to the bottom of the page.
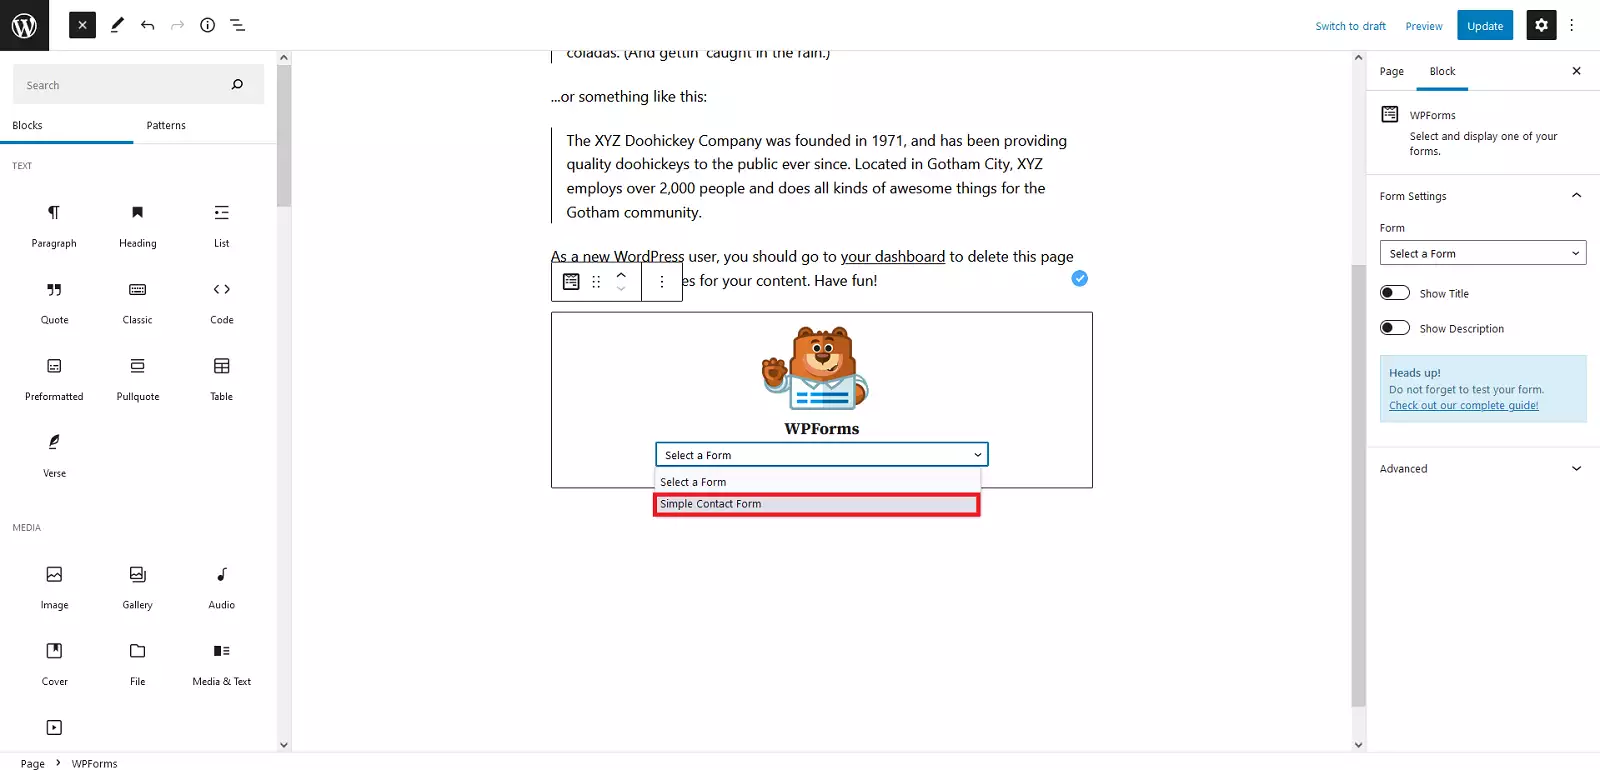
-A drop down list will appear where we will choose the form we have previously created "Simple Contact Form".
-Finally we will click on "Update" to update the page.
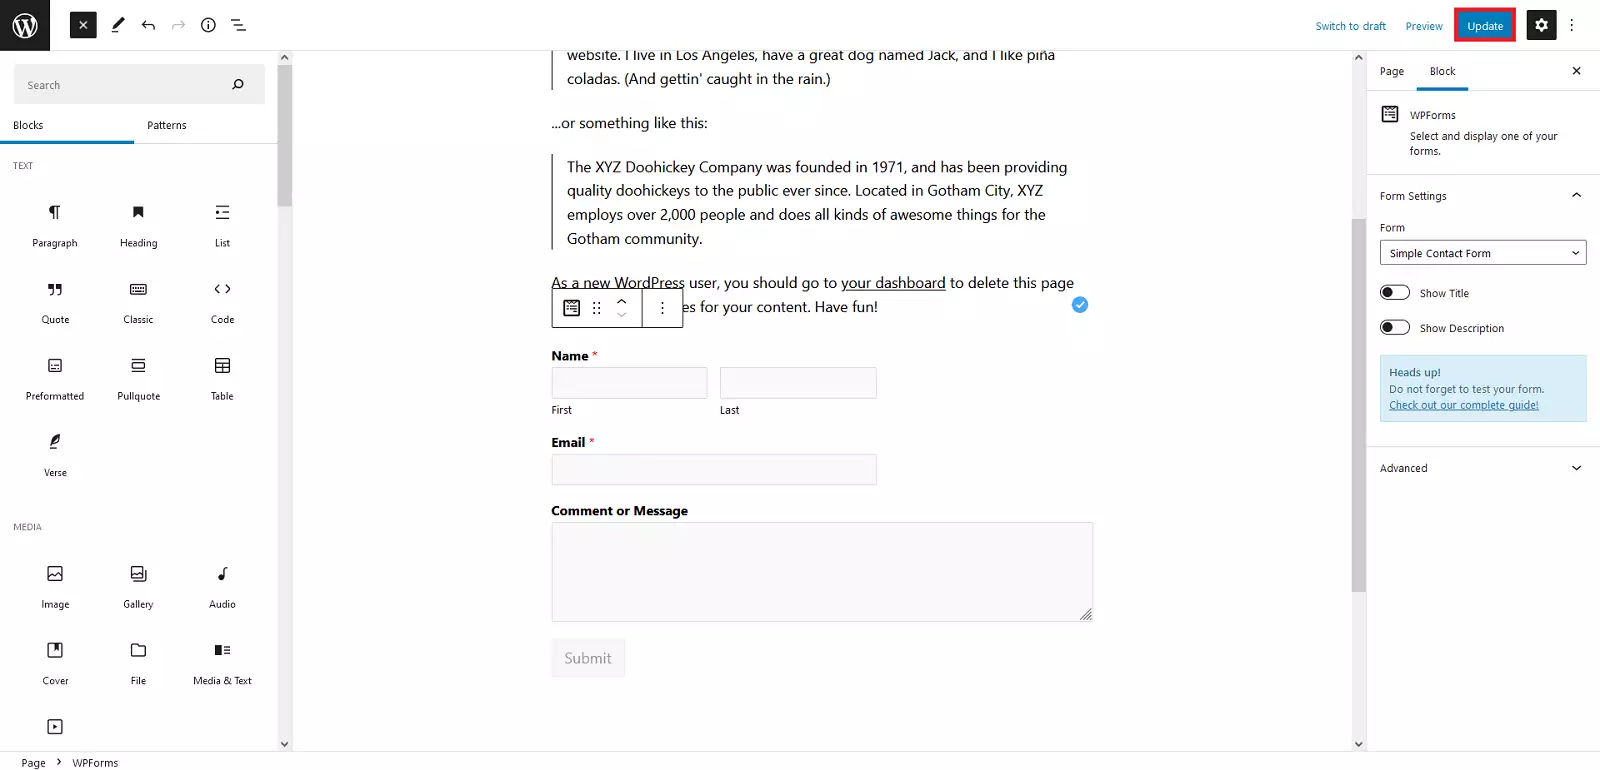
Done, we now have the form on our web page ready to use.
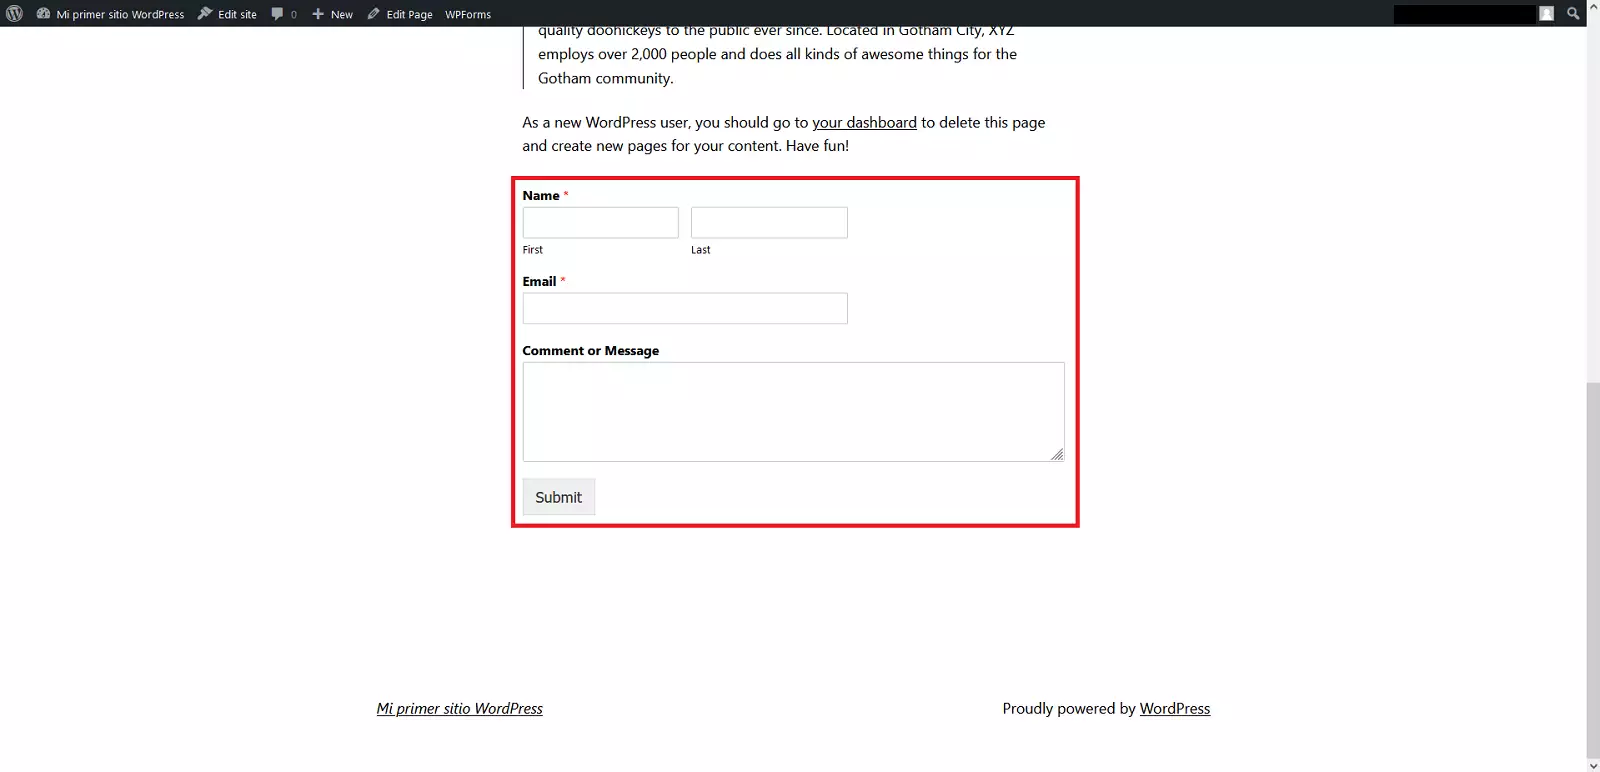
This way, in a matter of a couple of minutes we can set up a fully functional form that uses the email account associated with the WordPress to make submissions and without using any code.
TIP
Add a CAPTCHA to your forms to give them another layer of security. If we go to the settings of the commented form plug-in (WPFOMS > Settings > CAPTCHA), it will allow us to configure a CAPTCHA account that we can use in all our forms. The CAPTCHA account has to be hired separately (free versions are available).
With these indications we hope that you can configure your forms in the WordPress hosted in our company in a few minutes in a fast and secure way. All our hosting allows you to install WordPress in them with a single click. Do not wait any longer, hire now your hosting or cloud for your business in www.swhosting.com.