This manual will guide you through upgrading from “Ubuntu 22.04 LTS (Jammy Jellyfish)” to the latest Long Term Support (LTS) release of the Ubuntu operating system, Ubuntu 24.04 (Noble Numbat). This was released on 25 April 2024.
Before we start with the tutorial, if you don't have a Cloud server with Ubuntu 22.04 or you prefer a Cloud server already upgraded to Ubuntu 24.04, don't worry! With just one click, you can easily deploy it with SWPanel.
In order to always provide knowledge and to be able to help our customers in the different situations and scenarios they may encounter, we have decided to document the upgrade process to this version. This way you can enjoy the latest software functionality and security updates for the operating system.
In the following link you can find more information about the changes offered by this new version: Noble Numbat Release Notes
danger Warning! As with almost any upgrade between ‘major’ versions of an operating system, this process carries an inherent risk of failure, data loss or corrupted software configuration. Full backups and thorough testing are strongly recommended before beginning.
The upgrade process takes time due to Internet speed and other factors. Do not cancel the operation once it has started, as it will leave your Ubuntu machine in an inconsistent state.
We strongly recommend that you have a backup of all your data before upgrading from Ubuntu 22.04 to Ubuntu 24.04. Make sure you have all your backups up to date, so that you can ensure the integrity of all your data before proceeding.
? Activate backups in my Cloud
In addition, you also have the possibility to activate the snapshot service of your cloud service through your SWPanel, we recommend you to make a snapshot of your cloud prior to the upgrade process, so you can revert the changes at any time if necessary:
? How to create and manage SnapShots of your Cloud Server
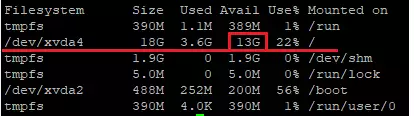
Make sure you have enough free disk space before starting this process.
We recommend having at least 10 GB of free disk space before upgrading. Use the df command to verify this:
df -h
All third-party repositories are disabled via comment (#) during the upgrade process of your operating system. If you are using any extra repositories on your server, you will need to enable them after the upgrade procedure is complete. Third-party mirrors can be found in the directory:
/etc/apt/sources.list.d/
It will be necessary to have the ubuntu-release-upgrader-core package that will allow us to perform the upgrade. To do this we can run the following command to install it:
sudo apt-get install ubuntu-release-upgrader-core -y
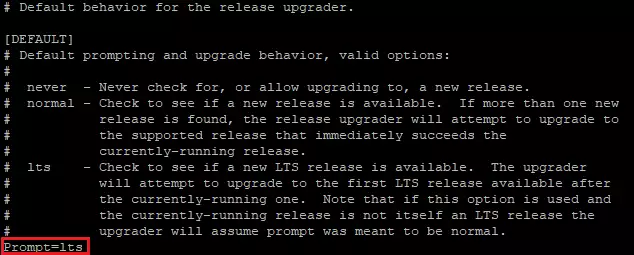
Check the default behaviour for the version updater, using the cat / more or less command:
cat /etc/update-manager/release-upgrades
And make sure that the following line is set in lts:
Prompt=lts
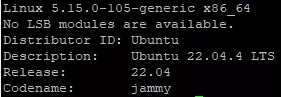
First it is important to check which kernel version you currently have, in case it is updated during the upgrade, and in case you need to reboot the server.
Make a note of the current Linux distribution name and kernel version before you start. Use the uname command and lsb_release command as follows:
uname -mrs && lsb_release -a

First, find all packages that are in "hold" mode, then type the command apt-mark:
sudo apt-mark showhold
If you see an empty output and no packets are being held, you can safely continue. Otherwise, you must remove the package hold with the apt-mark command. For example, release the packages as follows (replace package1 package2 with the package names listed):
sudo apt-mark unhold paquete1 paquete2
Next, update the current system using the apt command:
sudo apt-get update && sudo apt-get upgrade
You will be shown a list of updates and asked to continue. Press Y to confirm and Enter.
This process may take some time. Once finished, use the dist-upgrade command with apt-get which will perform any additional upgrades involving changing dependencies, adding or removing new packages as neede.
This command will install a set of updates that may have been held back by the previous apt update step:
sudo apt-get dist-upgrade
Again, press Y when prompted to continue and wait for the updates to finish.
If a new Linux kernel is installed, review and compare it to the command provided in the previous step:
uname -mrs && lsb_release -a
If your Kernel version has changed, reboot your system before continuing:
sudo reboot
Now that you have an updated Ubuntu 22.04 installation, you can use do-release-upgrade to upgrade to version 24.04.
You may need to activate the FW Layer 4 Management via your SWPanel and enable the following access profile temporarily to open the necessary ports used during the upgrade process of your system:
? How do I activate Layer 4 security profiles in my Cloud?
 In case you have Ubuntu's UFW software installed, you will have to perform the same procedure and also open the 1022 TCP port, which is the one used by the software to update:
? What is the UFW firewall and how to configure it in Linux?
At the command line, type the command do-release-upgrade as follows to start the upgrade procedure:
sudo do-release-upgrade -d
The ssh user will see the message immediately:
Checking for a new Ubuntu release

= Welcome to Ubuntu 24.04 LTS 'Noble Numbat' =

The Ubuntu team is proud to announce Ubuntu 24.04 LTS 'Noble Numbat'.

To see what's new in this release, visit:
  https://wiki.ubuntu.com/NobleNumbat/ReleaseNotes

Ubuntu is a Linux distribution for your desktop or server, with a fast
and easy install, regular releases, a tight selection of excellent
applications installed by default, and almost any other software you
can imagine available through the network.

We hope you enjoy Ubuntu.

== Feedback and Helping ==

If you would like to help shape Ubuntu, take a look at the list of
ways you can participate at

  http://www.ubuntu.com/community/participate/

Your comments, bug reports, patches and suggestions will help ensure
that our next release is the best release of Ubuntu ever.  If you feel
that you have found a bug please read:

  http://help.ubuntu.com/community/ReportingBugs

Then report bugs using apport in Ubuntu.  For example:

  ubuntu-bug linux

will open a bug report in Launchpad regarding the linux package.

If you have a question, or if you think you may have found a bug but
aren't sure, first try asking on the #ubuntu or #ubuntu-bugs IRC
channels on Libera.Chat, on the Ubuntu Users mailing list, or on the
Ubuntu forums:

  http://help.ubuntu.com/community/InternetRelayChat
  http://lists.ubuntu.com/mailman/listinfo/ubuntu-users
  http://www.ubuntuforums.org/


== More Information ==

You can find out more about Ubuntu on our website, IRC channel and wiki.
If you're new to Ubuntu, please visit:

  http://www.ubuntu.com/


To sign up for future Ubuntu announcements, please subscribe to Ubuntu's
very low volume announcement list at:

  http://lists.ubuntu.com/mailman/listinfo/ubuntu-announce


Continue [yN] y
Type Y, then you will get another message:
Reading cache

Checking package manager

Continue running under SSH?

This session appears to be running under ssh. It is not recommended
to perform a upgrade over ssh currently because in case of failure it
is harder to recover.

If you continue, an additional ssh daemon will be started at port
'1022'.
Do you want to continue?

Continue [yN] y
Type Y again, you will get another message:
Starting additional sshd

To make recovery in case of failure easier, an additional sshd will
be started on port '1022'. If anything goes wrong with the running
ssh you can still connect to the additional one.
If you run a firewall, you may need to temporarily open this port. As
this is potentially dangerous it's not done automatically. You can
open the port with e.g.:
'iptables -I INPUT -p tcp --dport 1022 -j ACCEPT'

To continue please press [ENTER]
Since we already opened port 1022, press the Enter key to continue. Again, you will get a final prompt with the details as follows:
Do you want to start the upgrade?


48 packages are going to be removed. 156 new packages are going to be
installed. 520 packages are going to be upgraded.

You have to download a total of 944 M. This download will take about
3 minutes with a 40Mbit connection and about 25 minutes with a 5Mbit
connection.

Fetching and installing the upgrade can take several hours. Once the
download has finished, the process cannot be canceled.

 Continue [yN]  Details [d] y
Finally, press Y again to accept and continue.
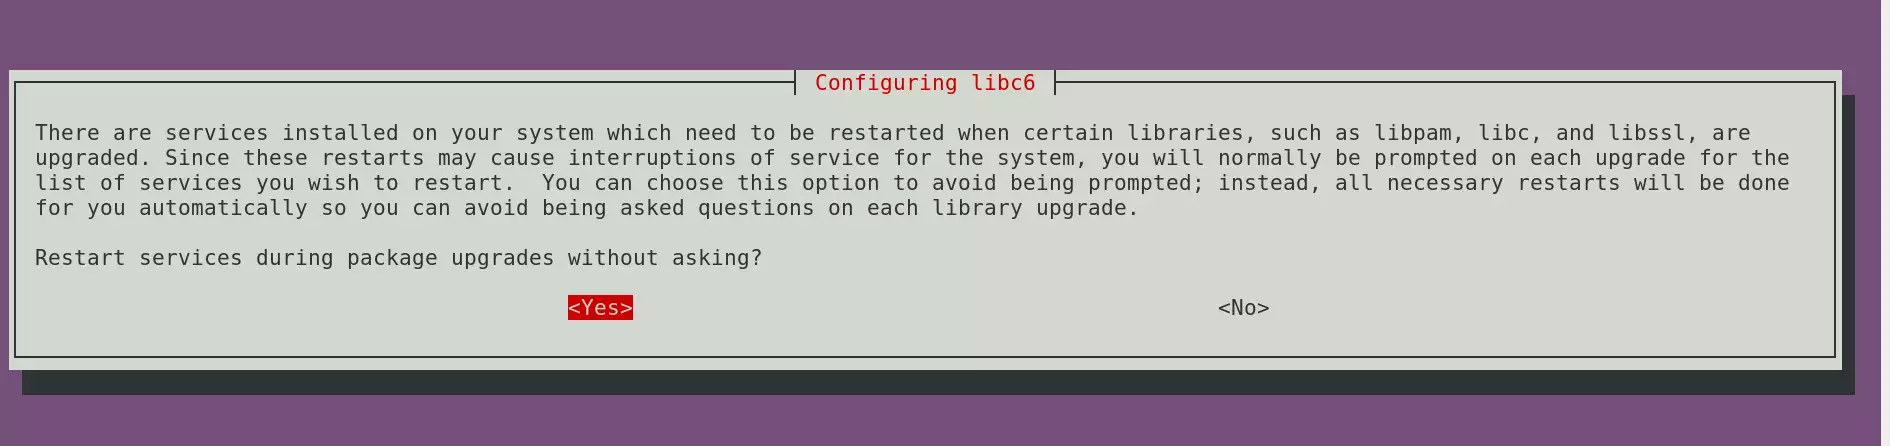
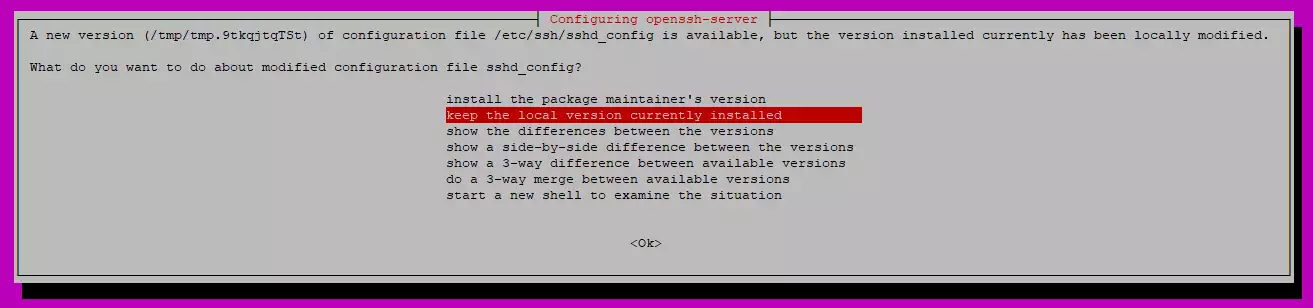
Also be sure to confirm the restart of services when prompted to do so:
 Mantén la configuración de tus ficheros modificados en Ubuntu 22.04 LTS, al actualizar a 24.04 LTS:
 Other examples:
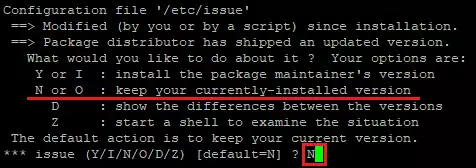
Press N and/or ENTER to check the default option (do not modify).
The installer will ask if you want to remove possibly obsolete packages as follows:
Remove obsolete packages?


106 packages are going to be removed.

Removing the packages can take several hours.

 Continue [yN]  Details [d]
Press D to view details about these packages. You can decide whether to keep them by pressing N or to delete them by pressing Y.
Once the steps have been followed, the update is complete. We will receive the following message indicating if we want to reboot.
 System upgrade is complete.

Restart required

To finish the upgrade, a restart is required.
If you select 'y' the system will be restarted.

Continue [yN] N
Although a reboot is required to finish the upgrade from 22.04 LTS to 24.04 LTS, we will press N to reject the reboot.
Next, via console we will check the name of the network interface:
ip a
eth0: <BROADCAST,MULTICAST,UP,LOWER_UP> mtu 1500 qdisc mq state UP group default qlen 1000
    link/ether 52:3a:72:52:fd:4c brd ff:ff:ff:ff:ff:ff
    inet 81.33.138.18/24 brd 81.25.125.255 scope global enX0
       valid_lft forever preferred_lft forever
    inet6 fe80::503a:72ff:fe52:fd4c/64 scope link
       valid_lft forever preferred_lft forever
In our case, we see that our public IP is 81.33.138.18 and the defined interface is eth0.
Now, we need to change the interface name from eth0 to enX0 (this step may vary depending on the Ubuntu 24.04 installation environment):
sudo nano /etc/netplan/01-netcfg.yaml
Once the interface name has been replaced, we can restart:
sudo reboot
danger Warning! If after rebooting you cannot access via SSH, it is probably because the interface name configuration is incorrect. Check via the SWPanel console which name is assigned via the "ip a" command and enter it again in the "/etc/netplan/01-netcfg.yaml" file. Use the ‘netplan apply’ command to apply the changes.
Don't forget to remove the Layer 4 Firewall rules via SWPanel, and/or UFW that you used to open port tcp/1022.
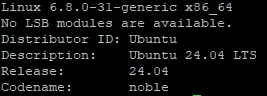
Once the system reboots, you can log in using the GUI or the ssh-based session. Then, you can see the Linux kernel version, run:
uname -mrs && lsb_release -a
Now that the upgrade from Ubuntu 22.04 LTS to 24.04 LTS is complete, if you had additional third-party repositories, you will need to verify that they are re-enabled, or enable them. Otherwise, you will not receive updates from those repositories.
You can check which additional repositories are active as follows:
cd /etc/apt/sources.list.d ls -l cat ubuntu.sources (cambiar ubuntu.sources por los ficheros listados)
To re-enable them, you will need to edit the file with a text editor (nano) and remove the comment line by deleting the #:
Then run the apt command to update those packages:
sudo apt-get update sudo apt-get upgrade
Finally, clean up unwanted and unused leftover packages:
sudo apt autoremove --purge
Remember that if you do not yet have a Cloud server with Ubuntu 22.04 or Ubuntu 24.04 you can easily deploy it with SWPanel.