On all SW Hosting servers with SWPanel, ClamAV is implemented as a comprehensive antivirus service. Its main function is to filter every email that enters or leaves the server to assess the possibility that the content includes some type of virus or malware. This analysis capability is based on the use of a regularly updated database that contains exhaustive lists of all known threats.
Each time an email is sent or received, ClamAV performs thorough comparisons between the content of the message and the information stored in the database. In this way, the system can determine whether there is any indication that the email content is some type of virus or malware.
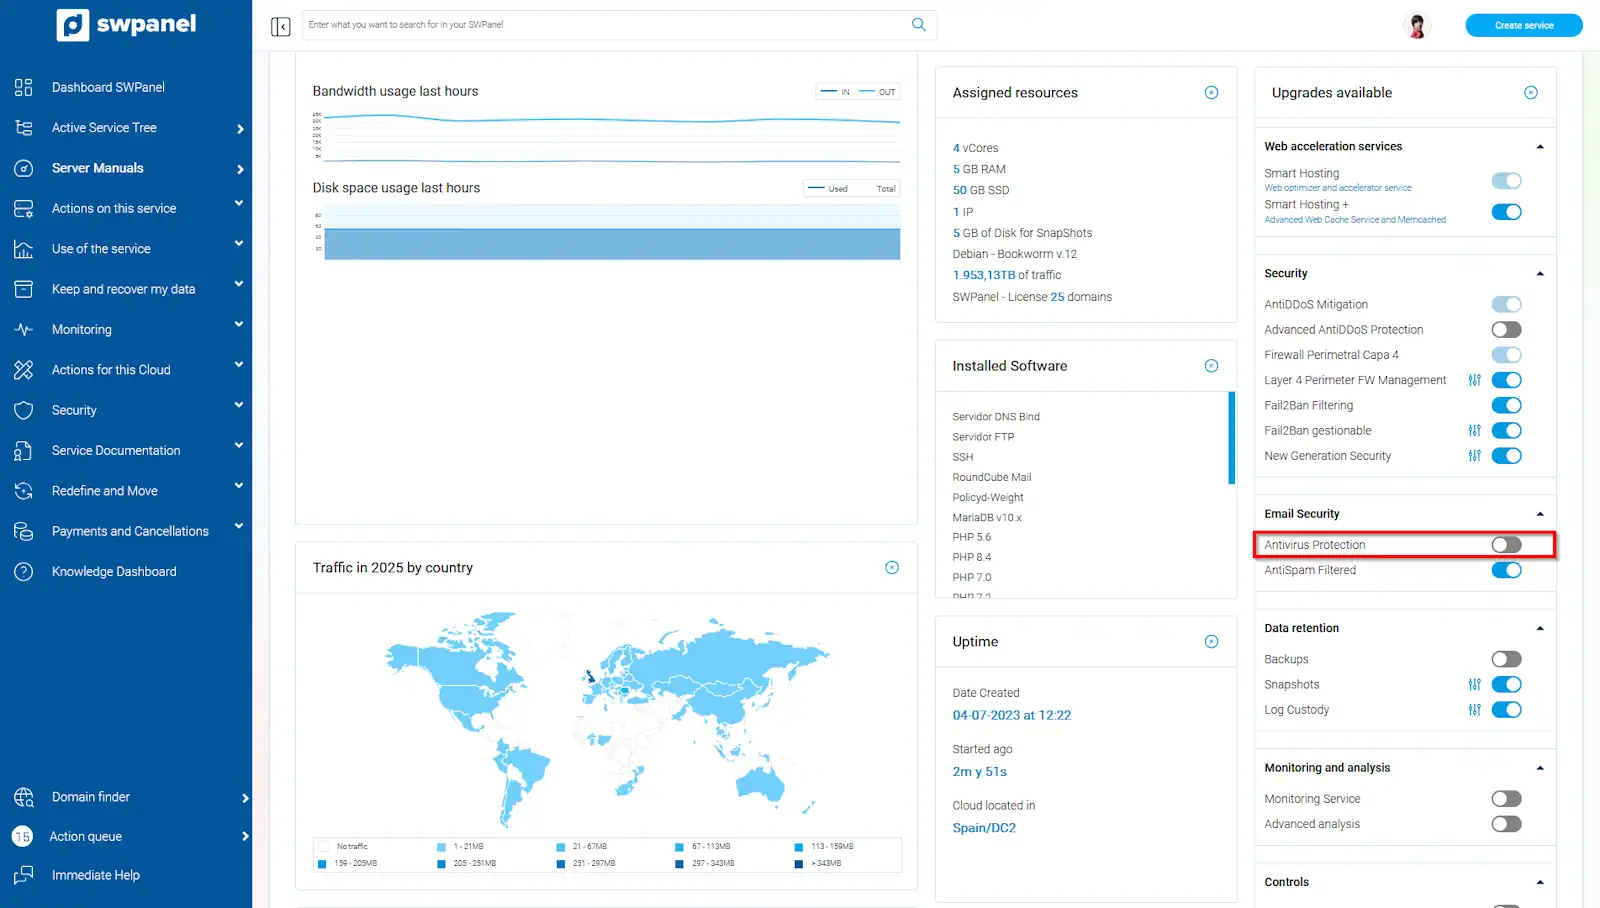
You should know that to activate this service for a specific domain, it must first be activated on the main server.
First, you must locate your server. To do so, we recommend using the search bar at the top of your screen:

info_capture The screenshot is for reference only. It was taken from version 2025.004.0002 dated 15/05/2025. It may differ from what the current version of SWPanel shows.
info_capture The screenshot is for reference only. It was taken from version 2025.004.0002 dated 15/05/2025. It may differ from what the current version of SWPanel shows.
Then, you will need to accept the additional costs for the contracted service, enter the required information (name and ID number), and click Accept and Confirm Changes:
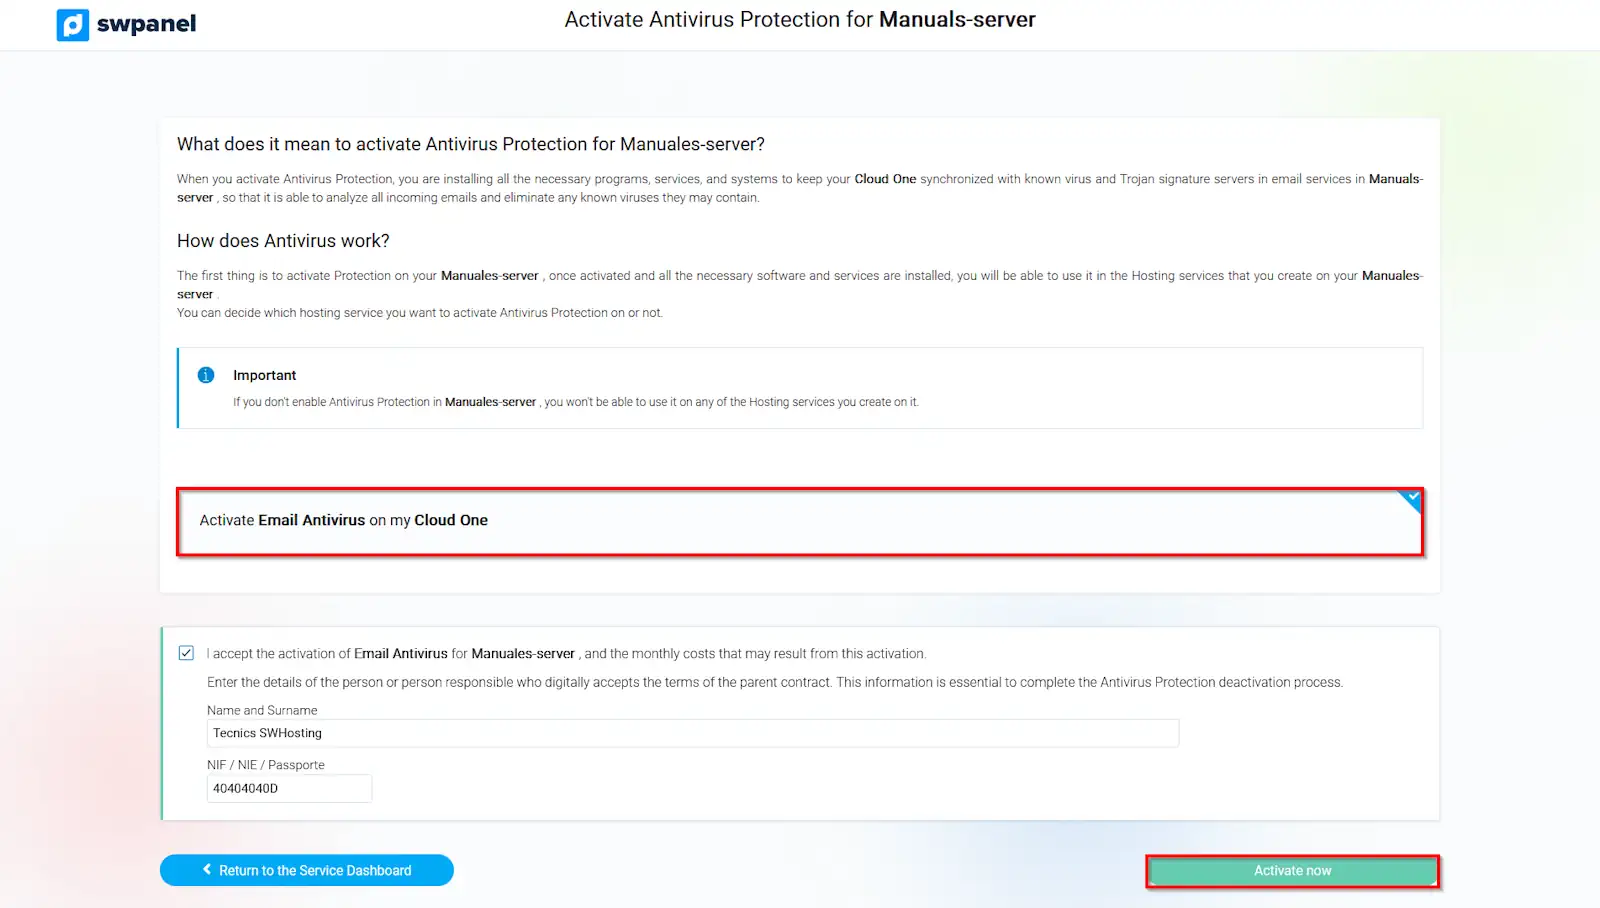
info_capture The screenshot is for reference only. It was taken from version 2025.004.0002 dated 15/05/2025. It may differ from what the current version of SWPanel shows.
Once the Antivirus service is activated on the main Cloud Server, we will proceed to enable it within a hosting service hosted on this same Cloud by following the next manual:
? Activate and deactivate the Antivirus service in a Hosting
Remember that this process must be repeated for each service under the main Cloud server where you want to have the Antivirus service activated.
To disable the antivirus service, follow these steps:
First, you must locate your server. To do so, we recommend using the search bar at the top of your screen:
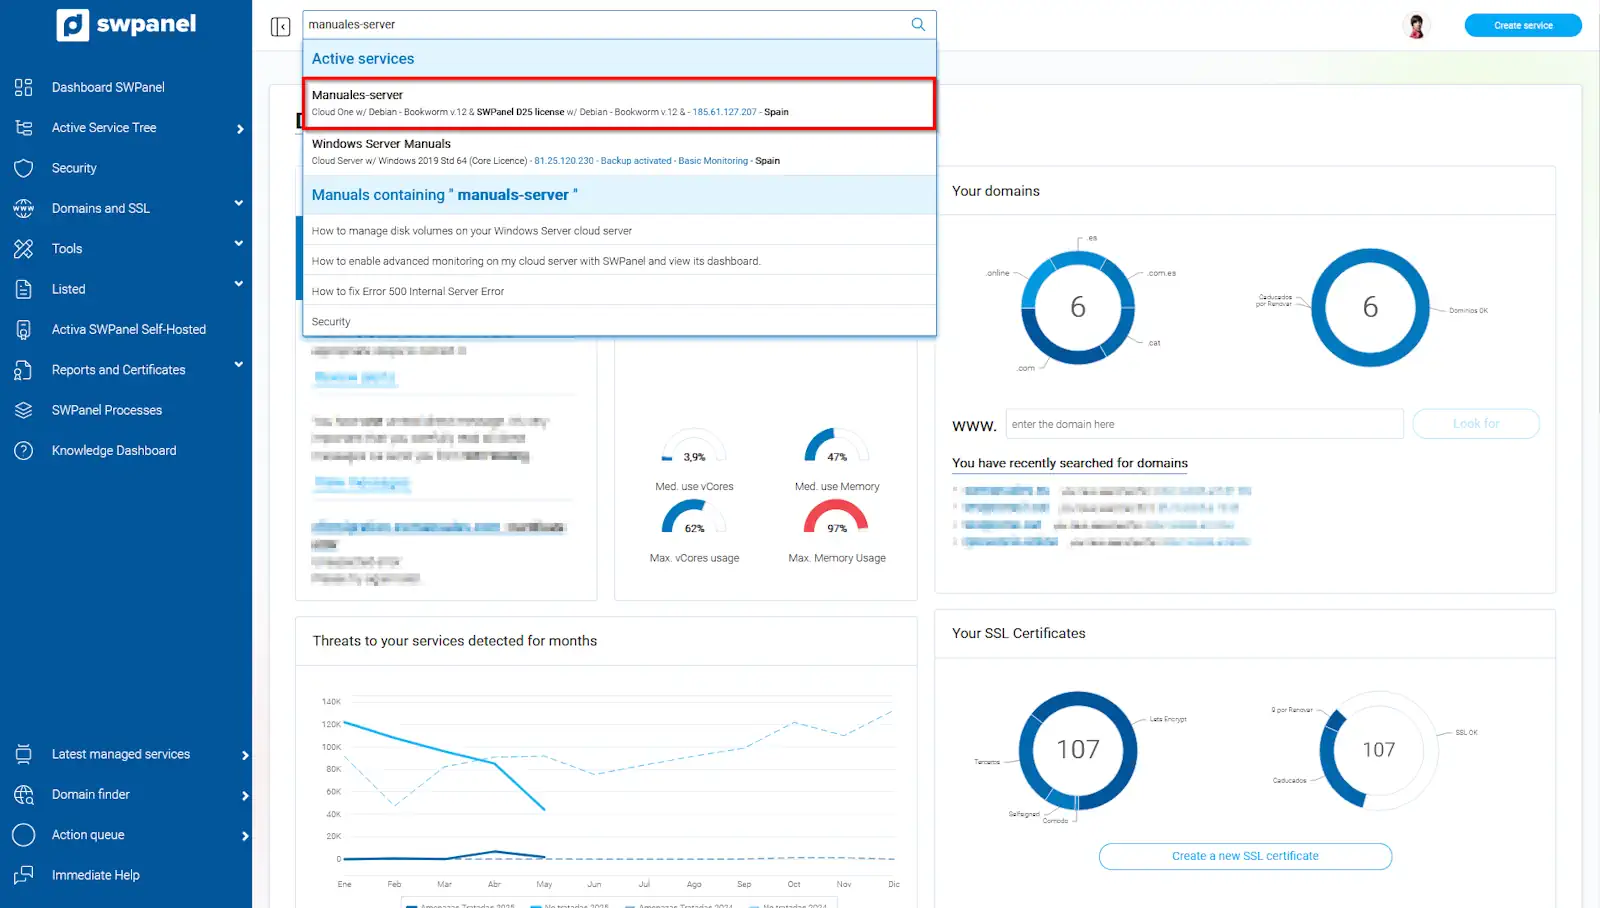
info_capture The screenshot is for reference only. It was taken from version 2025.004.0002 dated 15/05/2025. It may differ from what the current version of SWPanel shows.

info_capture The screenshot is for reference only. It was taken from version 2025.004.0002 dated 15/05/2025. It may differ from what the current version of SWPanel shows.
You will need to click "Accept and Confirm Changes" again, and the Antivirus analysis will be deactivated.
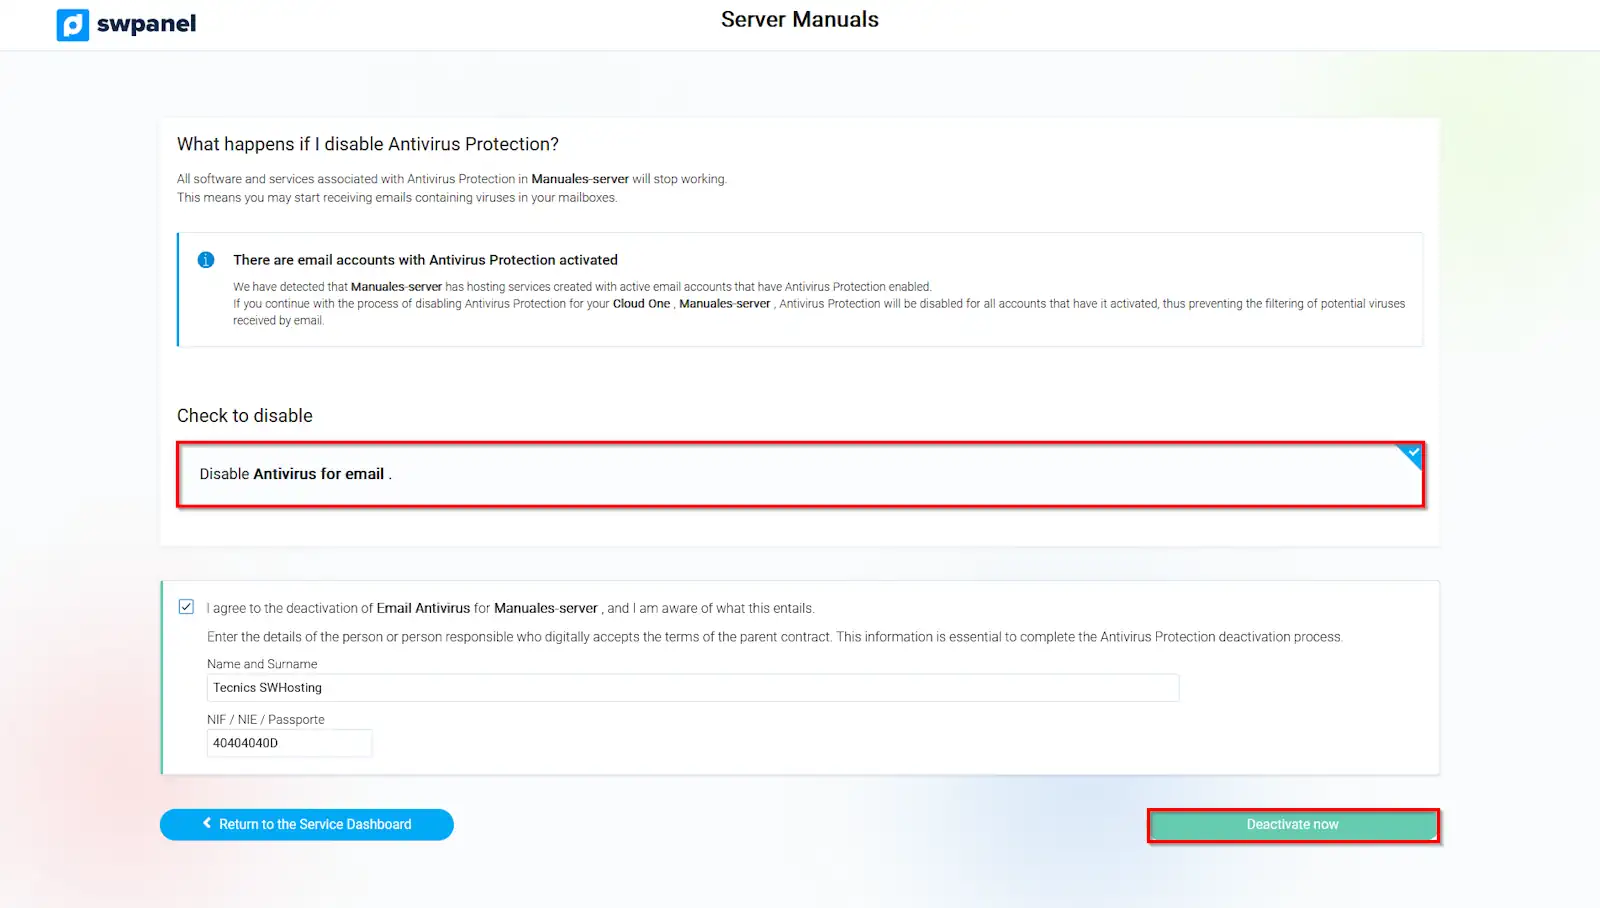
info_capture The screenshot is for reference only. It was taken from version 2025.004.0002 dated 15/05/2025. It may differ from what the current version of SWPanel shows.