⚠️ These settings for mail accounts are only valid for Cloud servers with Linux operating system versions Debian 10 or higher. ⚠️
Microsoft Outlook is one of the most widely used programs in offices and personal computers as a mail manager for corporate mail accounts or personalized mail.
The data that we must take into account for the configuration of the mail account are the following:
First, let's see how to configure Outlook, if it is the first time you access it. Later, we will see how to configure it if we already have an account configured in Outlook.
##Configuring an email account for the first time
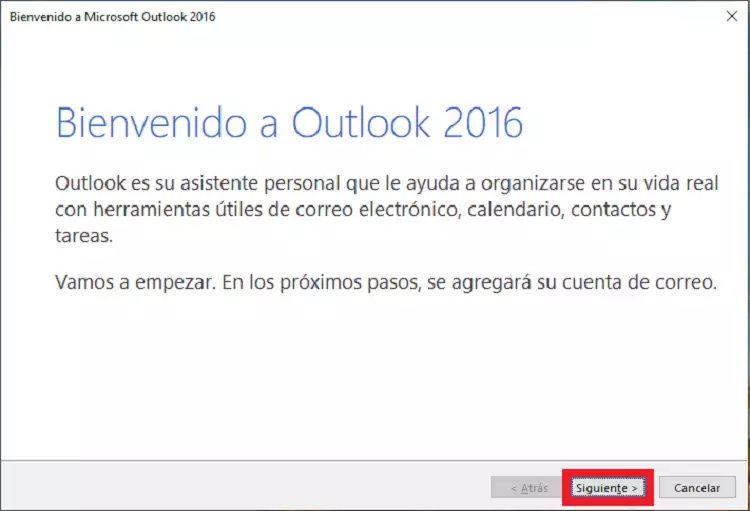
Open the application. The Outlook welcome message will open. Click on "next":
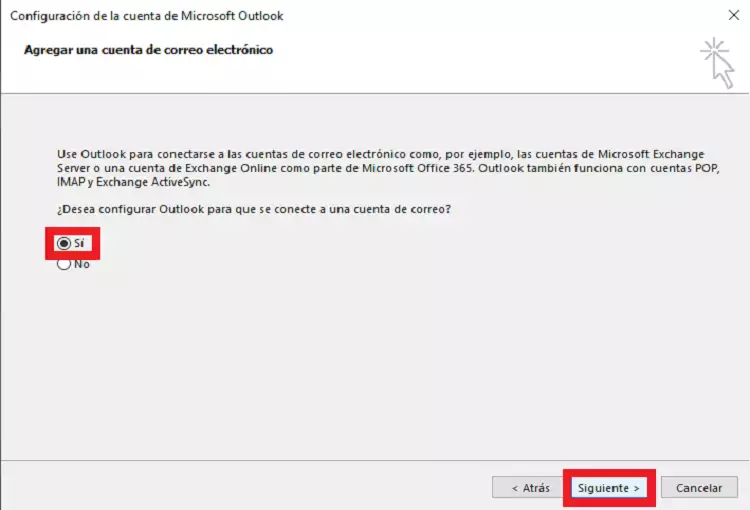
It is going to ask us if we want to configure our Outlook account to connect to an email account. We mark yes and click on "next":
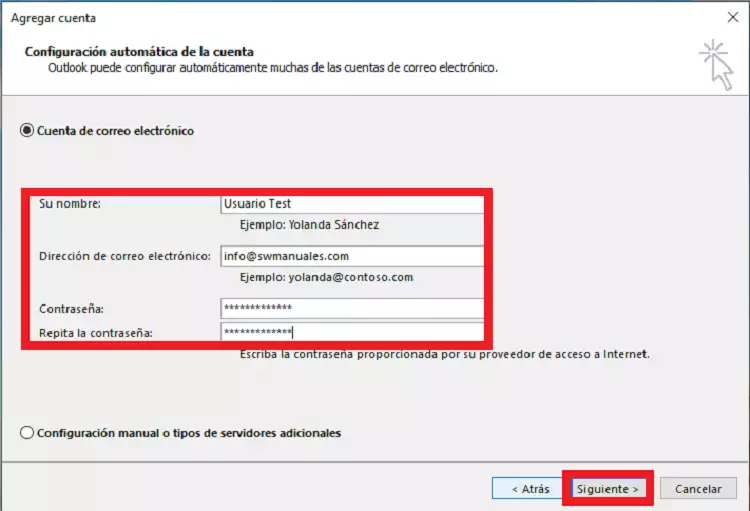
The automatic account configuration will open. We will have to fill in the requested fields, Name (it is not necessary to specify any specific data, we can put the name we want), the email address to be configured and the password to access the account:
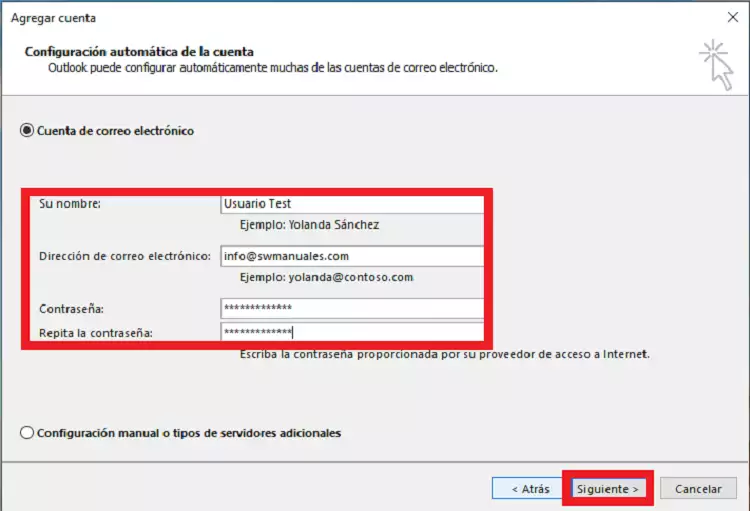
***We remind you that from SWPanel you will not be able to see the information about the password of the email account, because in compliance with ISO 27001, LOPD and RGPD, we do not store or provide personal passwords, as well as we do not have access to the passwords of email accounts, much less provide them ***.
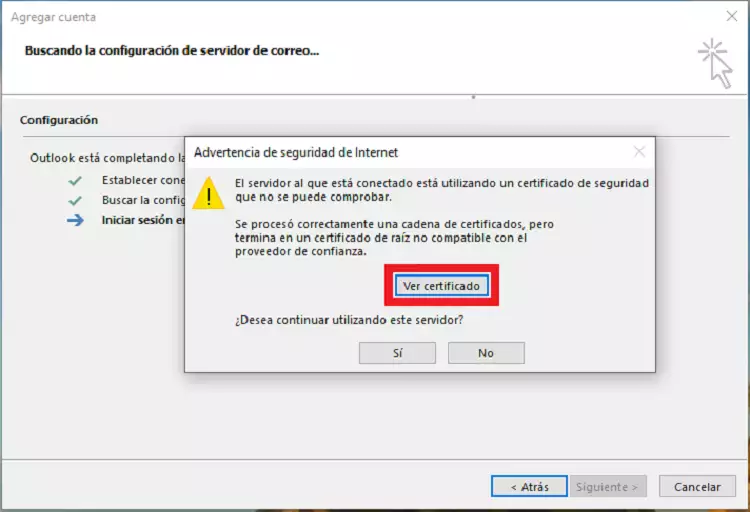
When the automatic configuration starts, Outlook will detect that the SSL certificate (if you have a certificate) is not "trusted". As in the case of Google, Microsoft only detects as trusted certificates its own, i.e. those corresponding to "hotmail.com", so we should not worry or think that our certificate is not valid, on the contrary.
To be able to proceed without any problem, we will have to follow some extra steps.
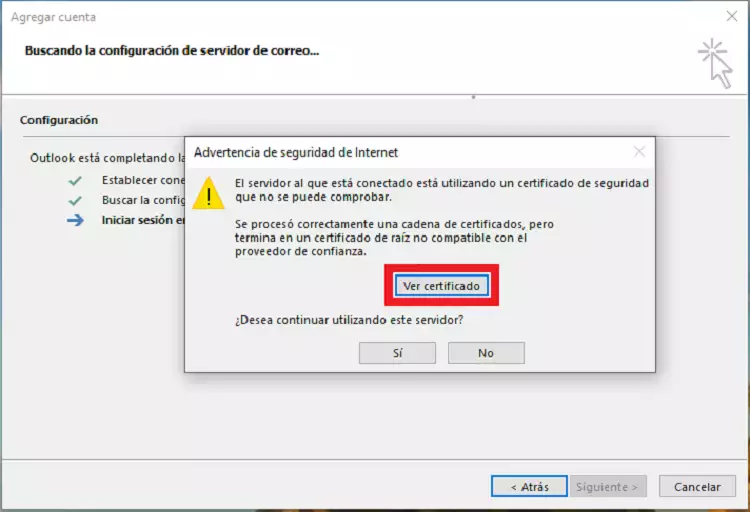
Once the message pops up, click on "view certificate":
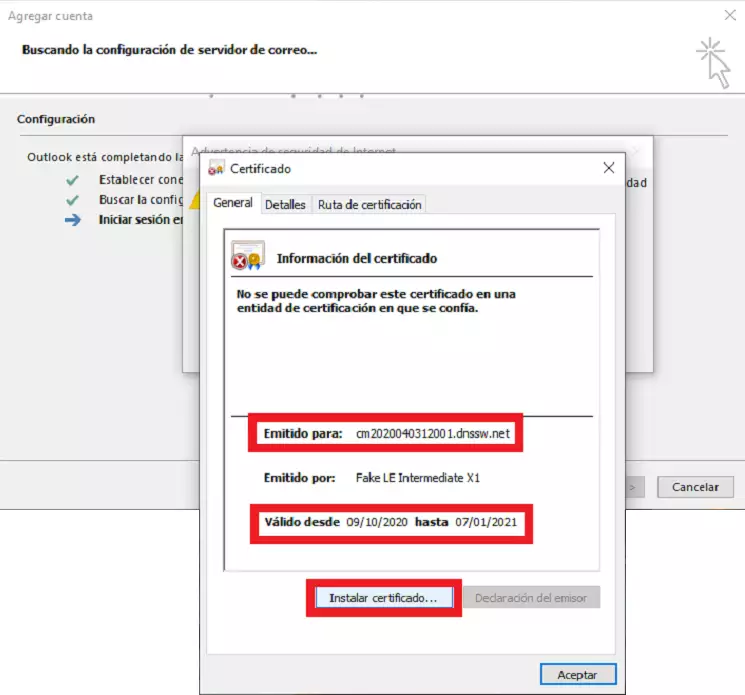
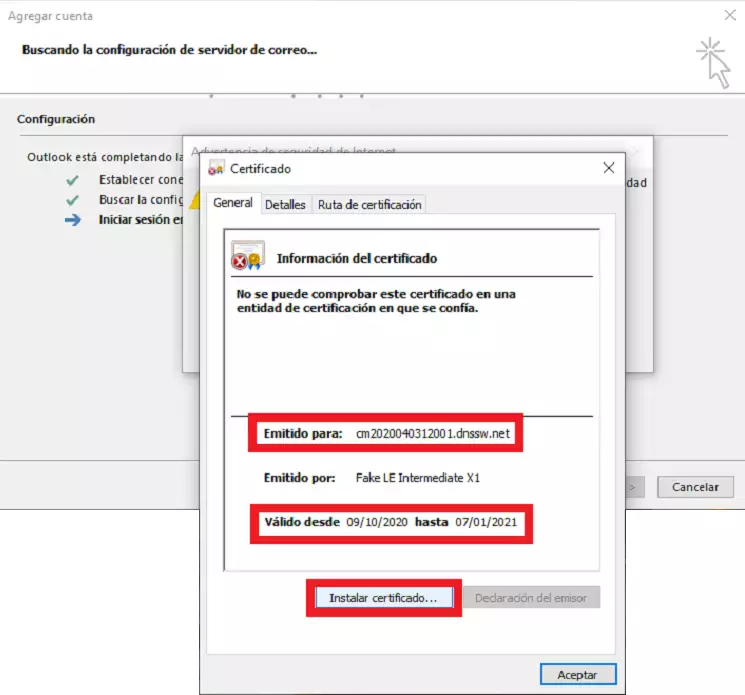
In the certificate information window, we check that the data of the server for which the certificate is issued are correct (our Cloud mail server should appear under its name), as well as the expiration date of the certificate, and click on "install certificate":
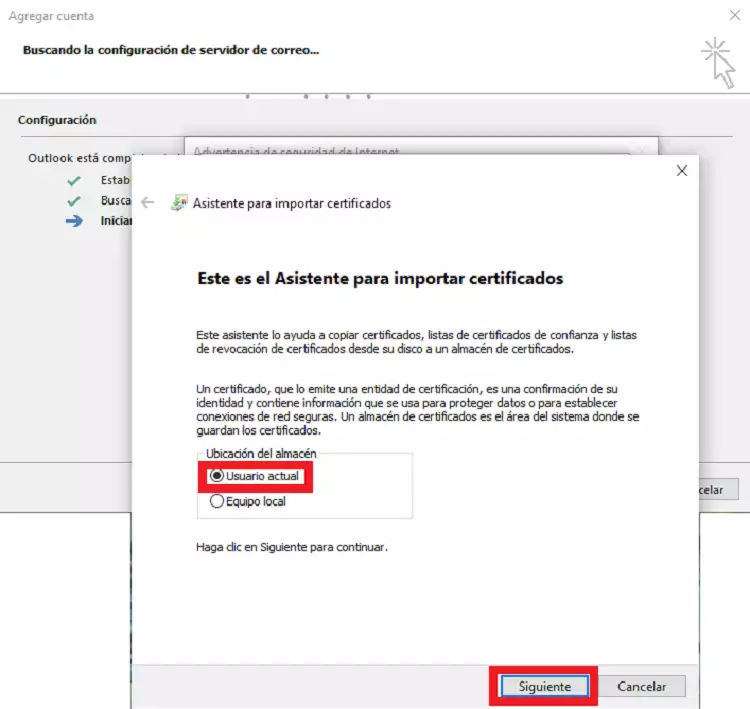
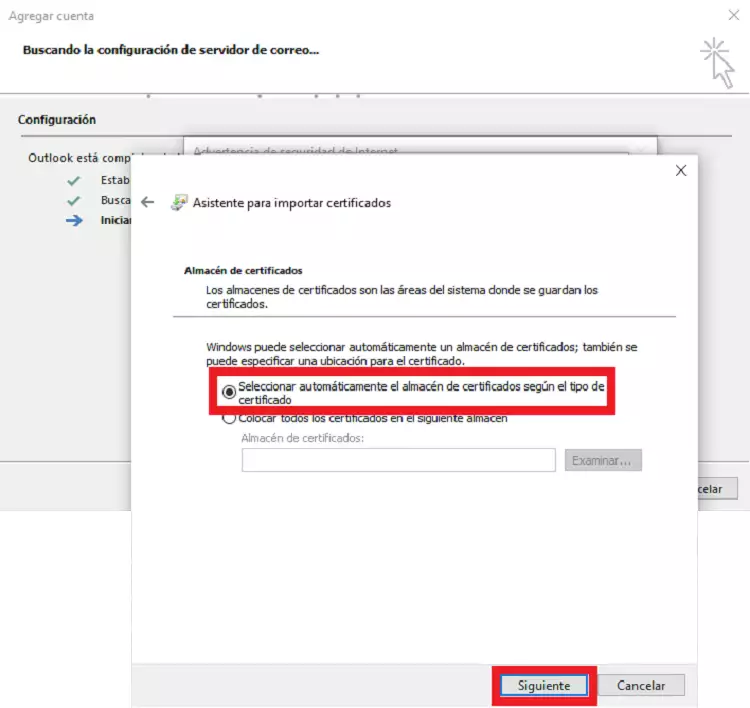
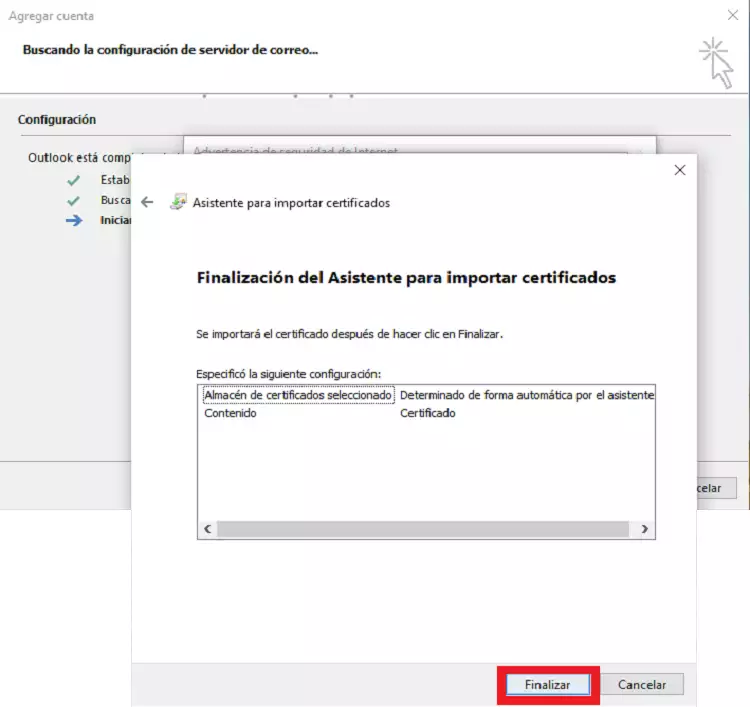
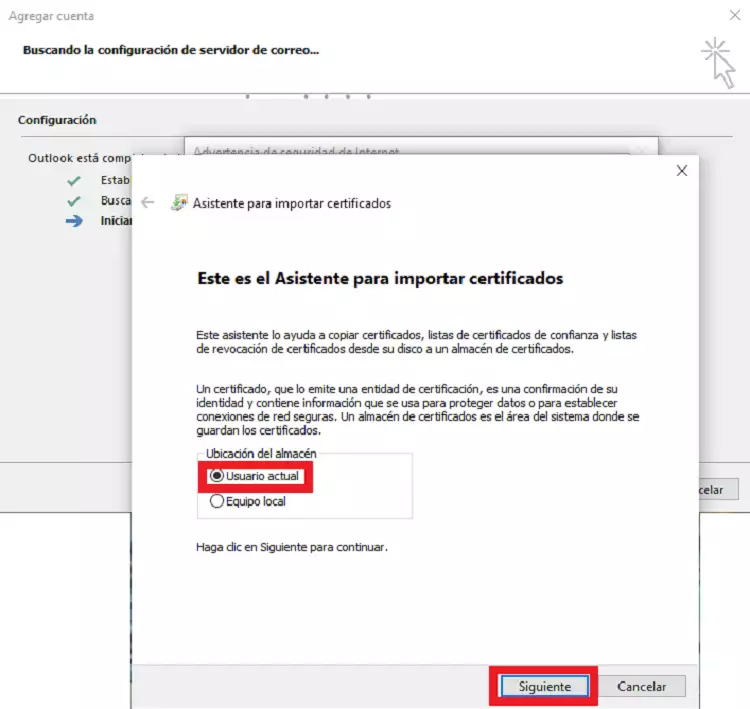
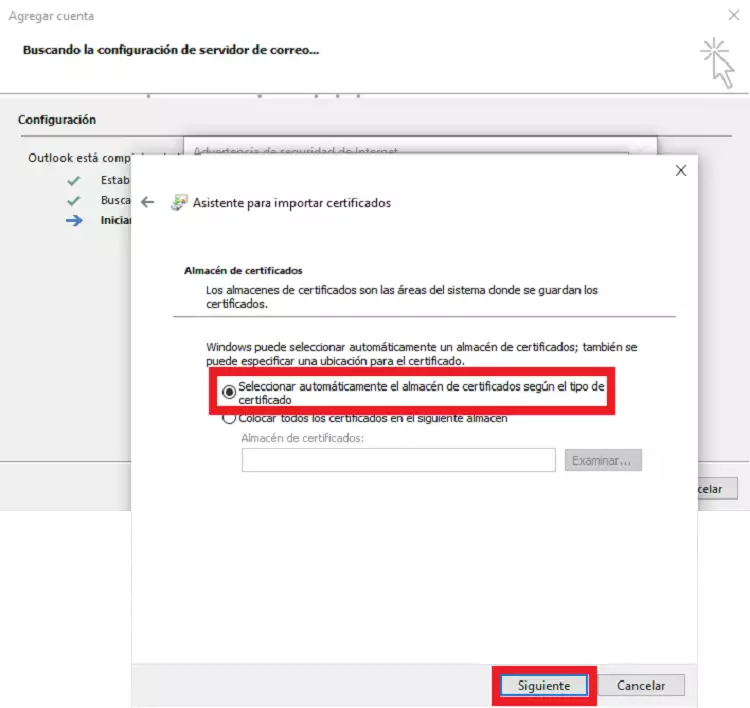
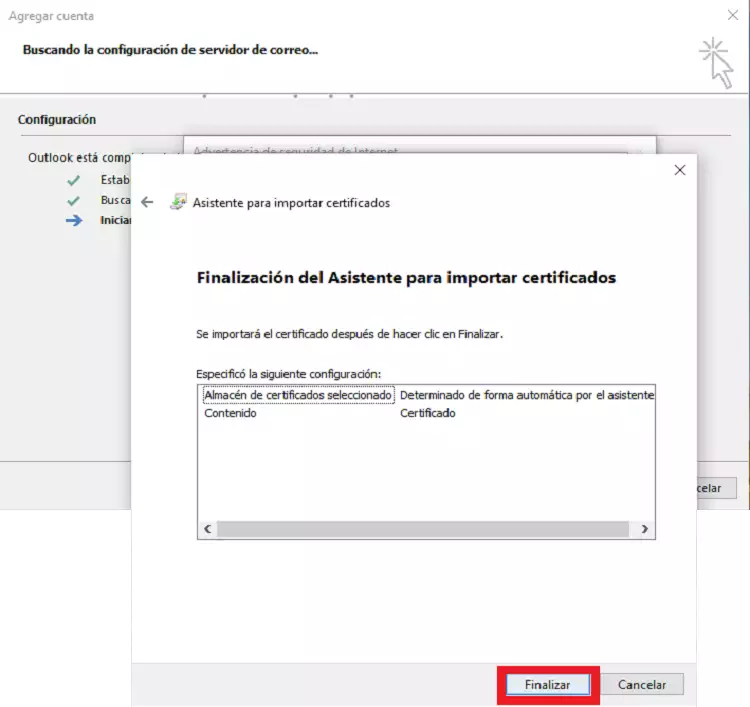
The certificate installation wizard will open. By default, the settings will be the correct ones. Click on "Next" if they match those in the images shown below:
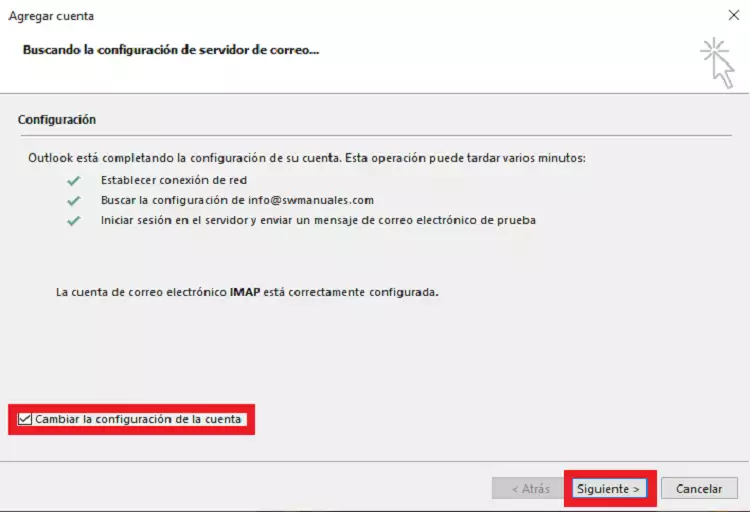
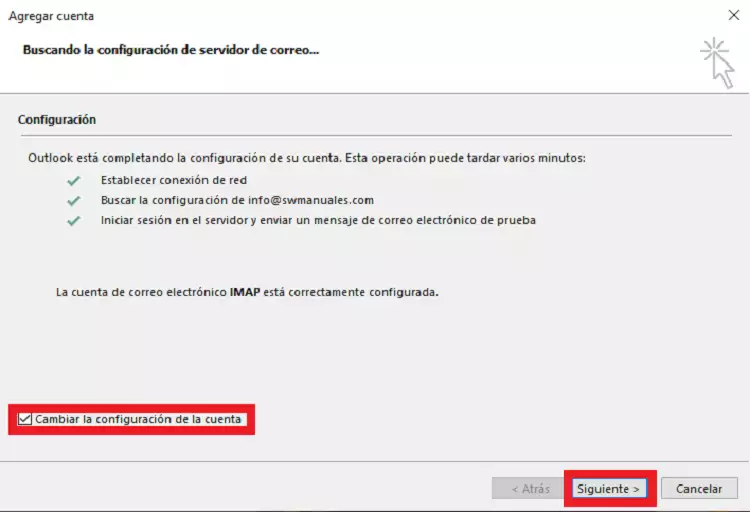
Once the automatic configuration is complete, an alert message will be displayed specifying that it has been successfully configured. The account, by default, will be set to IMAP. In order to verify that the configuration has been carried out correctly and to be able to modify the account settings to POP3, click on the "Change account settings" checkbox and click on "Next":
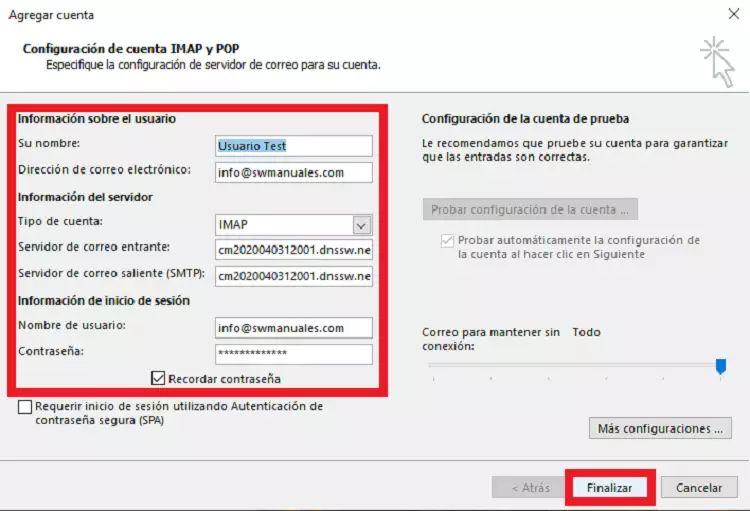
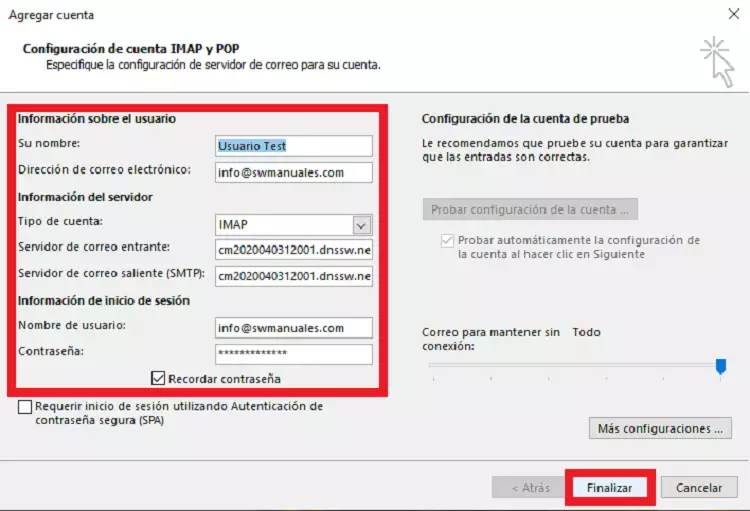
The configuration screen will open. Next we will check that the server data, the incoming and outgoing mail ports and the incoming mail protocol are the desired ones and click on "Next":
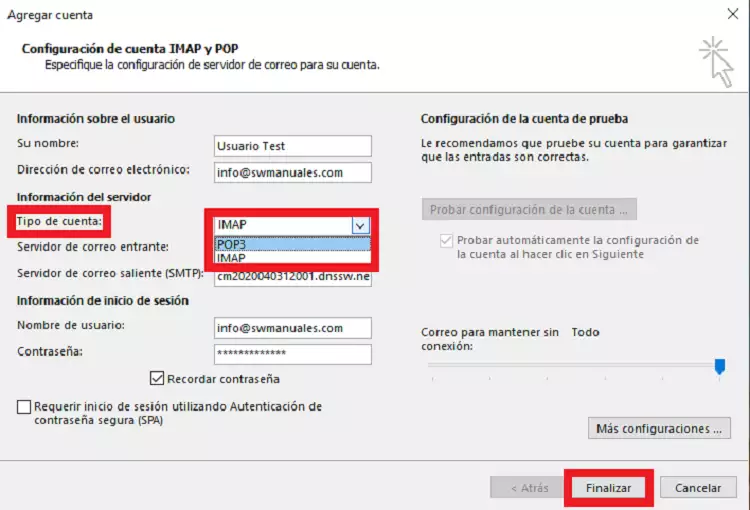
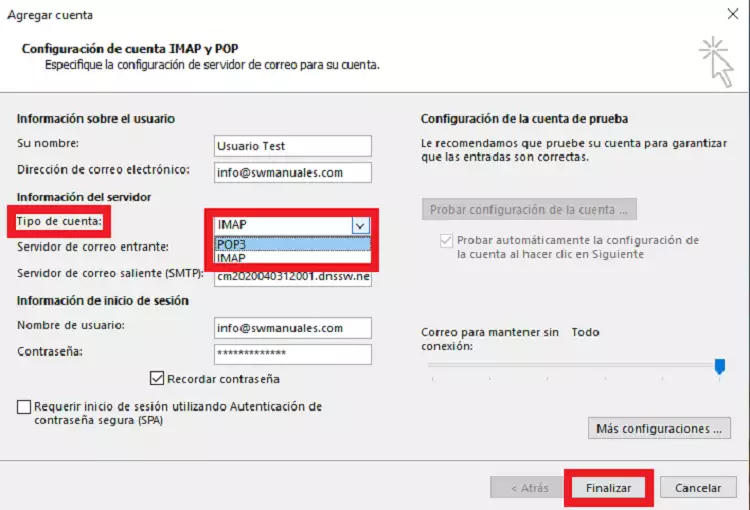
In "account type", we will see that we can modify the incoming mail protocol settings to IMAP or POP3:
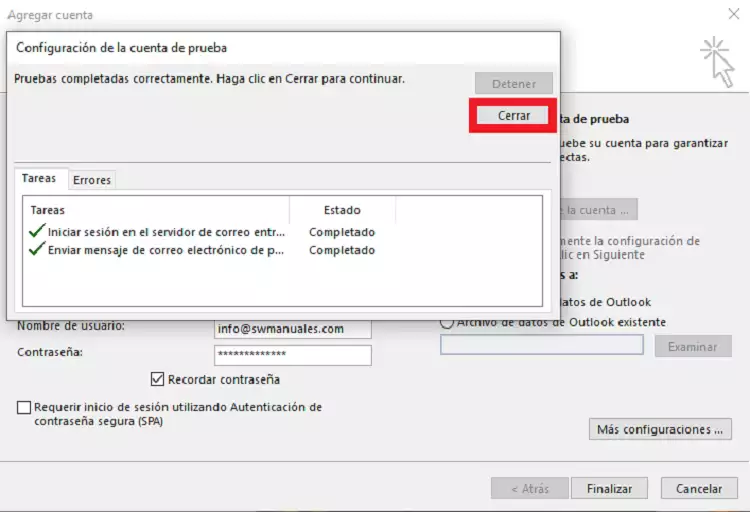
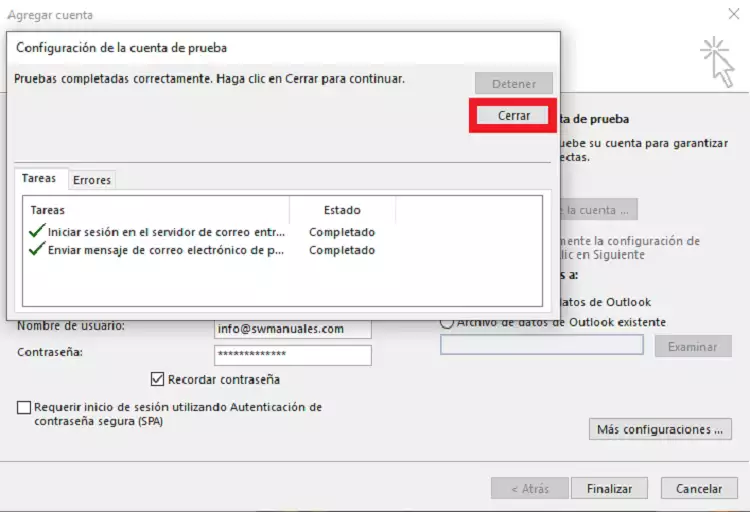
When you click on "Finish", the system will perform a configuration test to ensure correct operation. Click on "Close":
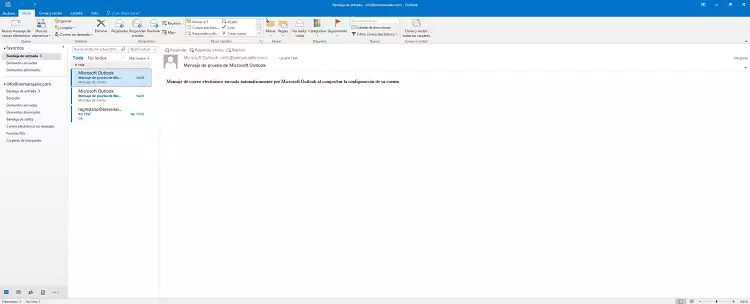
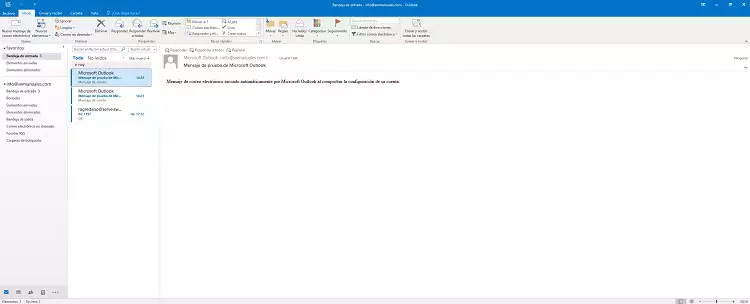
Finally, we will be able to view our configured email account:
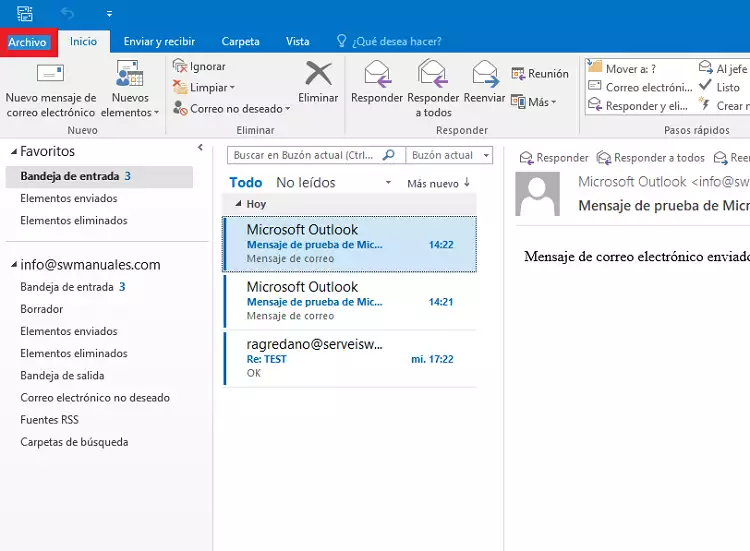
In order to be able to configure the mail account when we already have an account configured in Outlook, we will have to follow the following steps. First of all, we enter the Outlook application. Once inside, we click on "File", located in the upper left part:
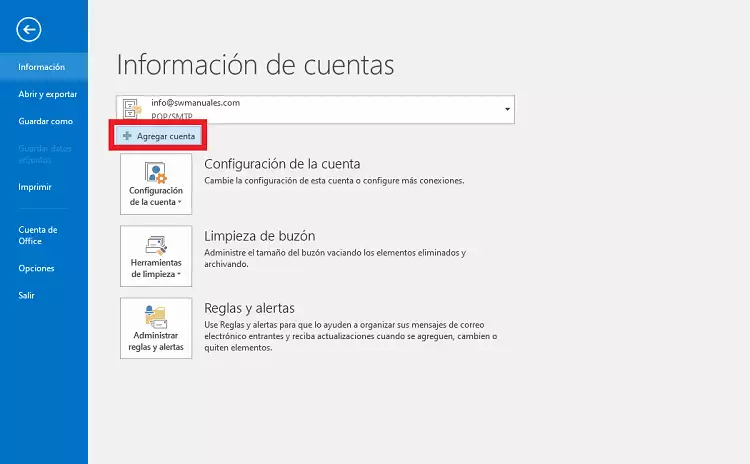
The account settings tab will open. In this section, without entering any other section, click on "Add account":
The automatic account configuration will open. We will have to fill in the requested fields, Name (it is not necessary to specify any specific data, we can put the name we want), the email address to be configured and the password to access the account:
***We remind you that from SWPanel you will not be able to see the information about the password of the email account, because in compliance with ISO 27001, LOPD and RGPD, we do not store or provide personal passwords, as well as we do not have access to the passwords of email accounts, much less provide them ***.
When the automatic configuration starts, Outlook will detect that the SSL certificate (if you have a certificate) is not "trusted". As in the case of Google, Microsoft only detects as trusted certificates its own, i.e. those corresponding to "hotmail.com", so we should not worry or think that our certificate is not valid, on the contrary.
To be able to proceed without any problem, we will have to follow some extra steps.
Once the message pops up, click on "view certificate":
In the certificate information window, we check that the data of the server for which the certificate is issued are correct (our Cloud mail server should appear under its name), as well as the expiration date of the certificate and click on "install certificate":
The certificate installation wizard will open. By default, the settings will be the correct ones. Click on "Next" if they match those in the images shown below:
Once the automatic configuration is complete, an alert message will be displayed specifying that it has been successfully configured. The account, by default, will be set to IMAP. In order to verify that the configuration has been carried out correctly and to be able to modify the account settings to POP3, click on the "Change account settings" checkbox and click on "Next":
The configuration screen will open. Then check that the server data, the incoming and outgoing mail ports and the incoming mail protocol are as desired and click on "Next":
In "account type", we will see that we can modify the incoming mail protocol settings to IMAP or POP3:
When you click on "Finish", the system will perform a configuration test to ensure correct operation. We must click on "Close":
Finally, we will be able to view our configured email account:
Consult another manual of interest: