Once the PrestaShop installation [? How to install Prestashop at your Hosting] is done, with a few simple steps you will have your email account integrated and configured. In this manual we explain how to do it.
The first thing is to have an existing email account and, on this account, you will need to know some specific data that you will need later.
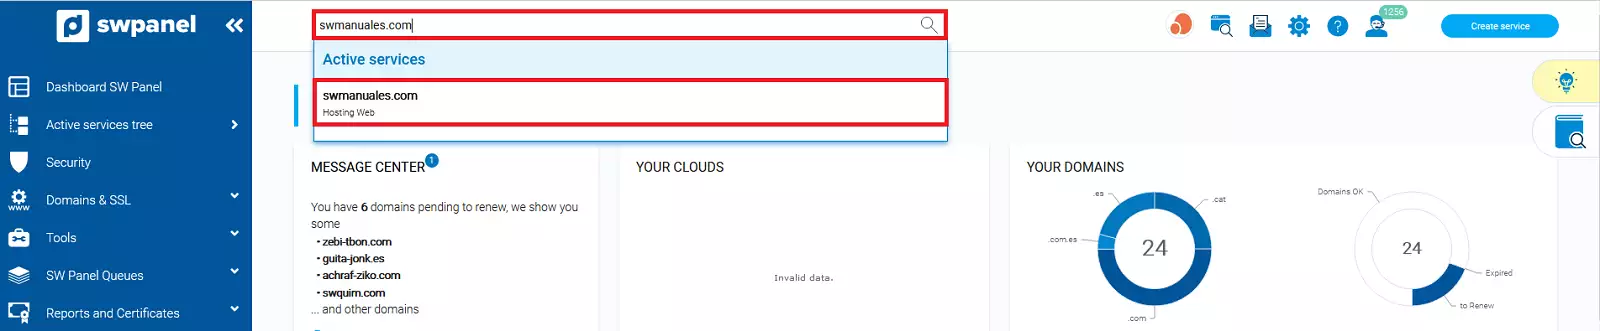
1. Inside your SWPanel use the search engine to find your service, in our case manuals.com, yours will have a different name. Once you find it, select it.
2. First click on Service management and then on DNS management .
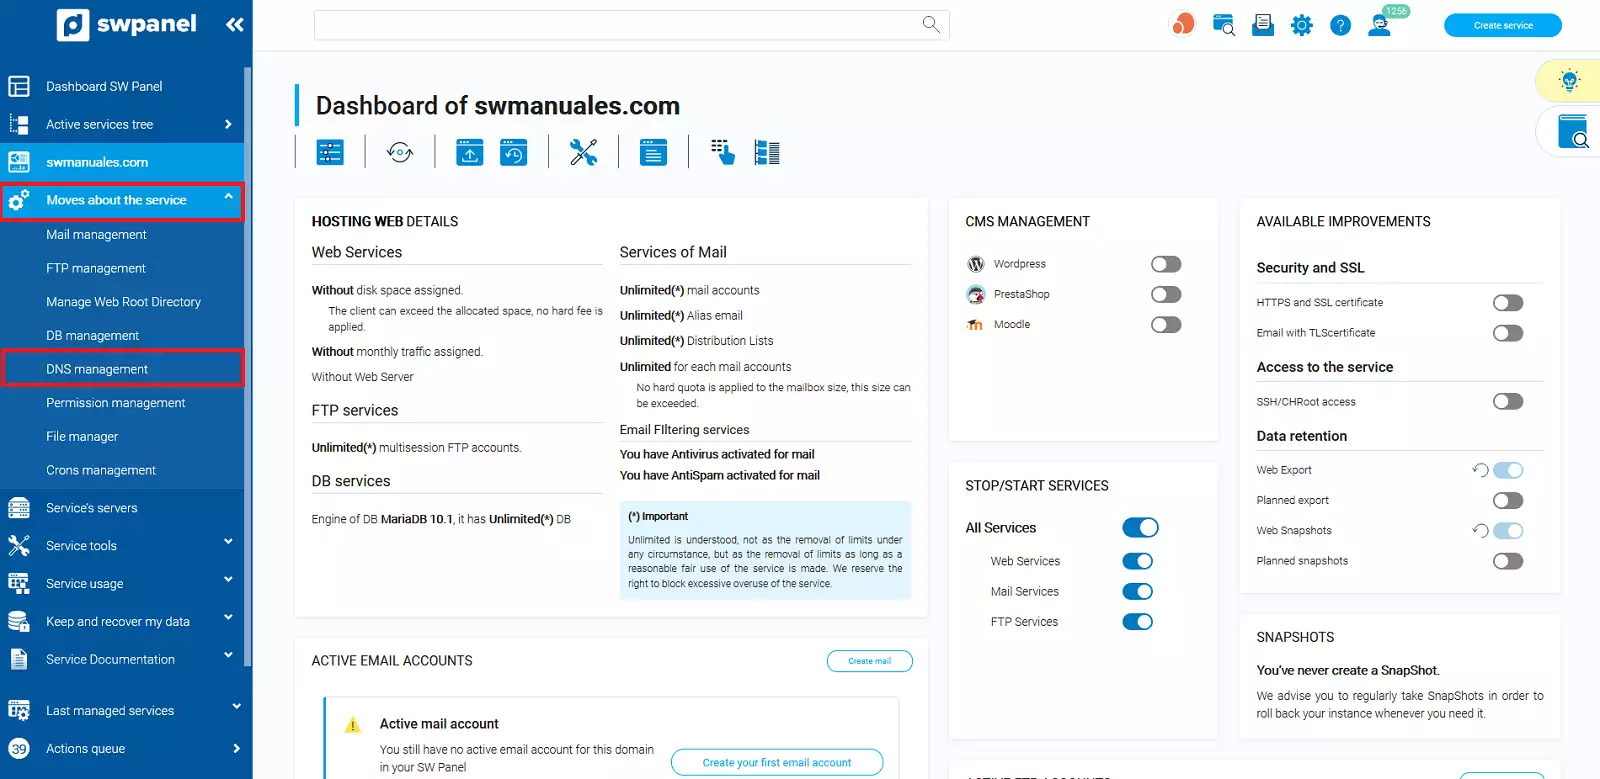
3. Save the name that you will find in the MX record, you will need it later.

Now you will have to configure sending via SMTP in PrestaShop:
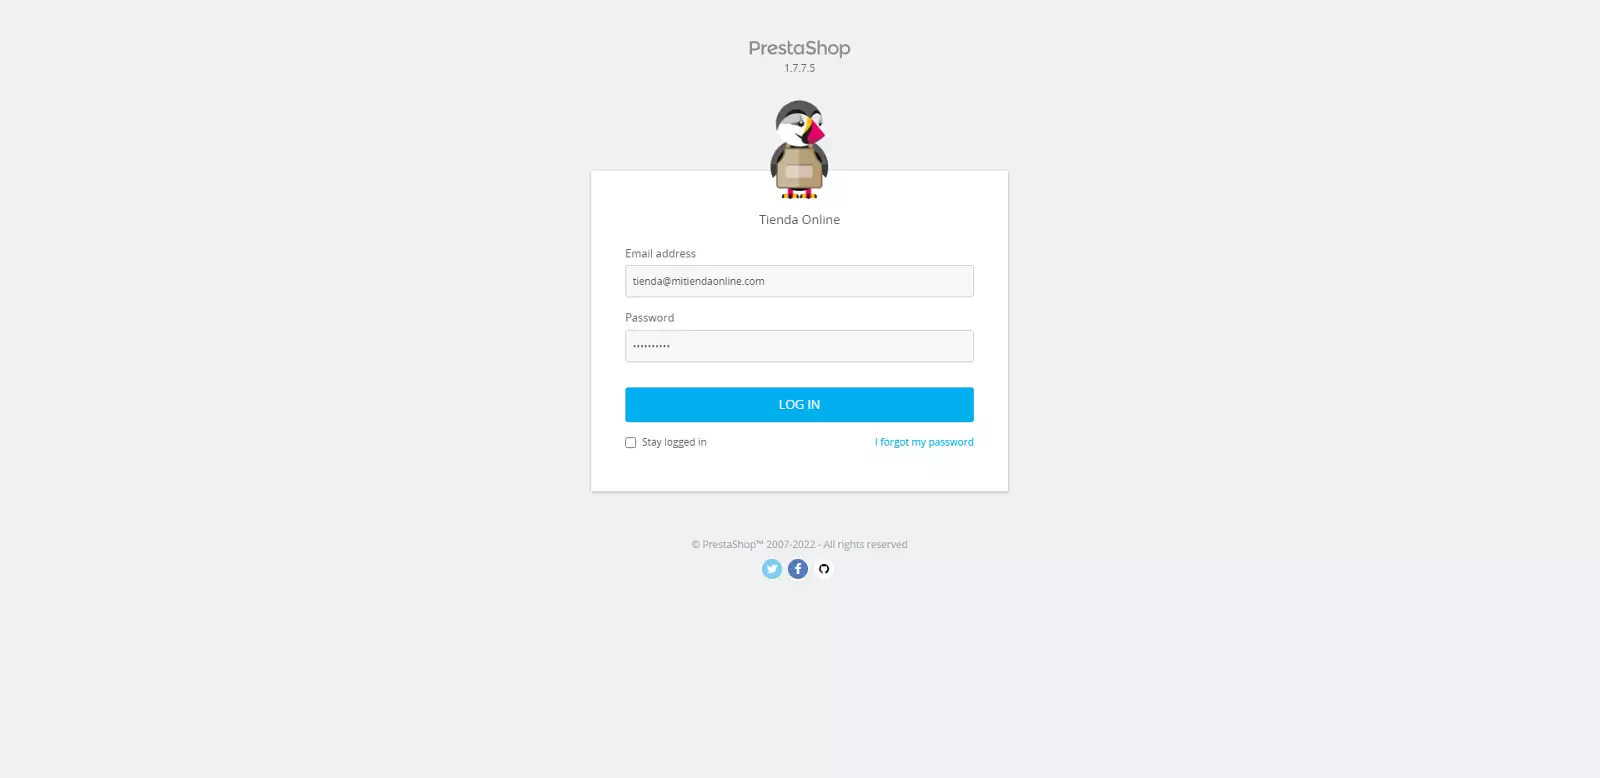
1. Go to your website BackOffice
2. In the menu on the left, In the left menu, open the drop down menu above "Advanced Settings" and, in the submenu, choose "Email".
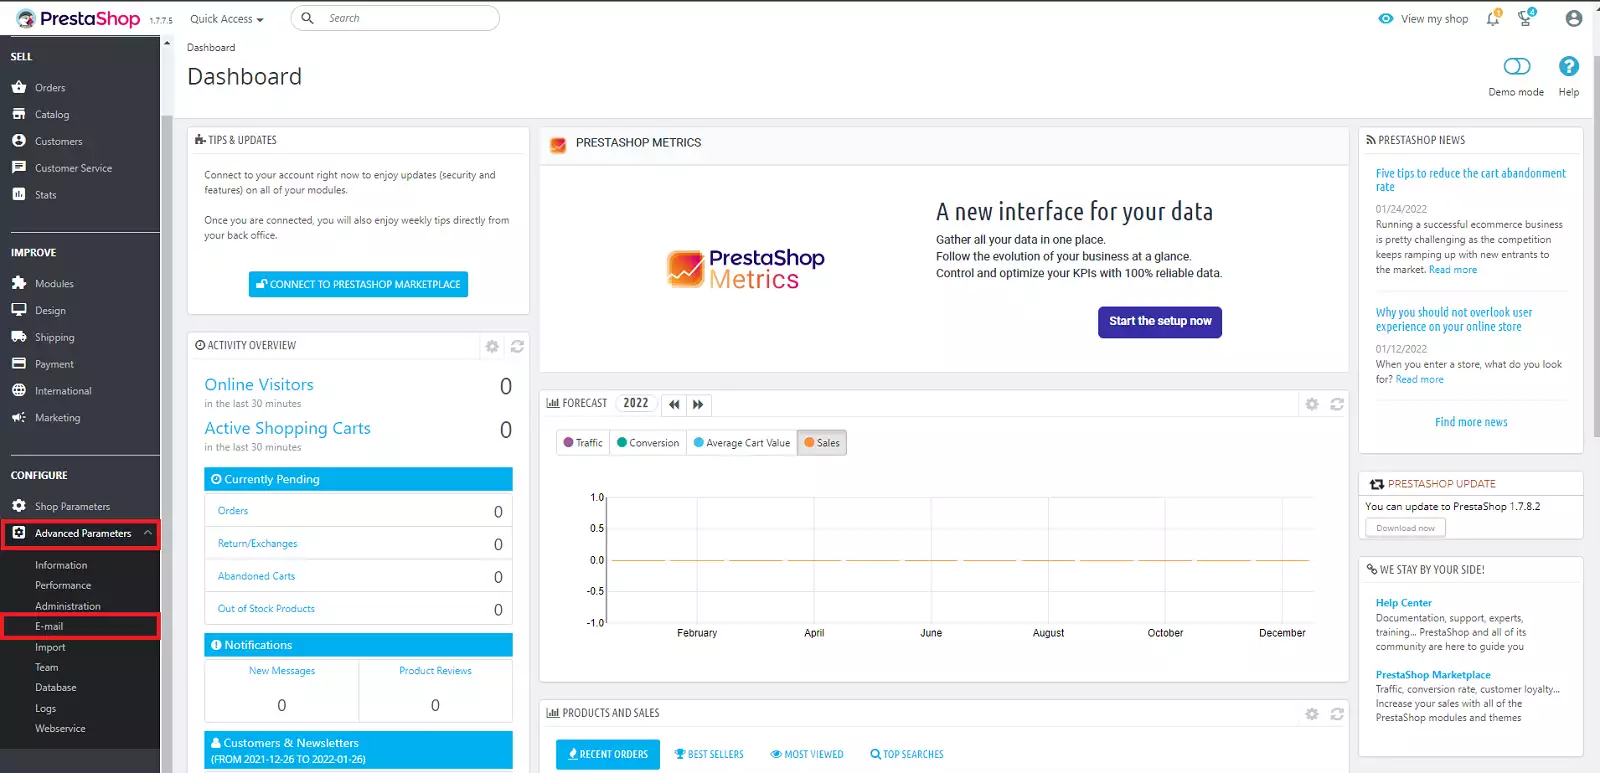
3. You will find something similar or the same as the following image. Depending on the version of Prestashop, the image may vary, but the data to ask for will be the same.
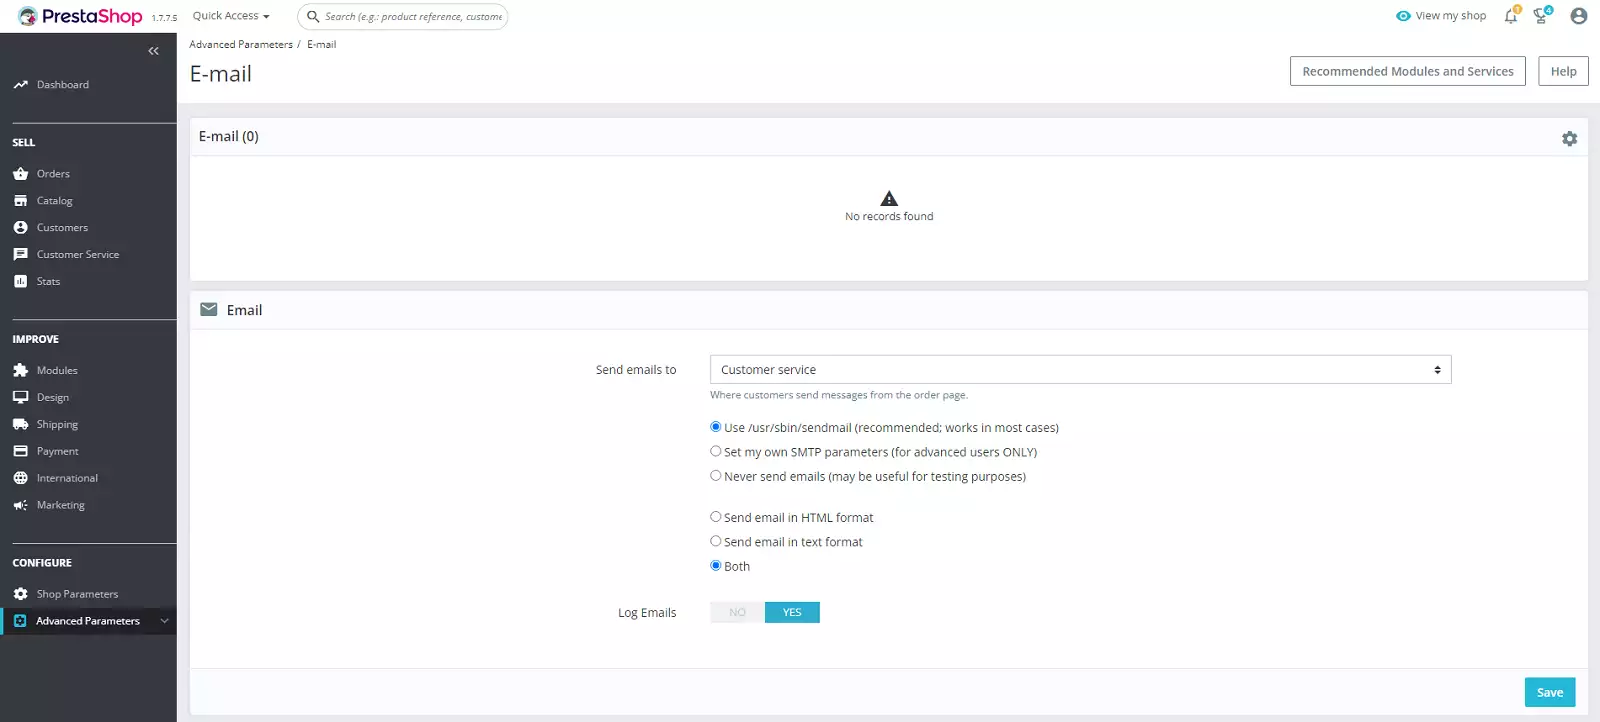
4. Choose the second option. In this case a form will be displayed where you will have to enter the data of the account you will use for SMTP sending.
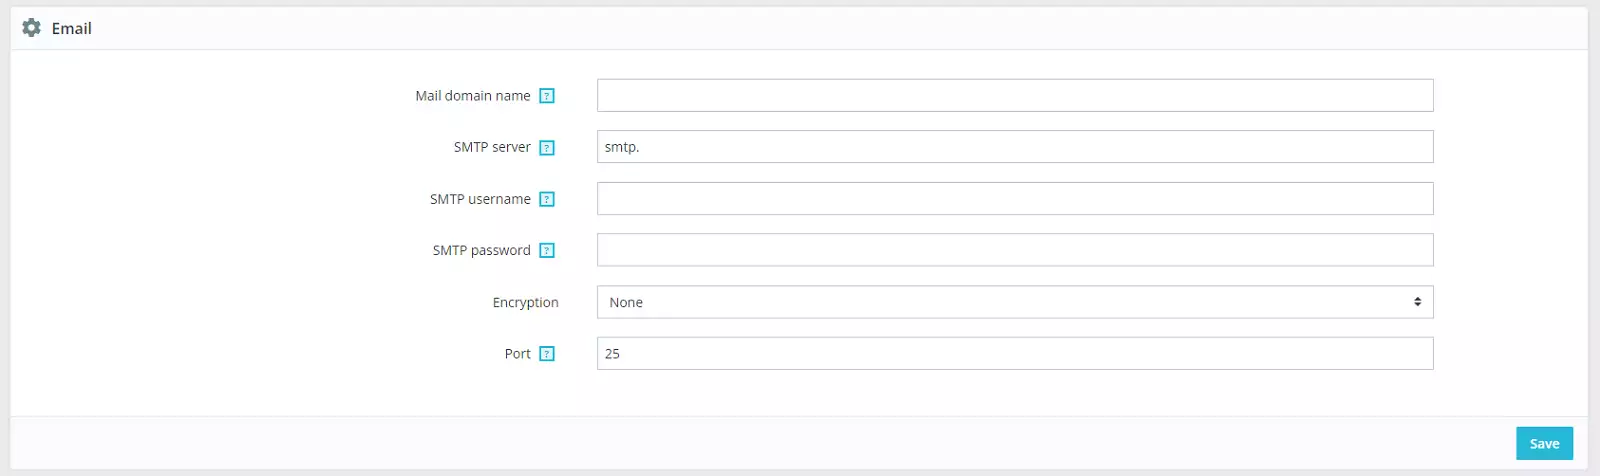
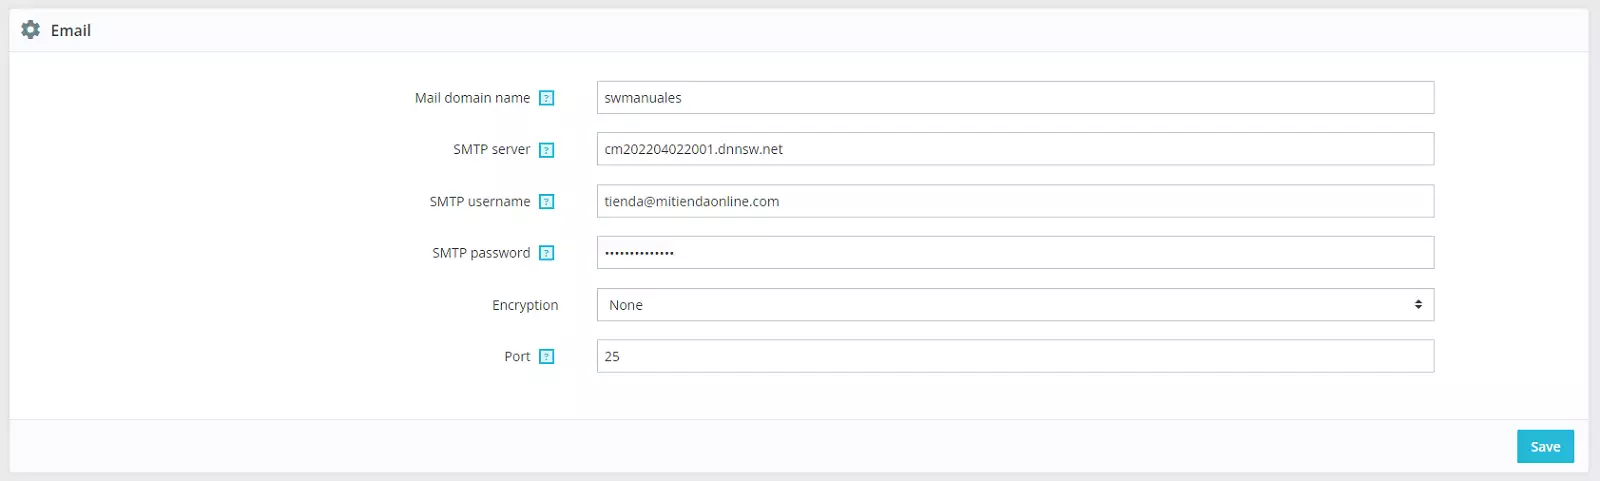
5. Fill in with the data obtained at the beginning of the manual. The field where it indicates "Domain for emails" or "Domain name for email", is a field that can be left empty and does not affect the sending of emails. Once you have configured the SMTP email, click on Save.
6. You can do a "Email Configuration Test". Where it says "Send a test email to" type the email address you want to send a test email to and check if the configuration is correct.

7. If you have received the test email, it means that everything is set up correctly.