Multicloud is the use of multiple cloud computing and storage services in a single heterogeneous architecture. This also refers to the distribution of cloud assets, software, applications, etc., across multiple cloud hosting environments.
By default, the following servers are included in the MultiCloud:
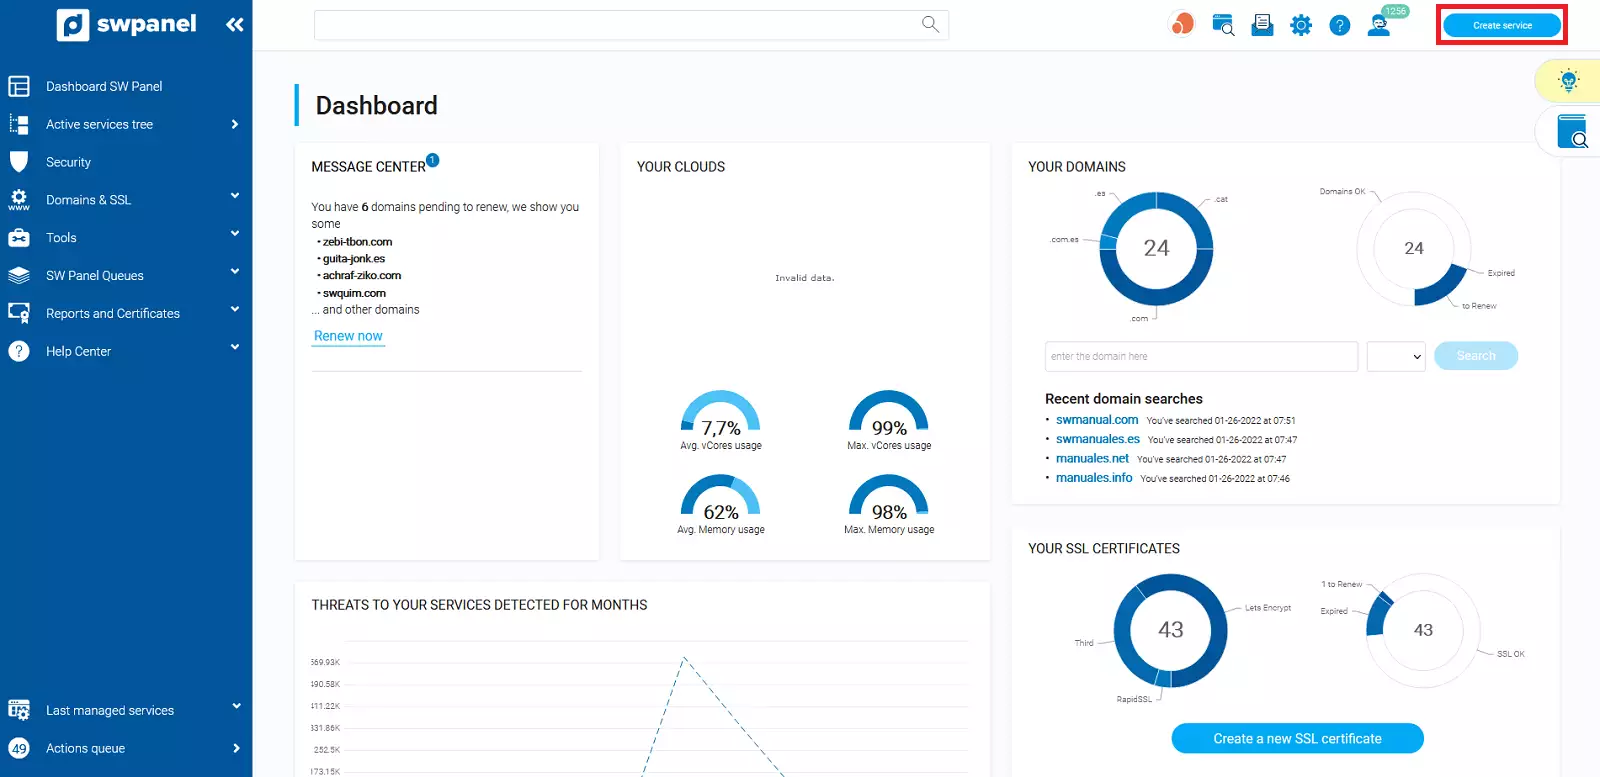
Access SWPanel and go to the Create Service section:
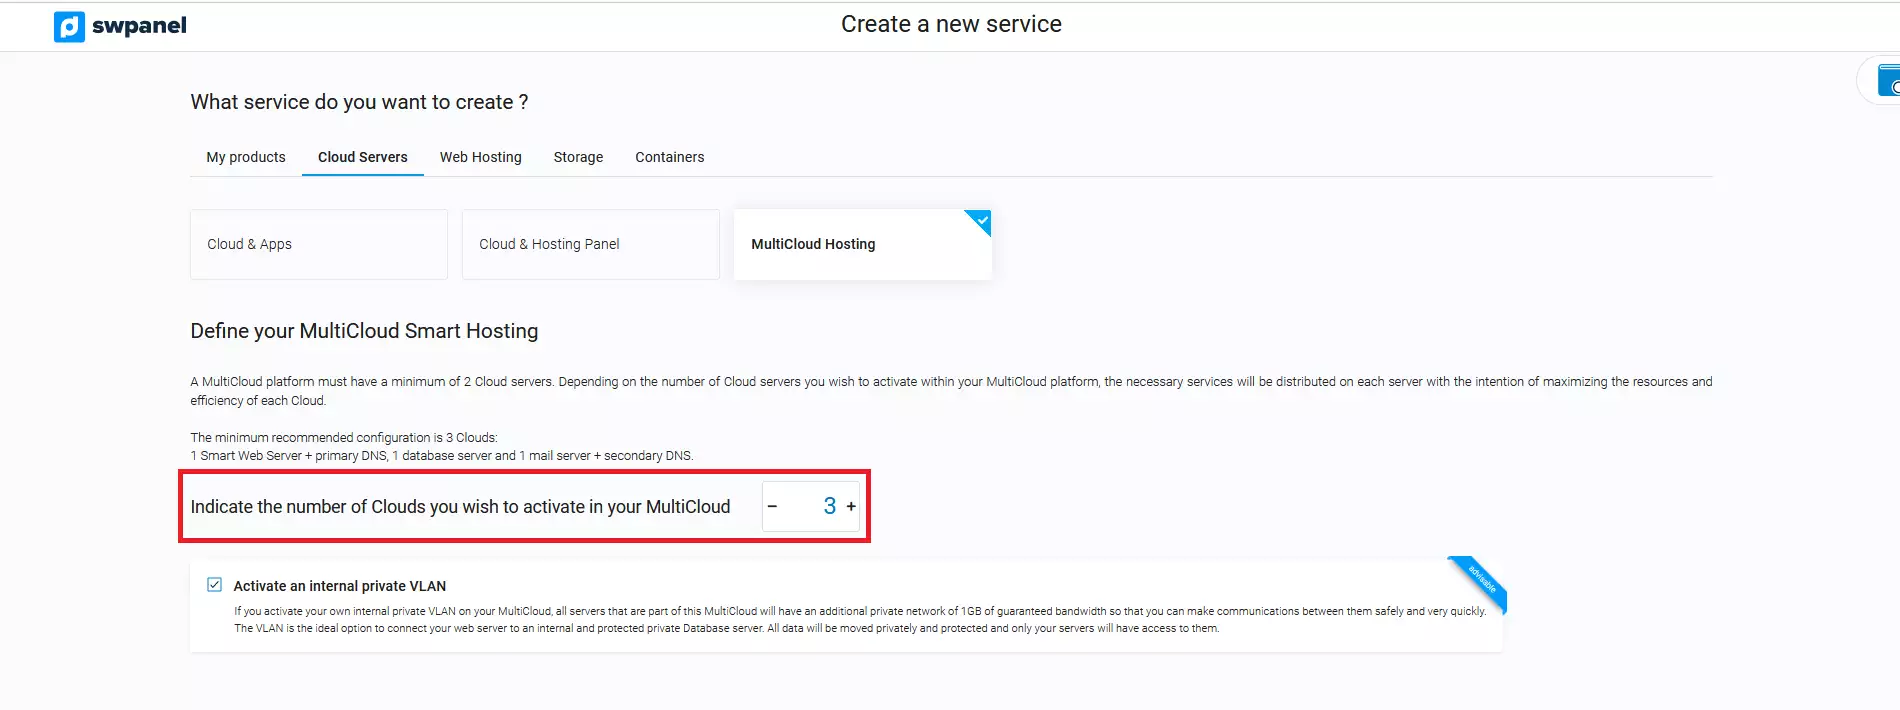
Once here, you will have to click on MultiCloud Hosting SWPanel:

Here, you will be able to choose the number of services you want the MultiCloud to include, the minimum is two, one for Web and the other for Database.
We recommend choosing three services, as they will be better distributed and offer optimal performance.
Next you can choose the disk type and Cloud type for the Database server.
We recommend choosing "All Flash" and "Cloud Plus" platform; because they offer maximum performance for reading and writing the Database Server.
You can also choose whether or not to add an internal private VLAN.
💡 A private internal VLAN allows you to have a connection between your servers. This connection is encrypted and is only accessible between those servers.
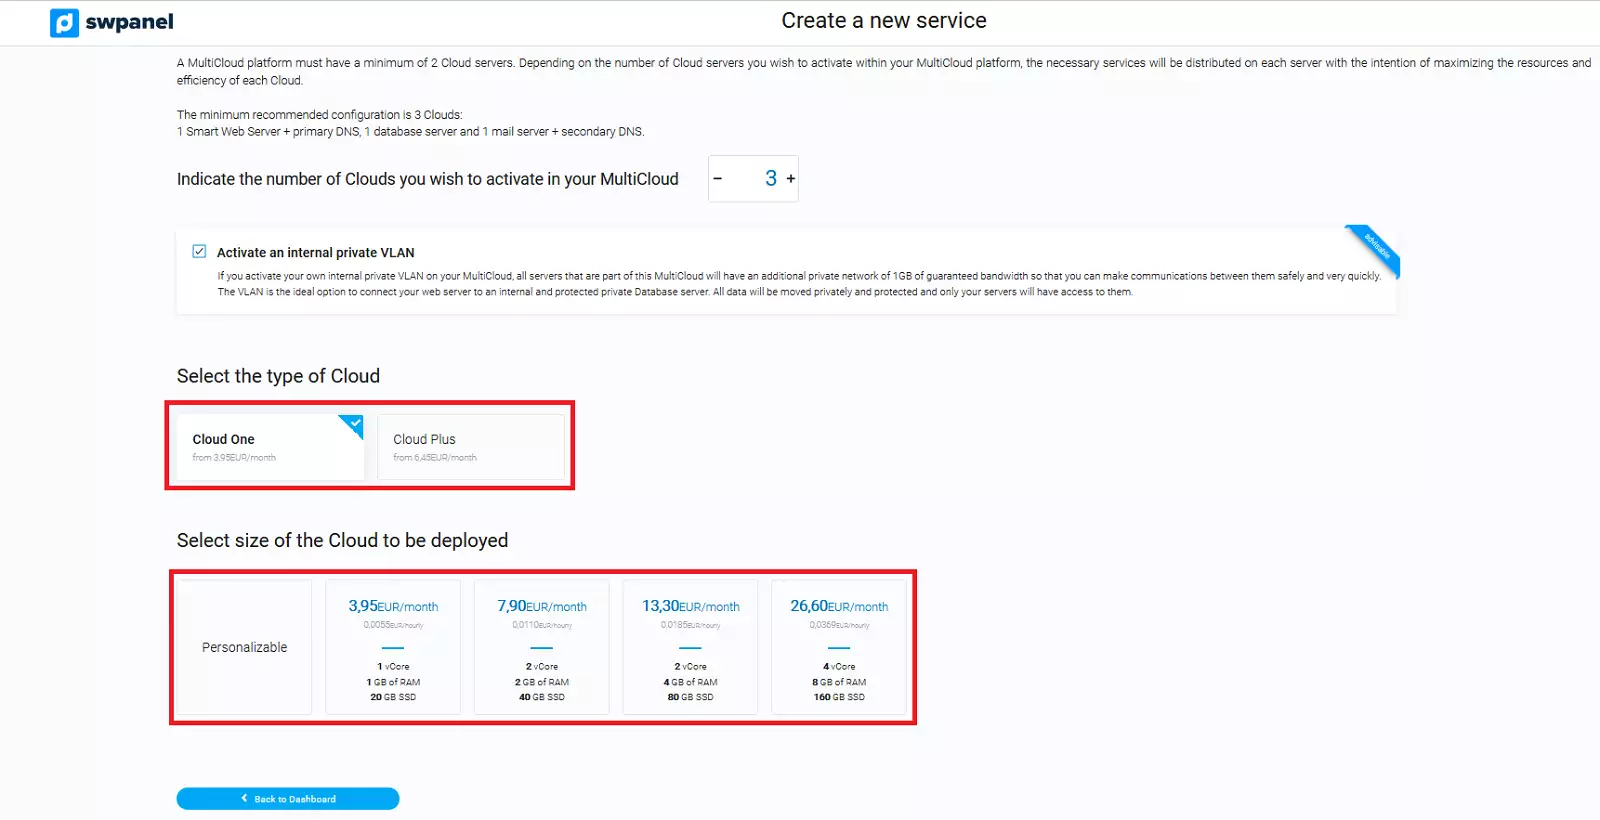
Then, you will be able to choose the Cloud type and select the Cloud size:
CLoud type:
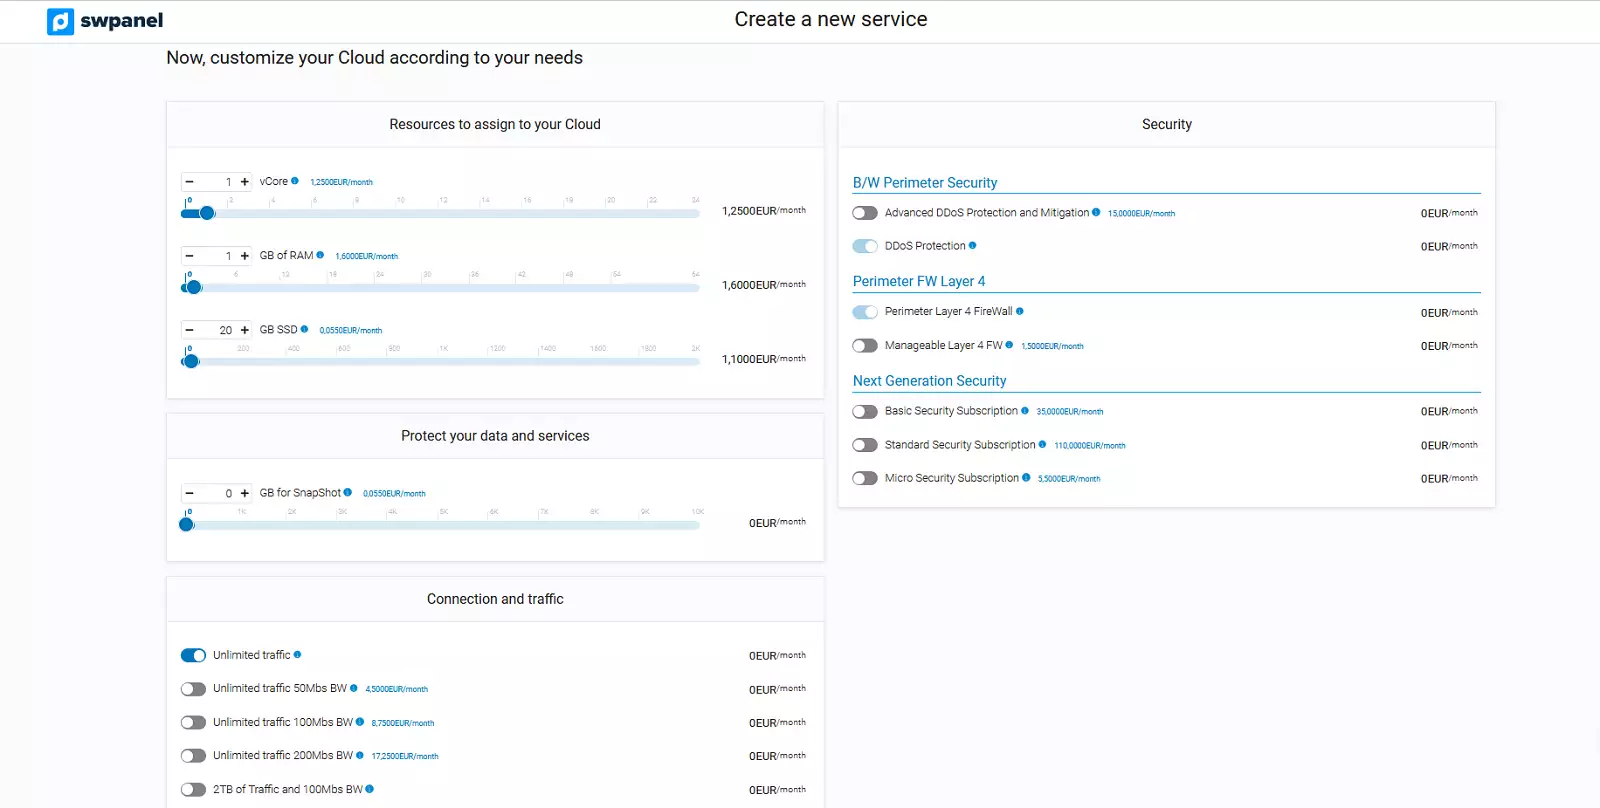
Cloud Size: We have at your disposal some predefined settings, but you can also customize in detail the characteristics of your Cloud. To do so, click on Customizable.
Finally, you will have to set the customization values of your Cloud server:
You will also be able to choose the location of your server.
To continue, you must accept and finalize the contract:
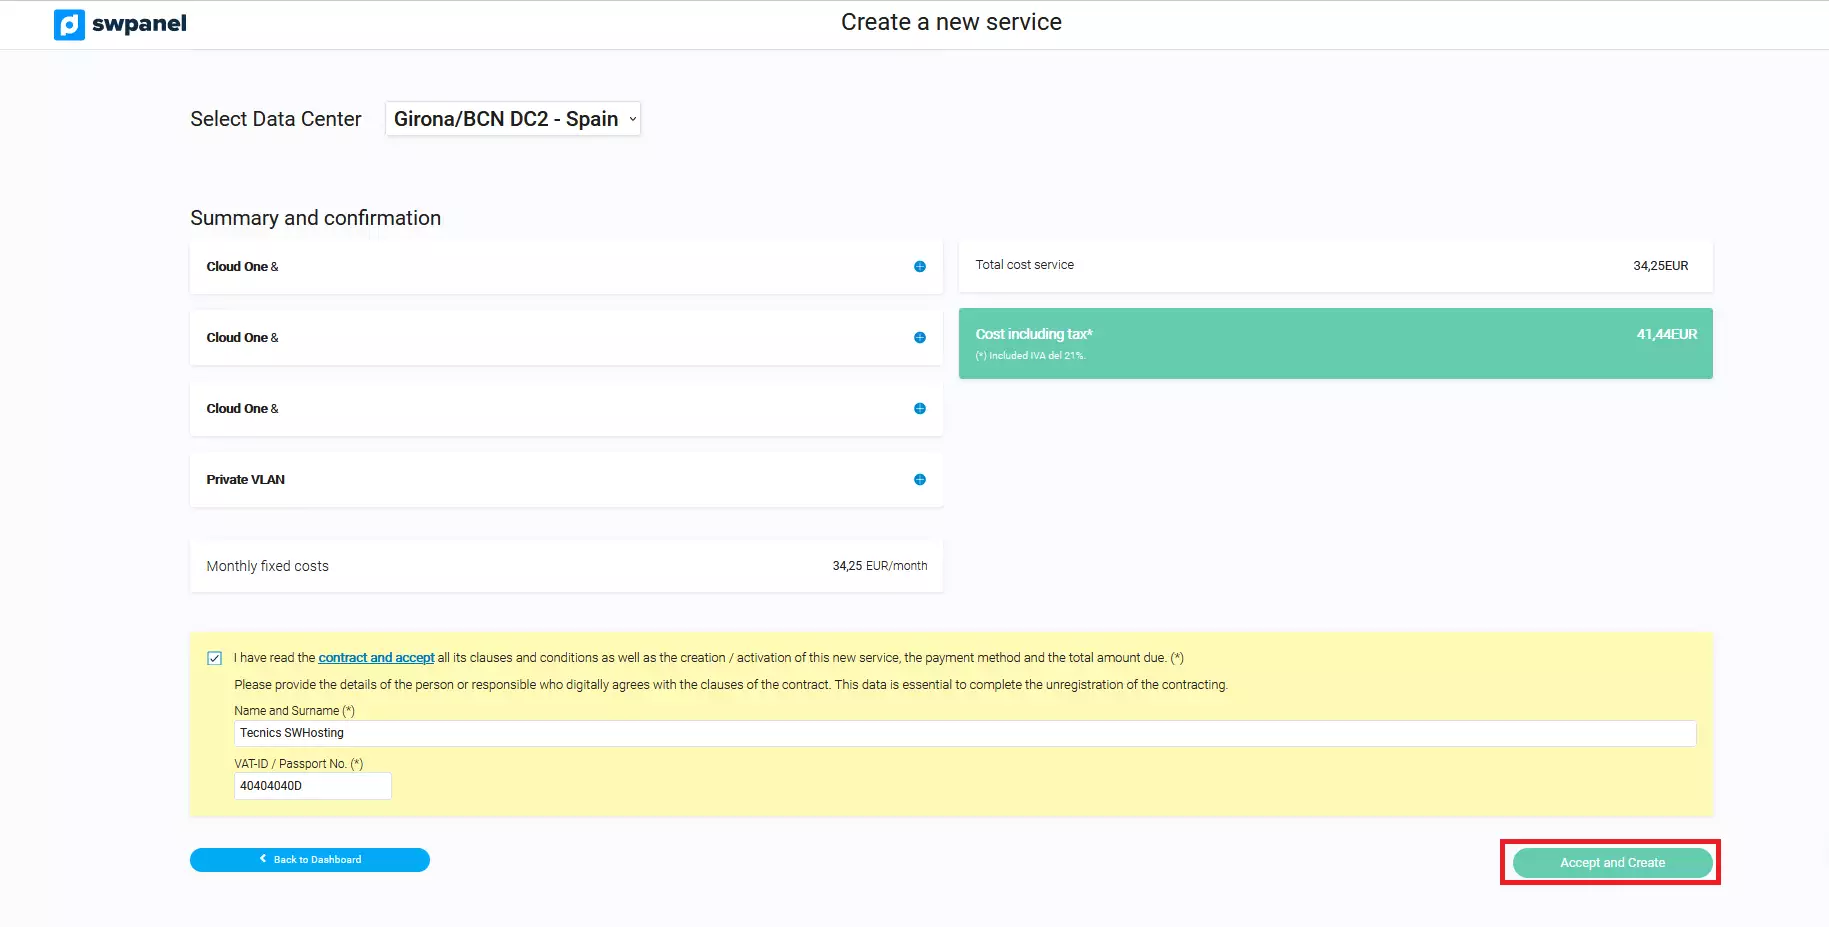
Once accepted and created, you will be sent an email with a Root access username and password for each of the servers created.
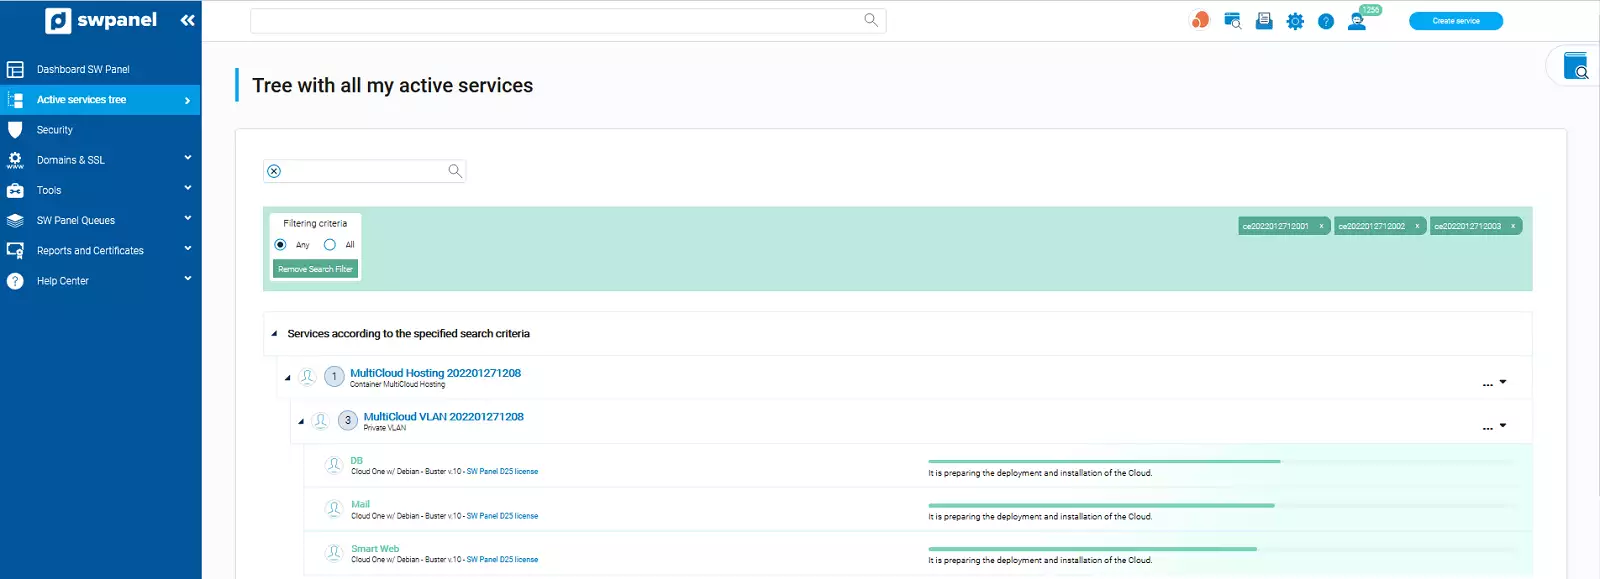
Subsequently, in the Active Services Tree section, you will see the servers created: