Roundcube is the Webmail access tool that we include free with all email services.
With Roundcube, you can access your email account from anywhere without needing to install or configure an email client. You only need a web browser (Google Chrome, Mozilla Firefox...) and internet access.
You can access Webmail via your domain, host, or Cloud IP:
https://mail.yourdomain.com/webmail/
https://ce2020123456789.dnssw.net/webmail/
https://81.25.123.123/webmail/
If you have a Hosting plan or are unsure about the above details, you can find the access address in SWPanel. To do this, go to your service’s Dashboard:
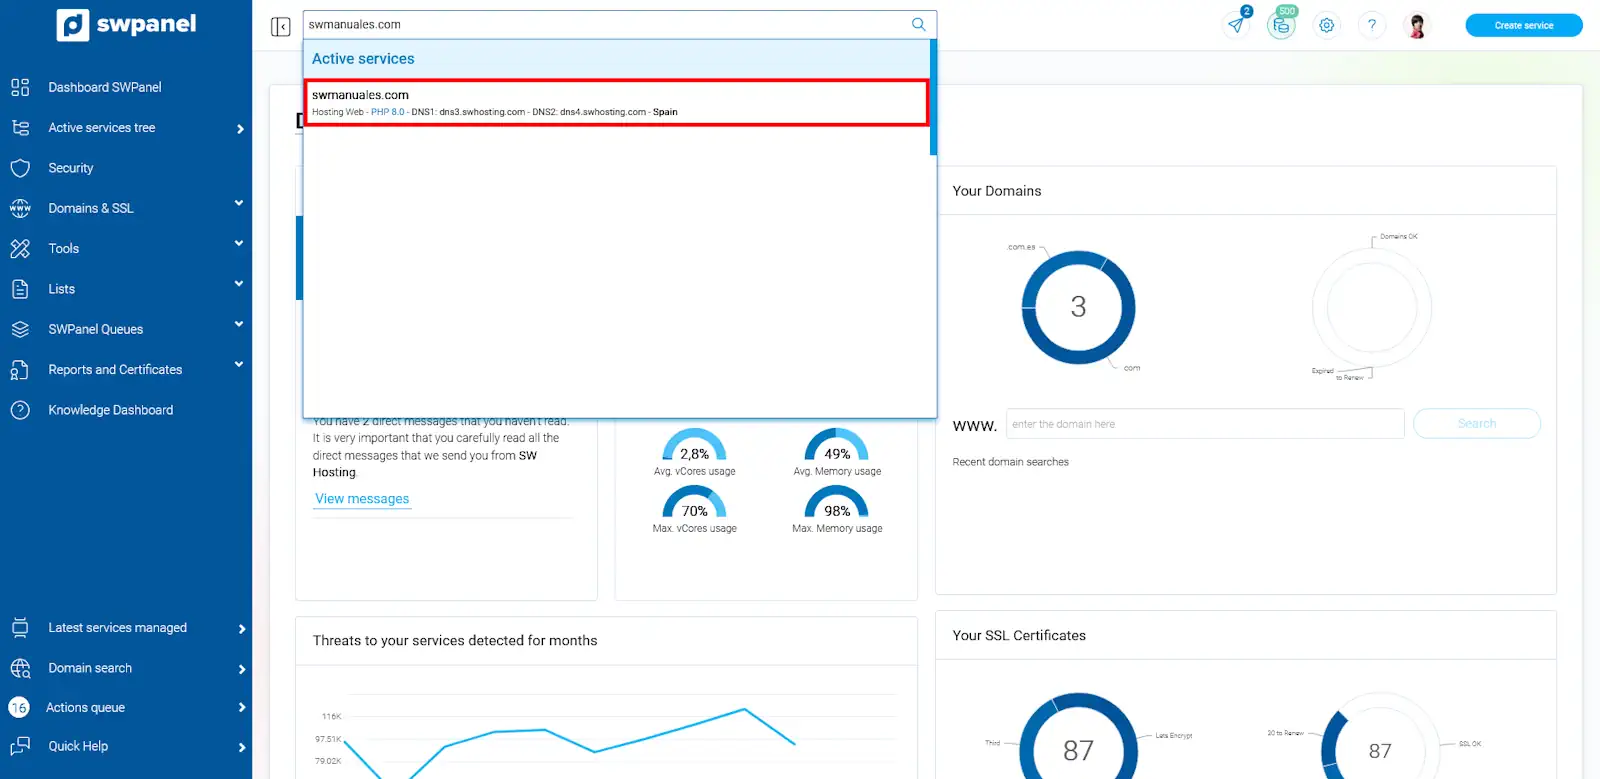
💡 Use the search bar at the top to quickly locate your service.
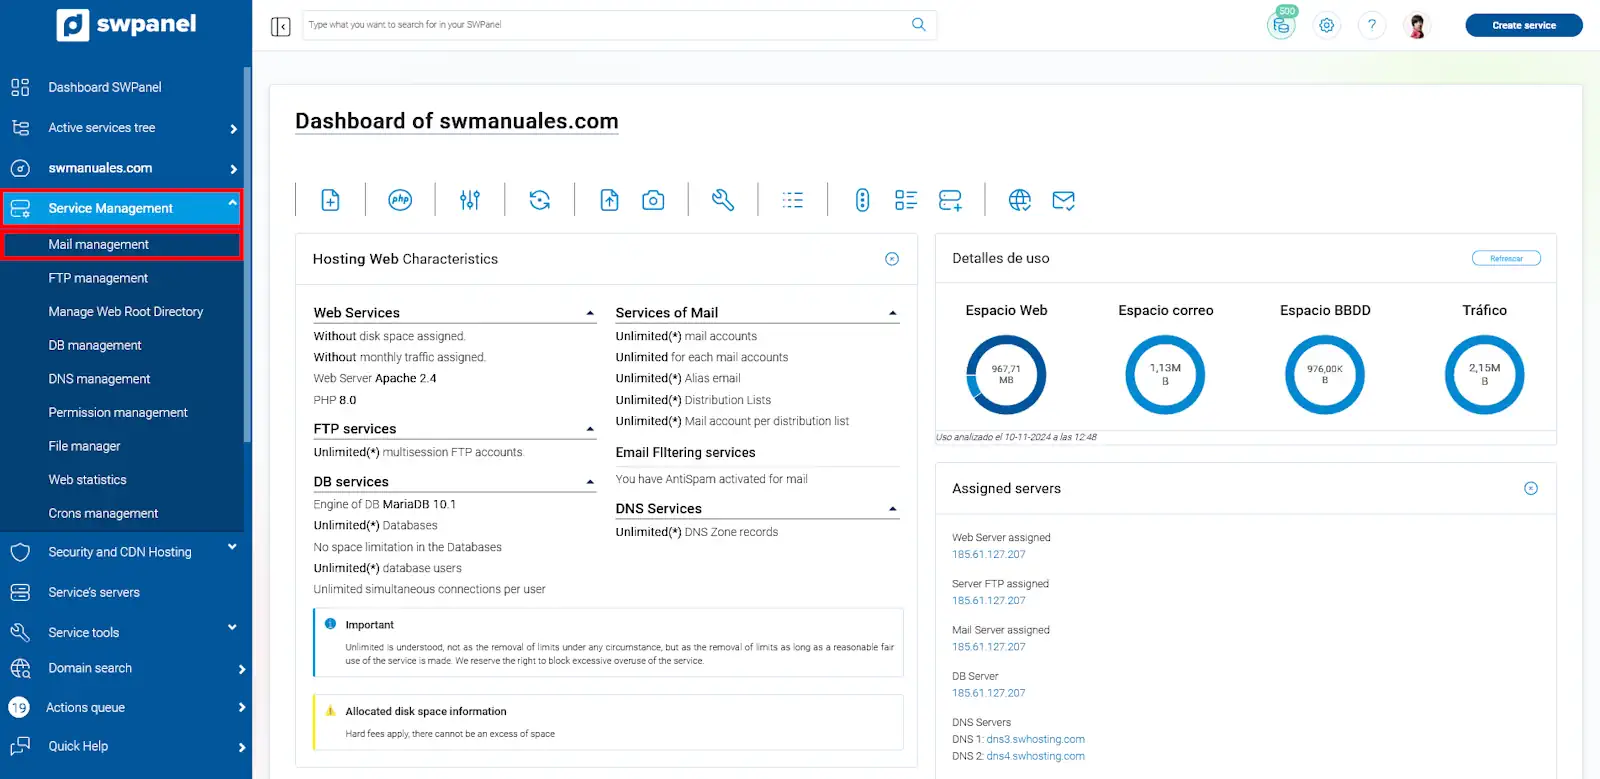
In the Dashboard, select Service Management -> ail Management (left menu):
The email accounts created in the current service are listed. Note that the Webmail address is the same for all email accounts under the same domain.
In the list of email accounts, go to the Manage menu (right side) and click on Email Account Details.
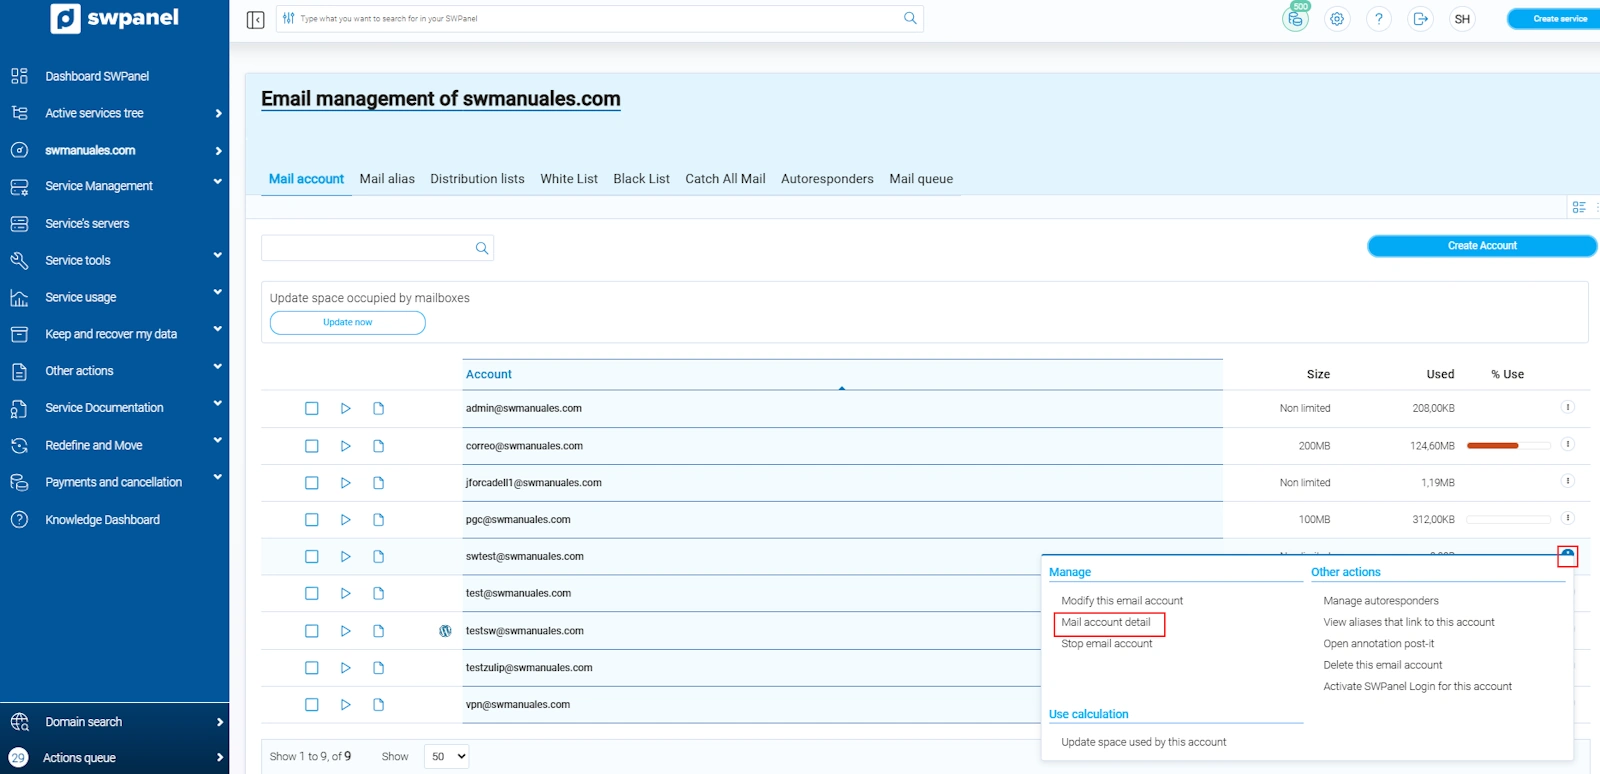
You’ll see the Webmail access address on the screen, along with other useful parameters for configuring the account in email clients (such as Outlook, Thunderbird...):
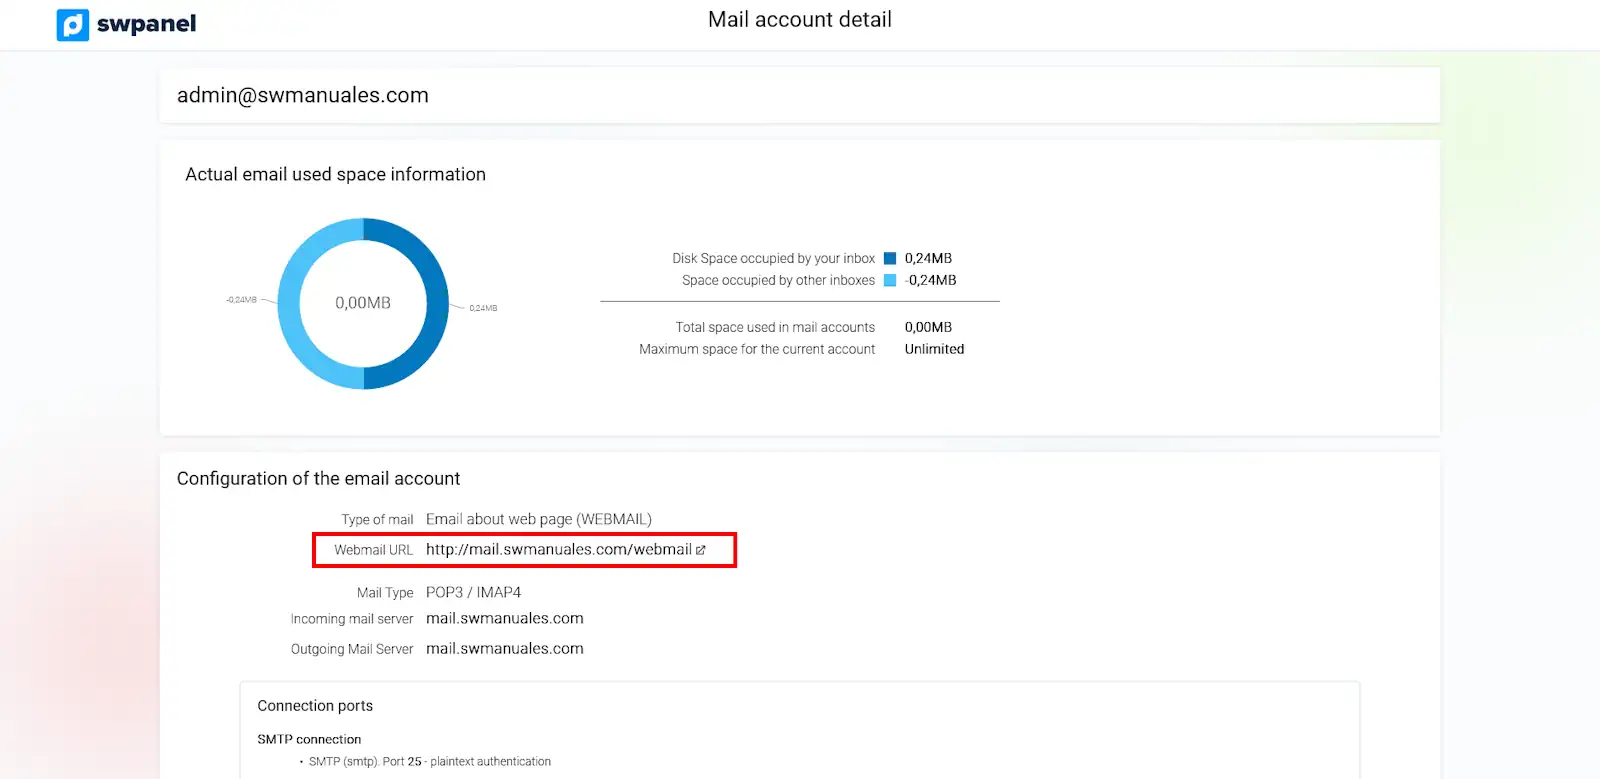
Click on the URL to access Roundcube:
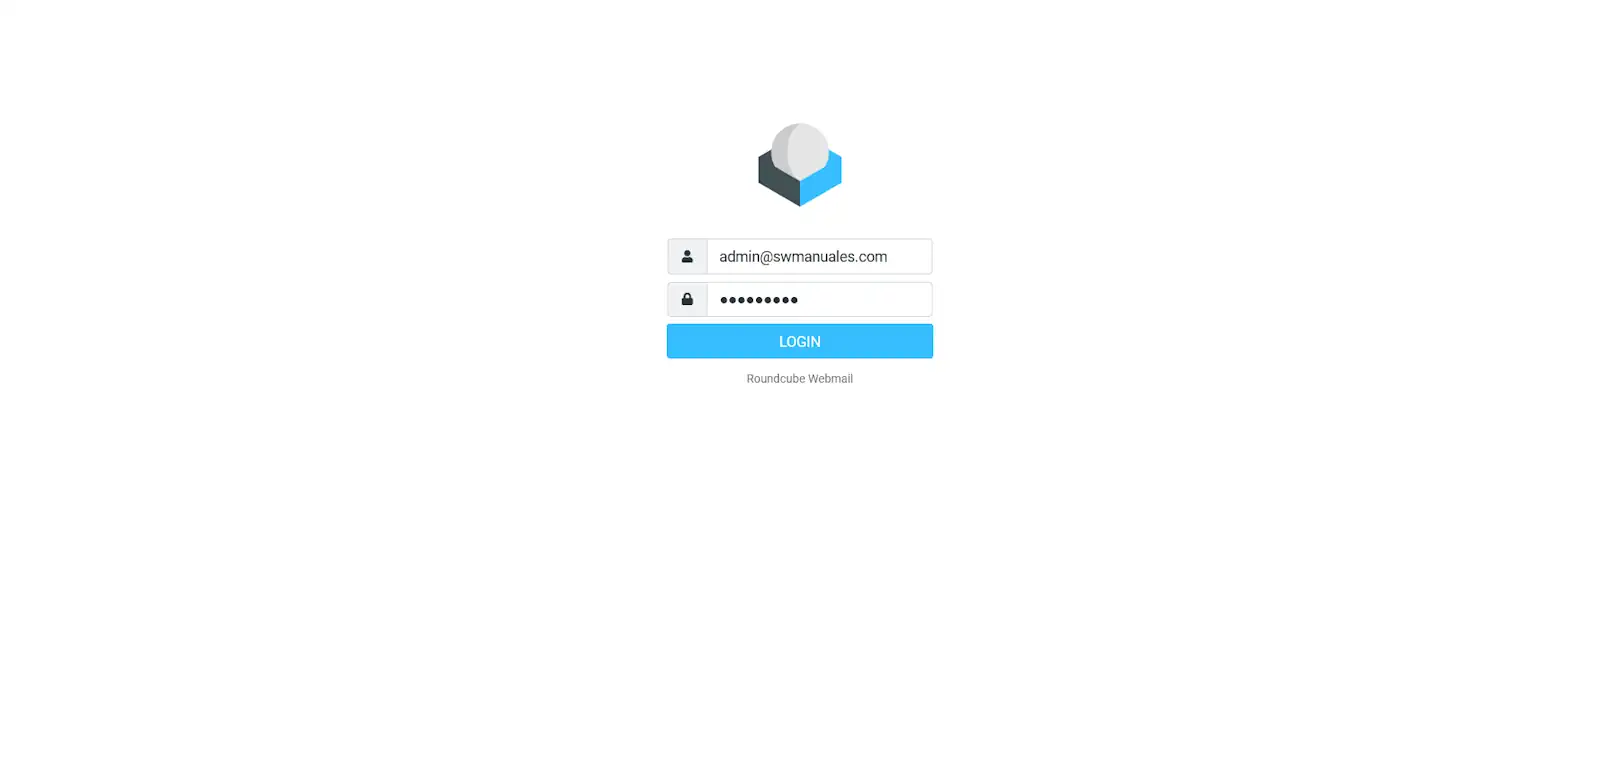
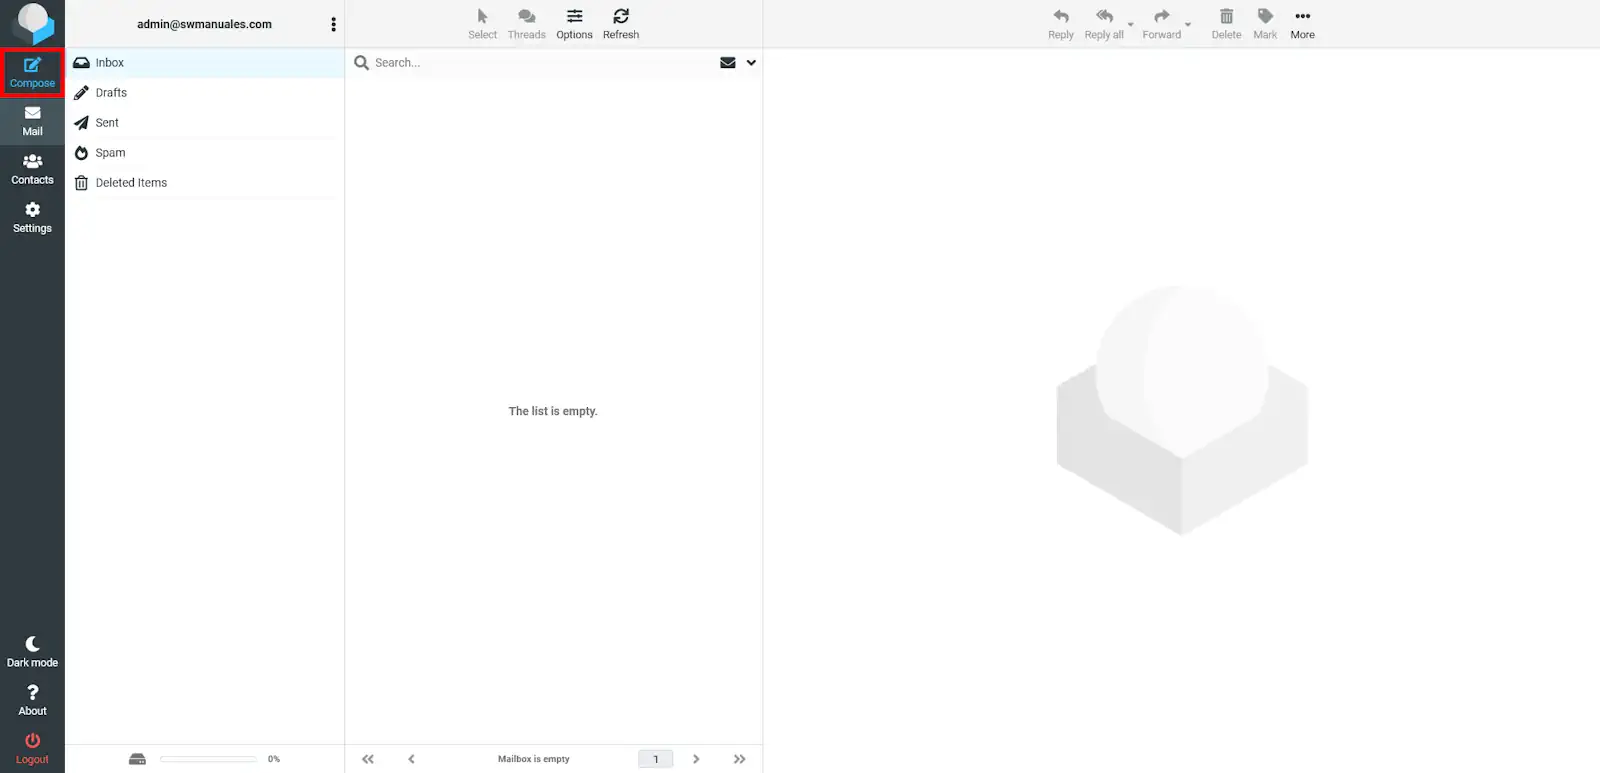
Enter your email address and password to log in. You’ll go directly to the inbox:
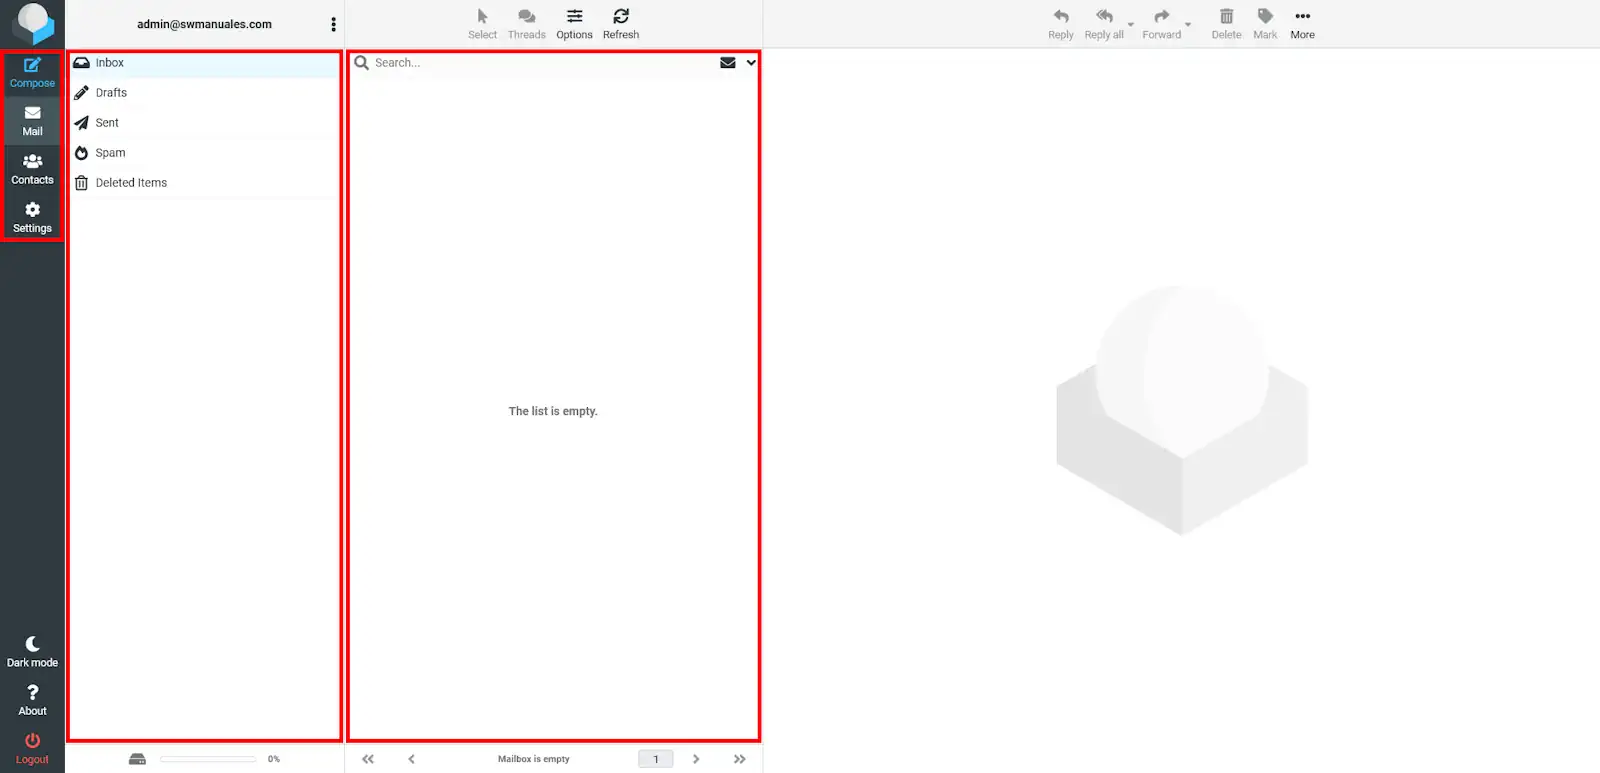
New messages will automatically appear here. You can also click on Refresh to manually reload the inbox.
On the left, you’ll find the button bar. In the middle, you’ll see your email folders: Inbox, Drafts, Sent, SPAM, and Trash. On the right, emails in the currently selected folder will be listed.
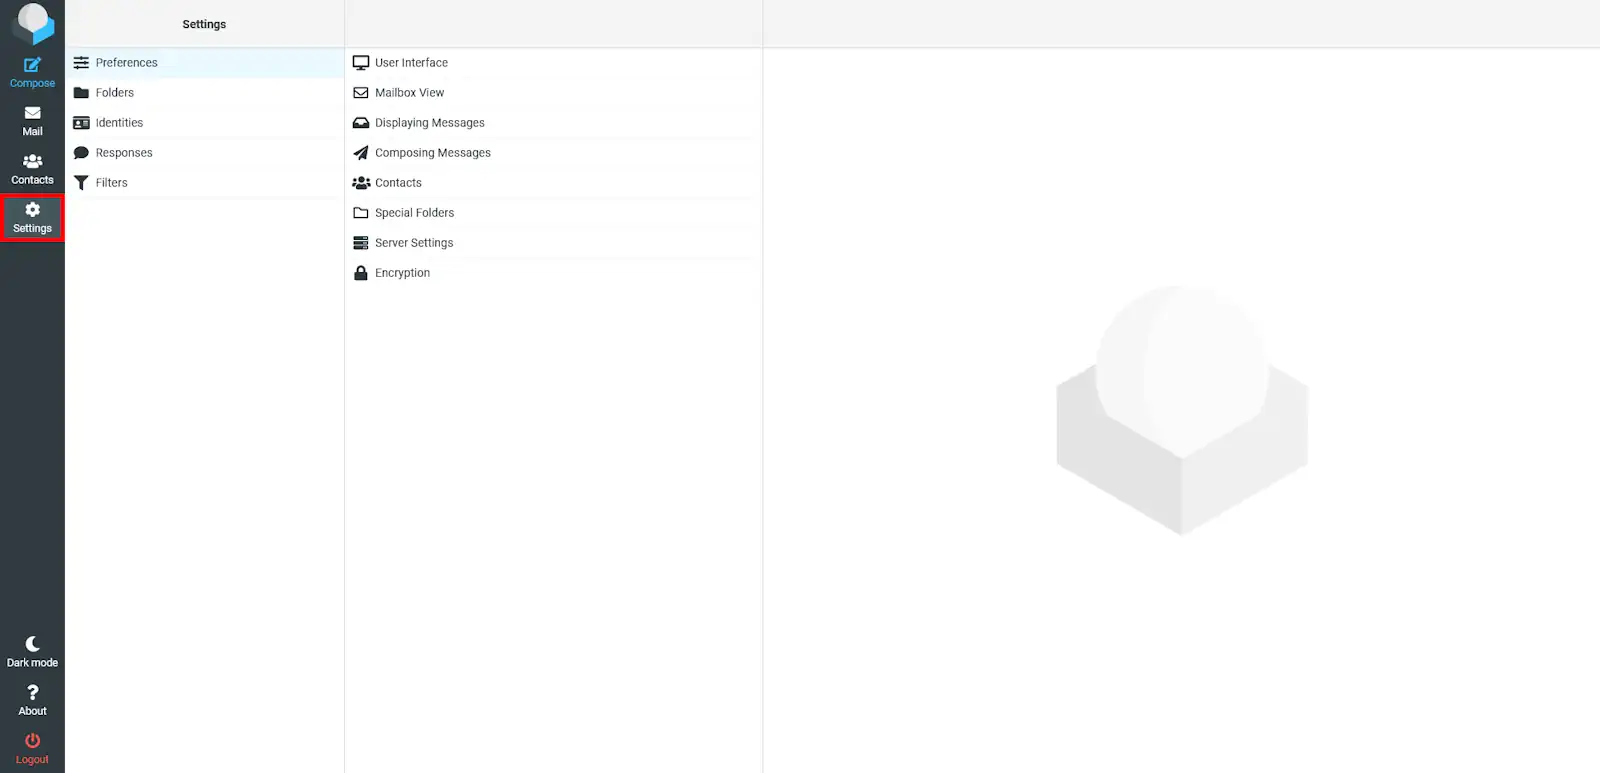
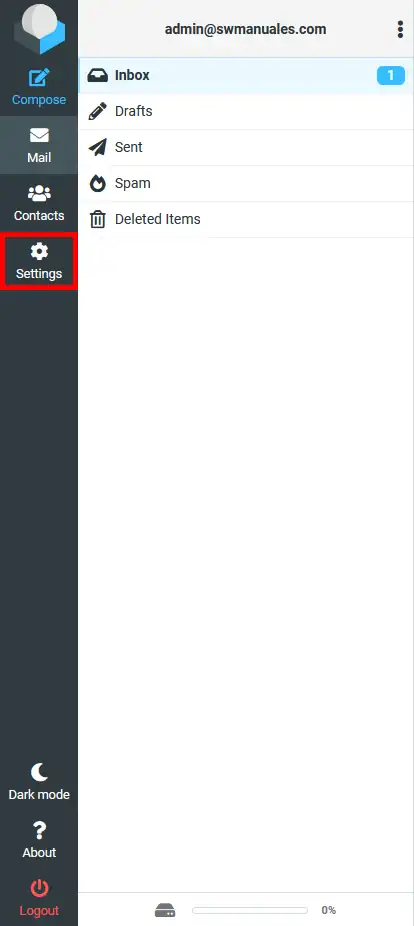
You can customize and modify Roundcube’s settings from the Settings section (left sidebar):
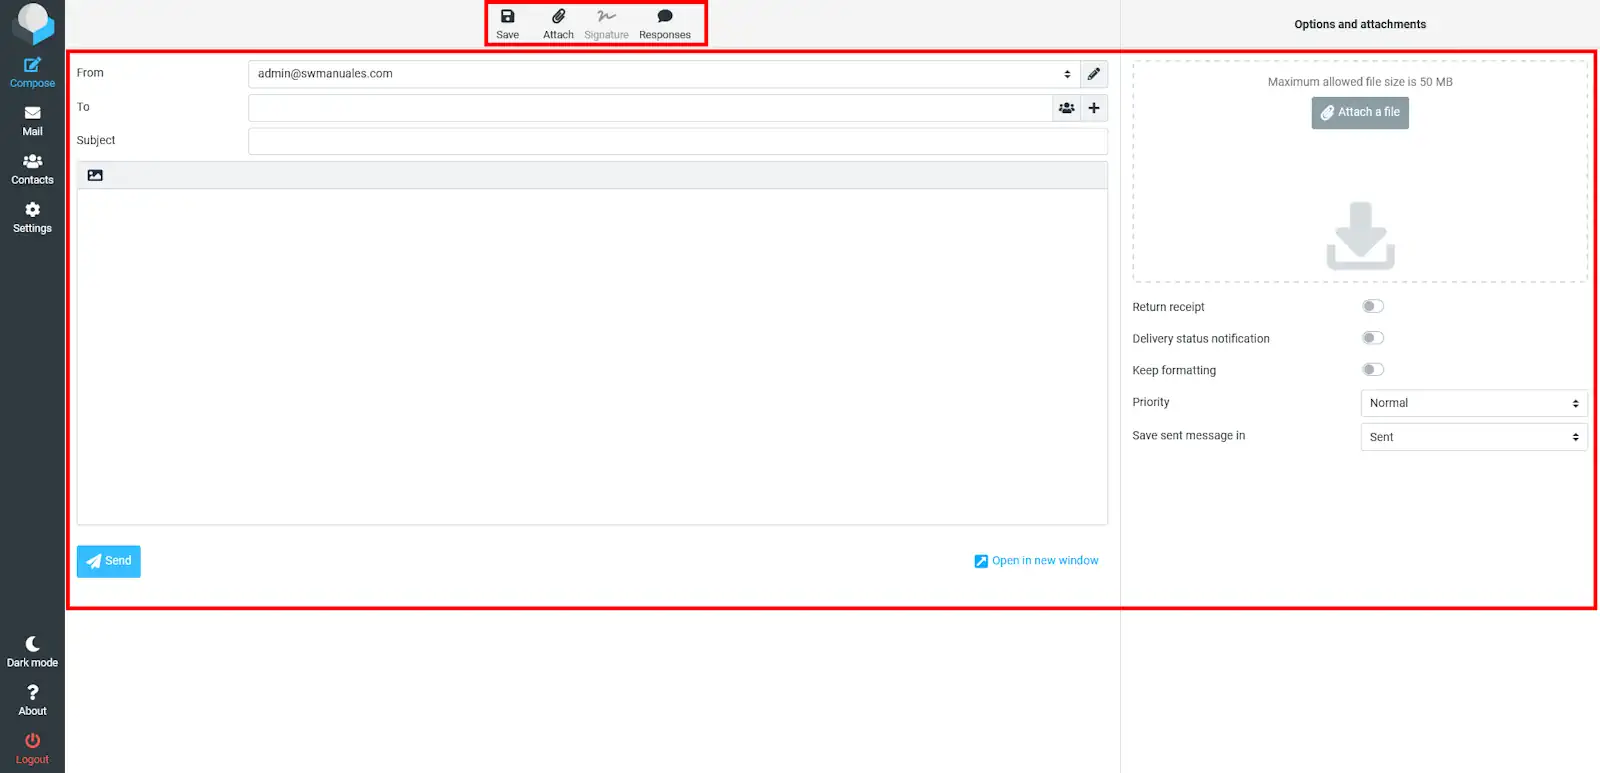
To compose a new message, click on Compose:
From the Inbox (in the Mail section), double-click the message you want to read, and it will load on the screen:
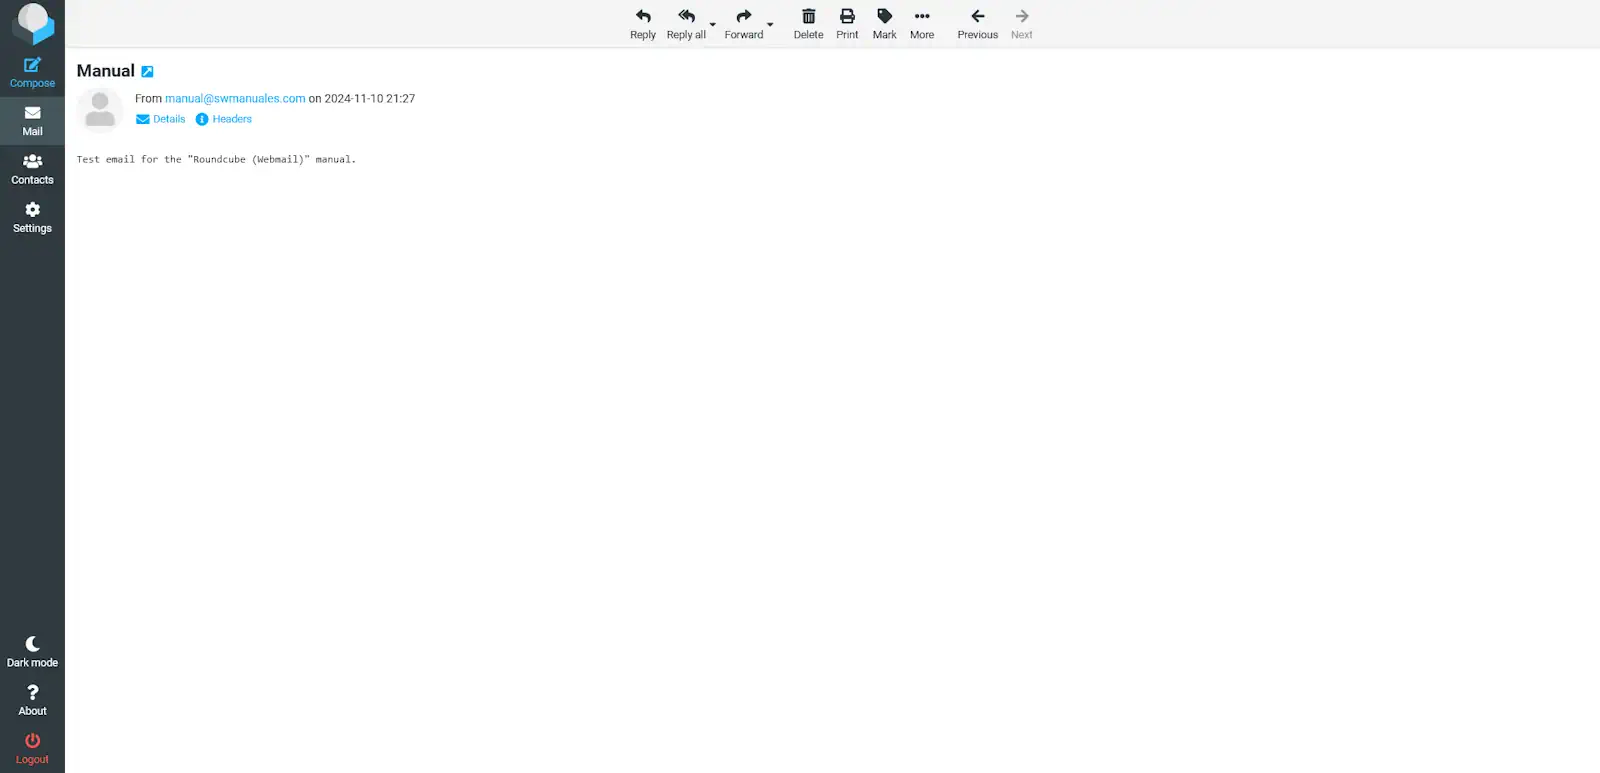
To navigate between messages, click the previous "<" and next ">" arrows.
Available options in the top panel include:
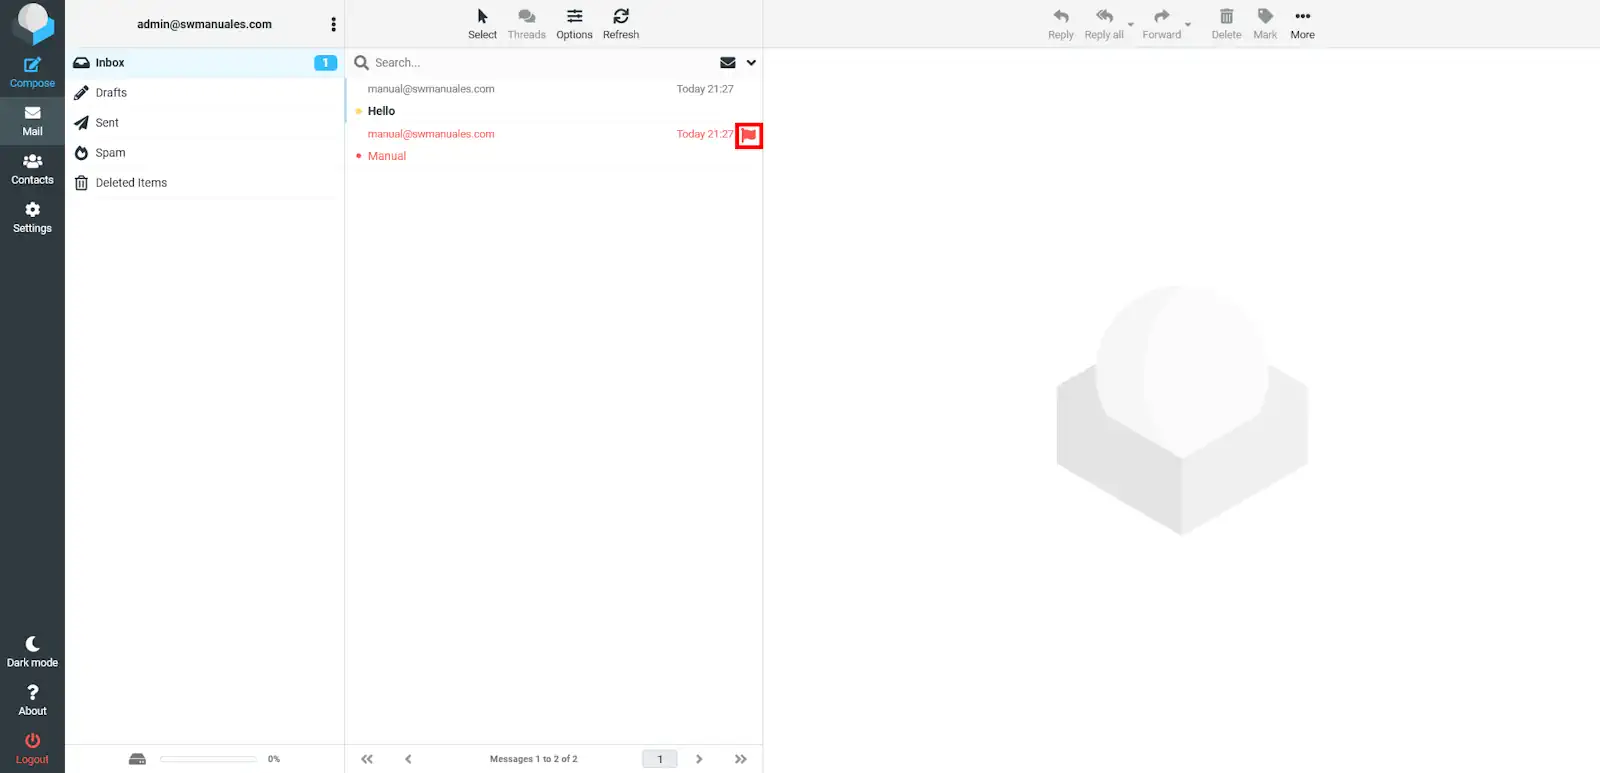
Go to the folder where the message is located and click on it to select it:
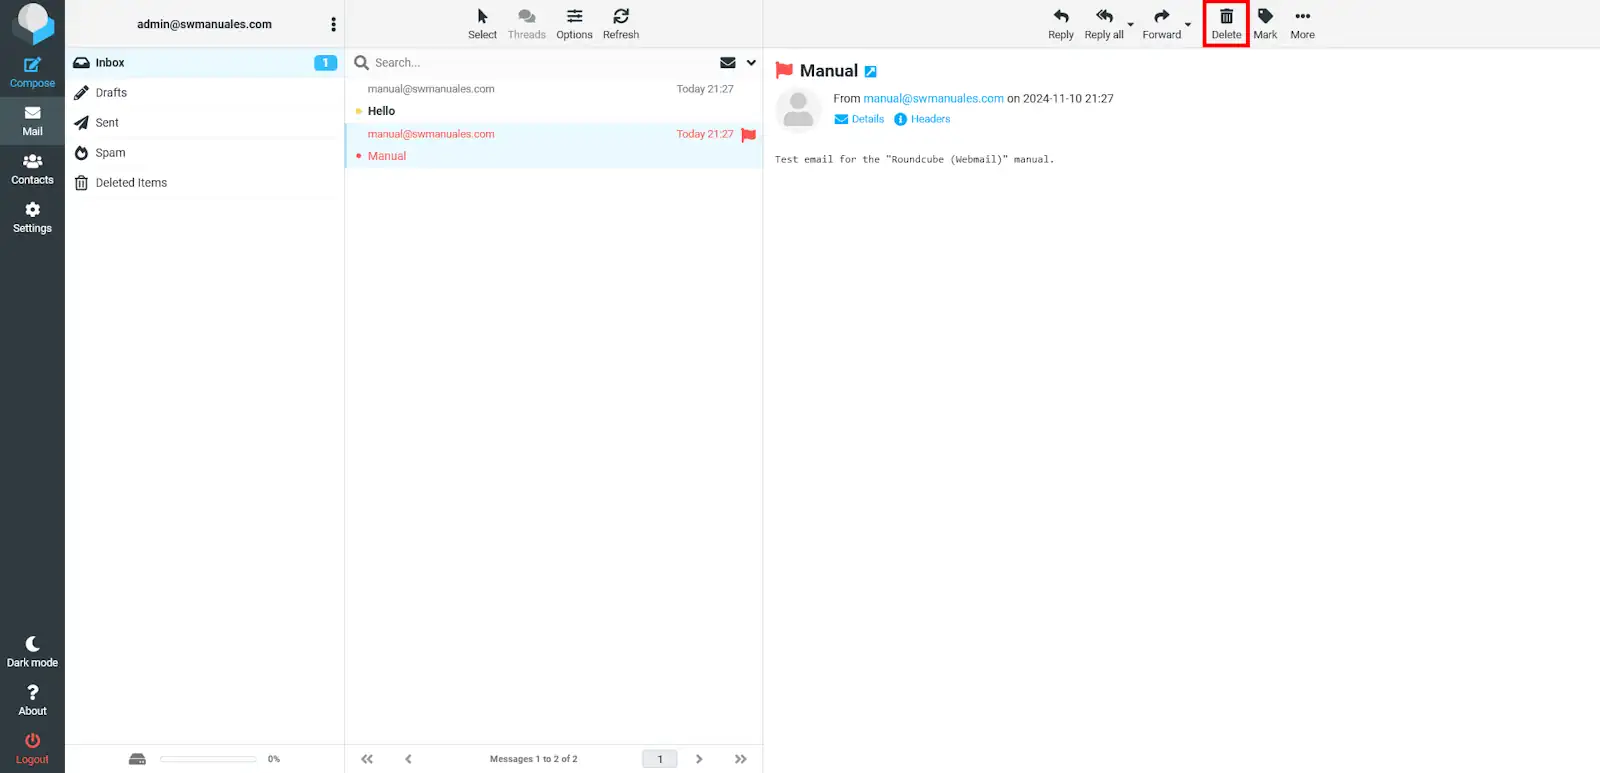
💡 To select multiple messages, hold down Ctrl and click on the messages. If you hold down Shift, you can select multiple messages at once.
To delete the message, click Delete, and it will move to the Trash. To move the message, click More > Move to... and select the destination folder. Or simply drag the message to the folder where you want to save it.
⚠️ Remember to periodically check and empty the Trash and SPAM folders to avoid using excessive space.
Subscribing to folders creates the same folder on the email server, allowing it to be viewed from any email client set up as IMAP, like Outlook or Thunderbird.
To subscribe to folders, go to RoundCube Webmail and click on the settings tab.
Select "Folders" and click the folder you want to subscribe to.
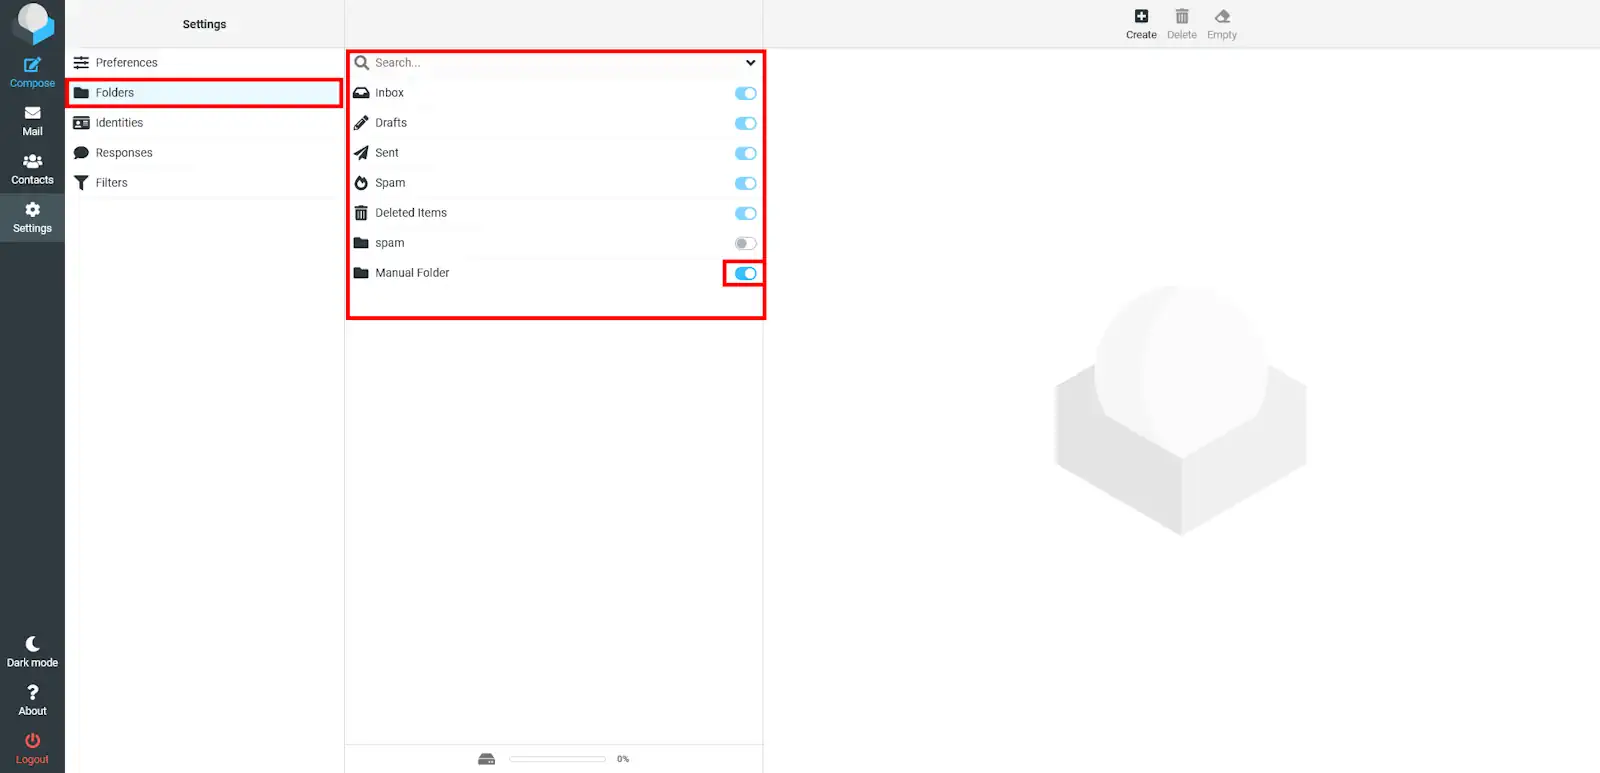
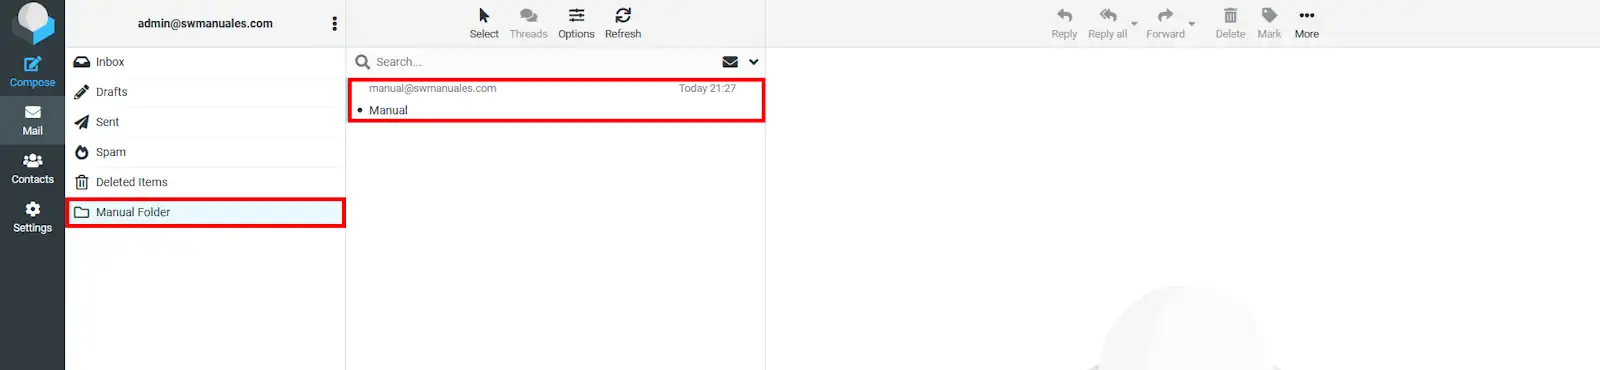
Once selected, the folder will be automatically subscribed, displaying the message on the screen:
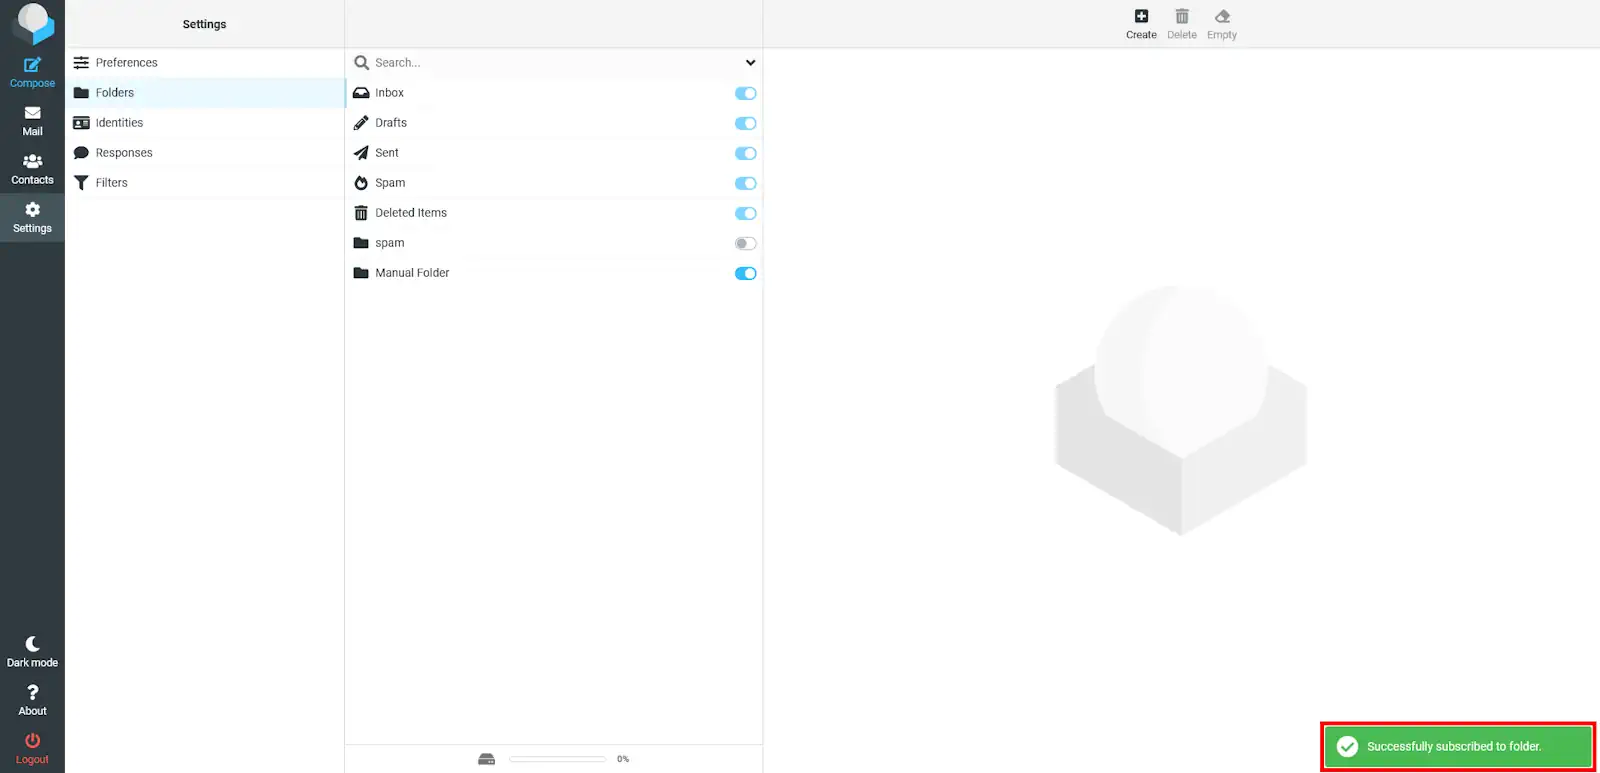
To unsubscribe, uncheck the previously marked box, and a confirmation message will appear at the bottom right.
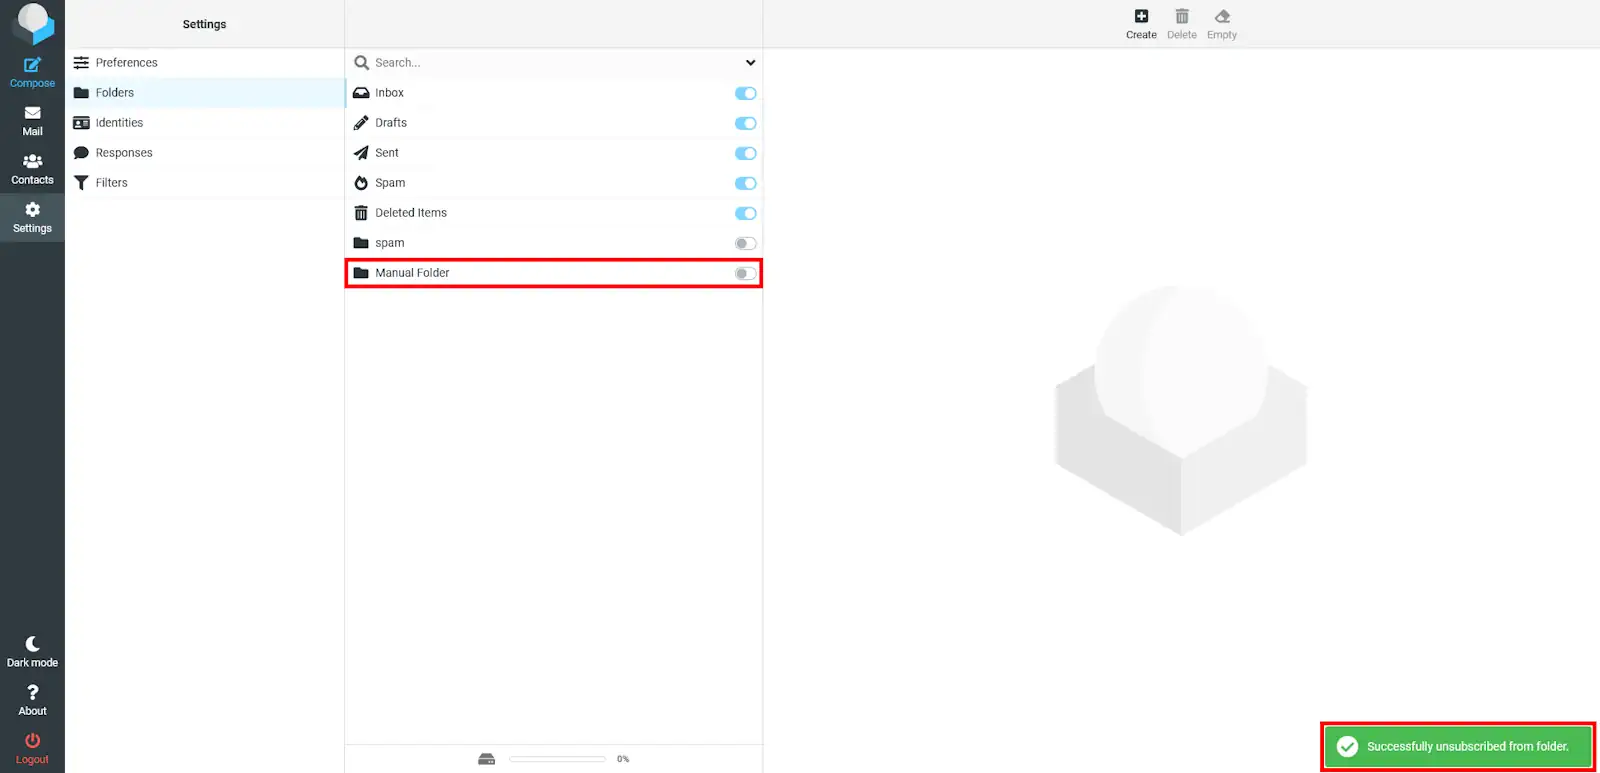
⚠️ Note that "Inbox," "Drafts," "Sent," "SPAM," and "Trash" are special folders and cannot be unsubscribed.
As seen in the following images, the folder originally in the "Roundcube" email client is now also visible in the "Thunderbird" email client.
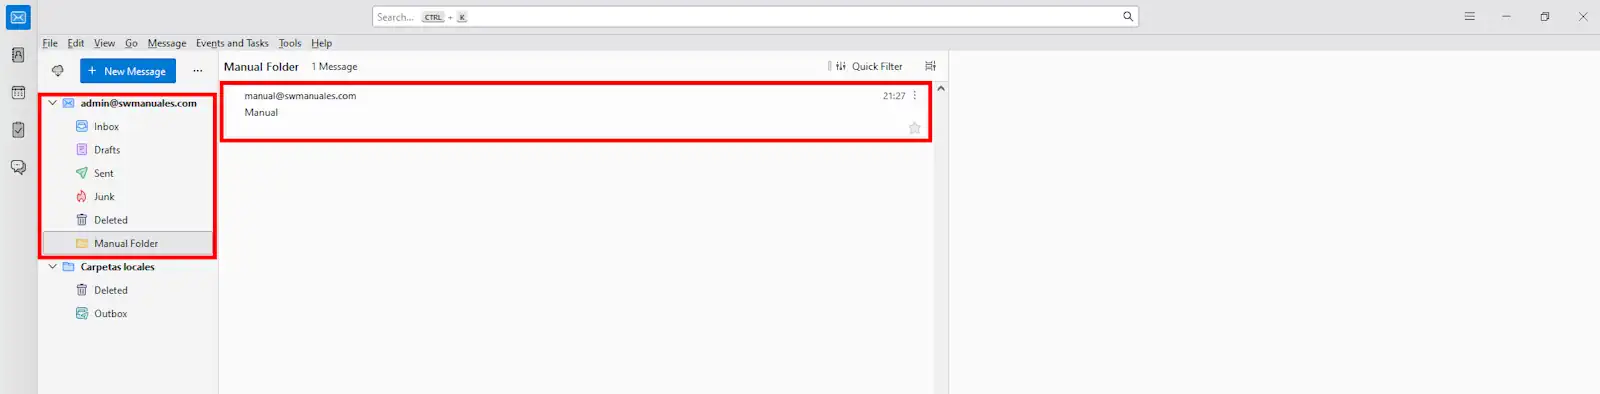
⚠️ Remember that synchronization requires the same email accounts to be used and that special folders like Inbox, Drafts, Sent, SPAM, and Trash are subscribed by default.
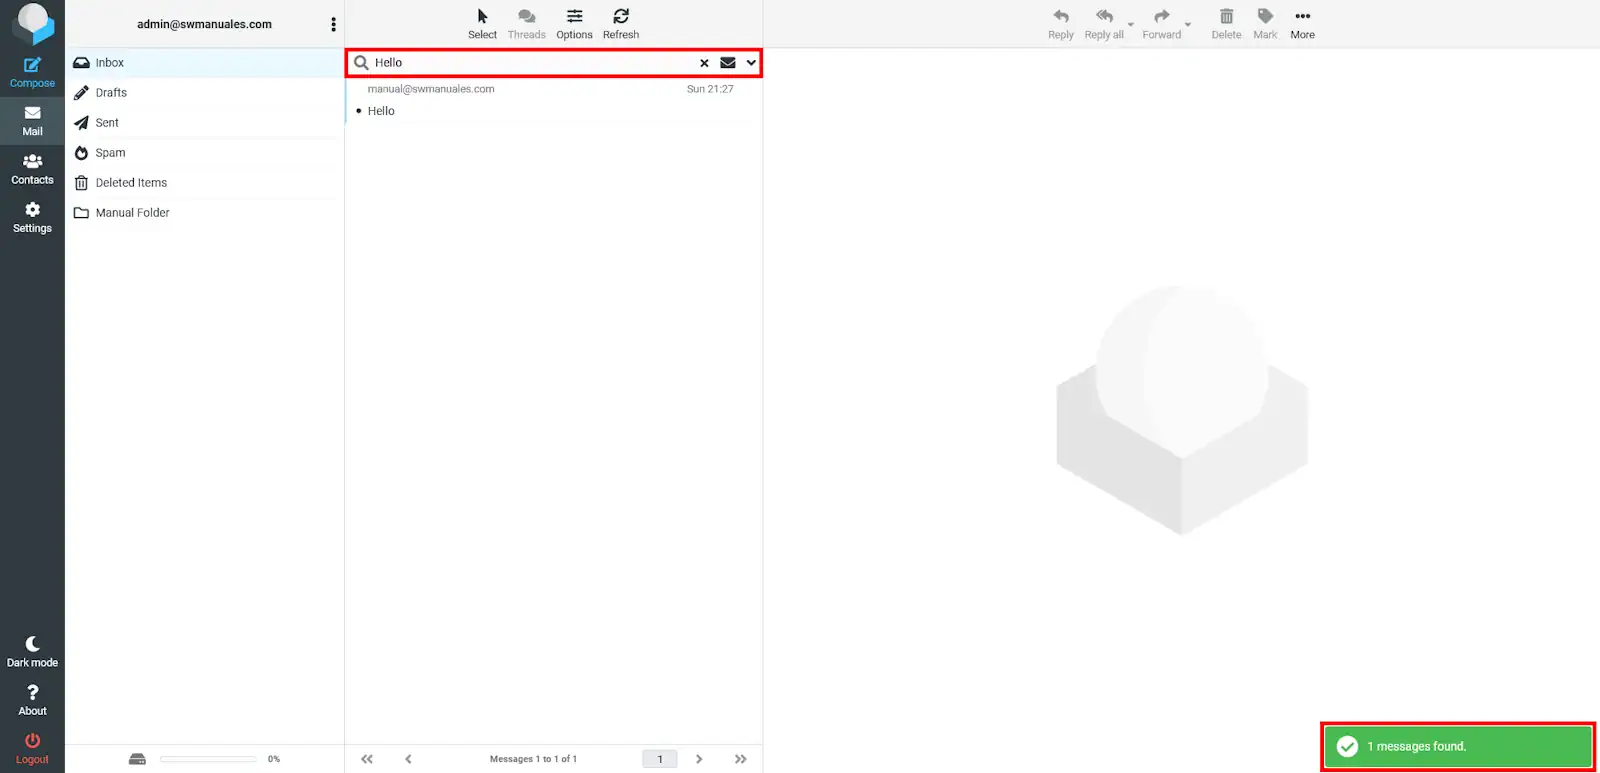
To search for an email, use the search bar at the top.
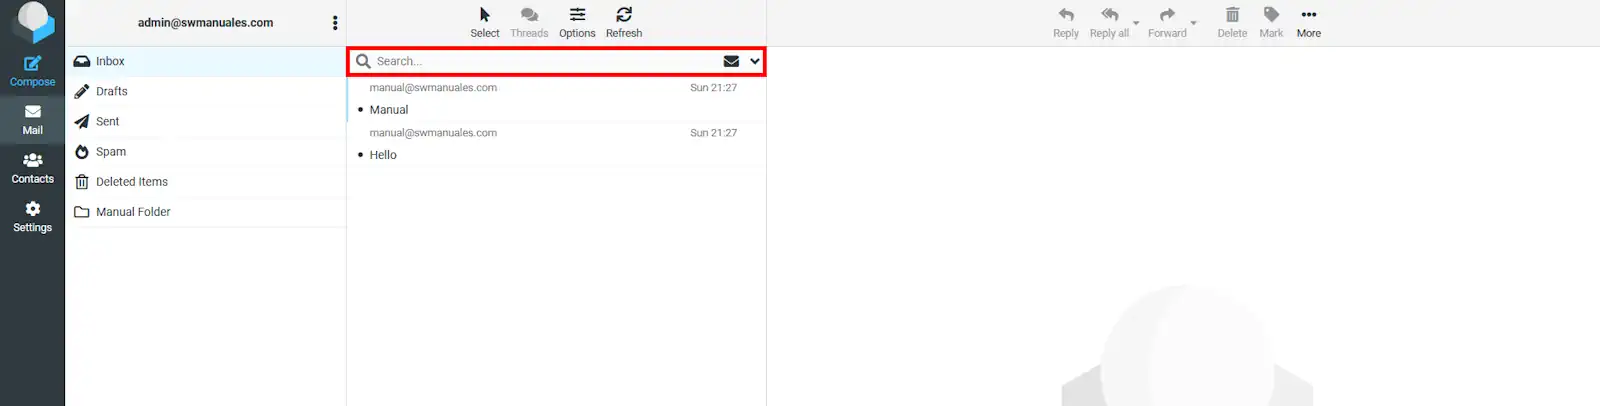
Enter the email you want to search for and press the Enter key; a message at the bottom right will display the number of found messages.
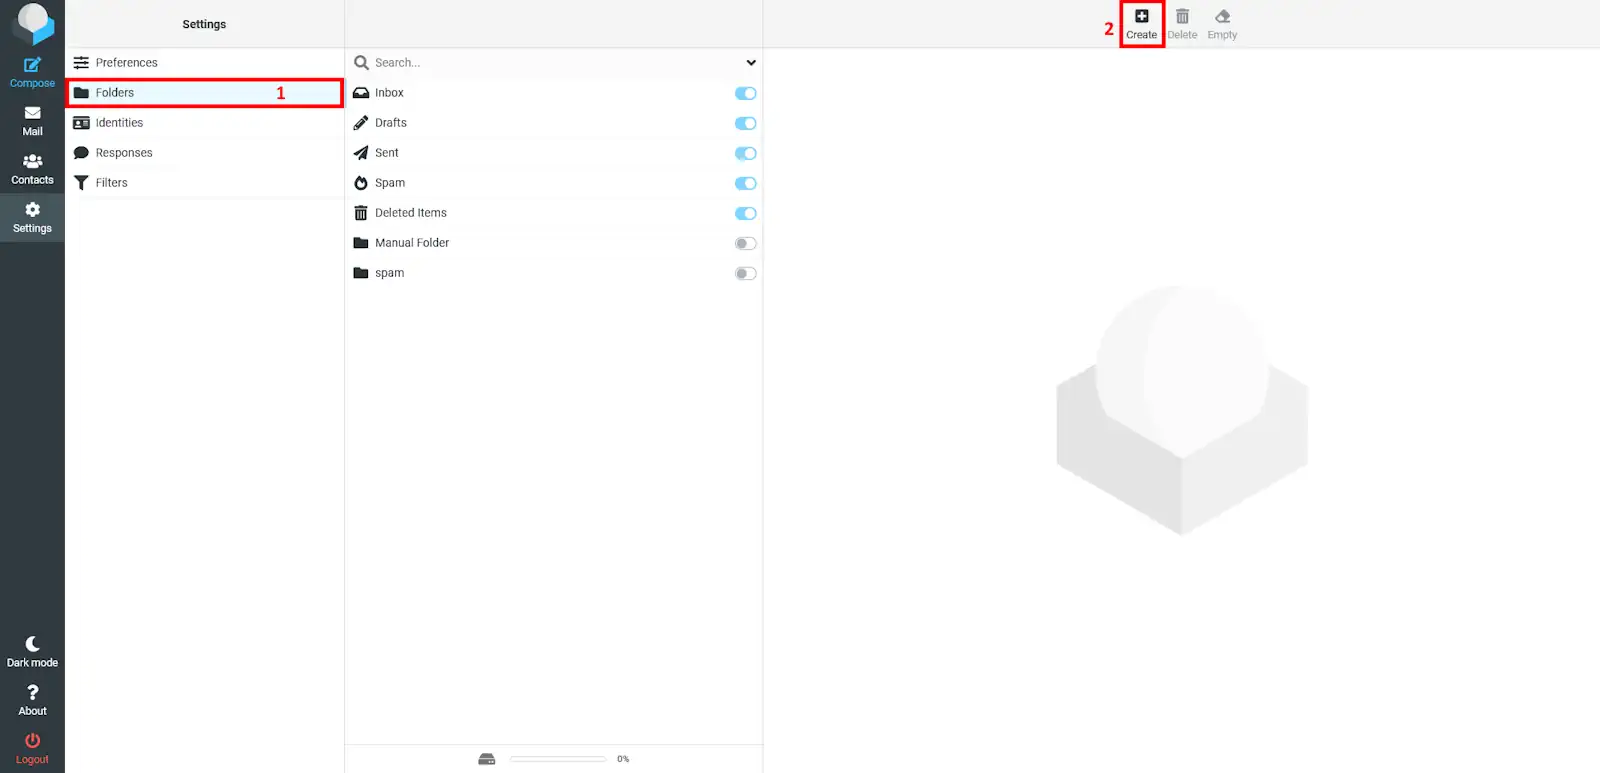
To create folders, go to RoundCube Webmail and click on the settings tab.
Then, go to the "Folders" section, where you can see all the folders you have. To create one, simply click on the button on the right side of the pagebelow, which has the "+" symbol.
Then a new menu will appear, where you have to enter the name of the folder, the root directory and the list view mode.
The root directory is the directory in which you want the new folder you want to make to be located. The list view mode is simply a presentation mode.
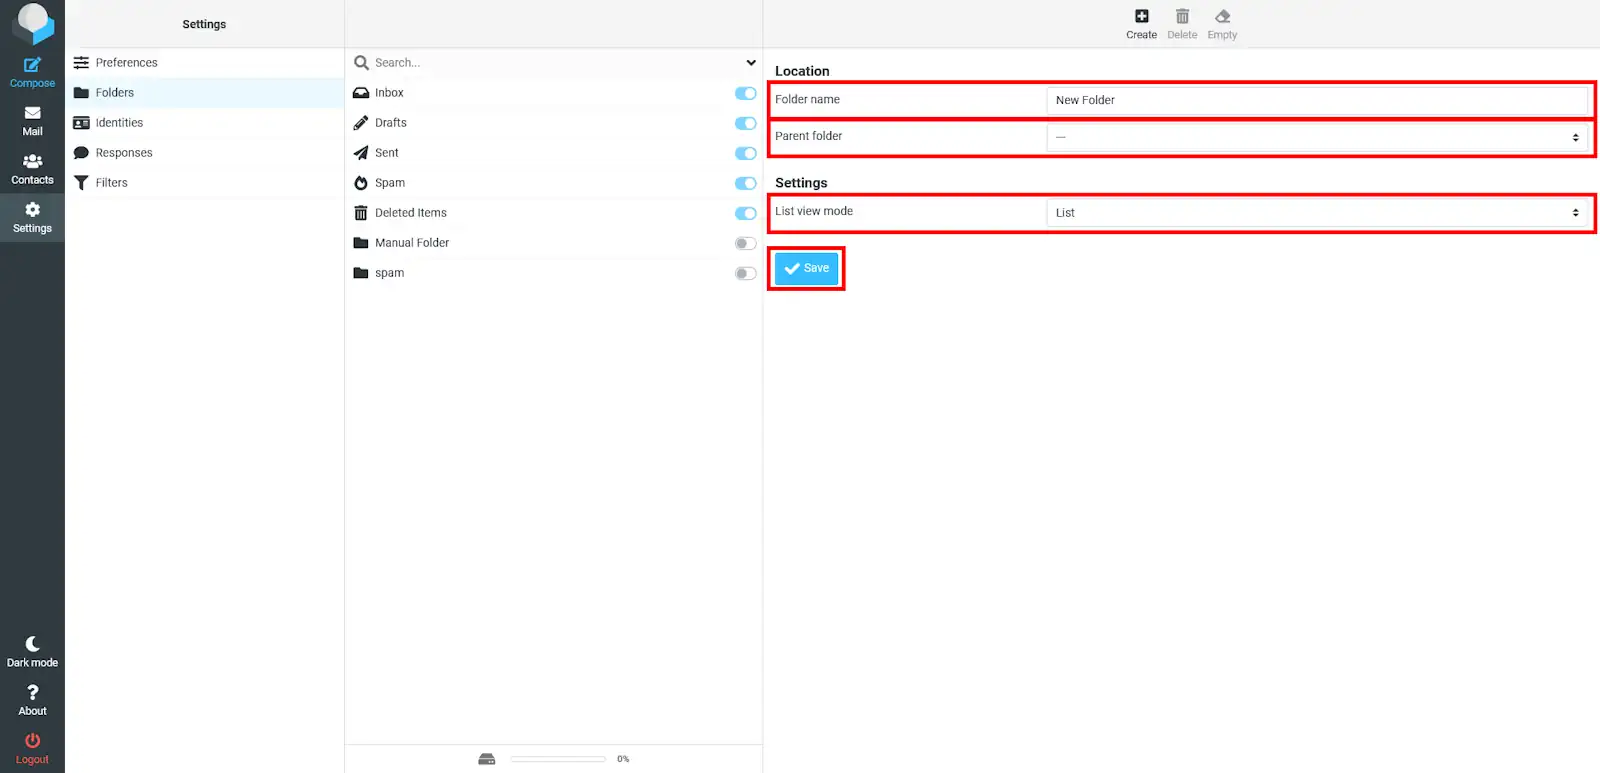
Remember to click the "Save " button.
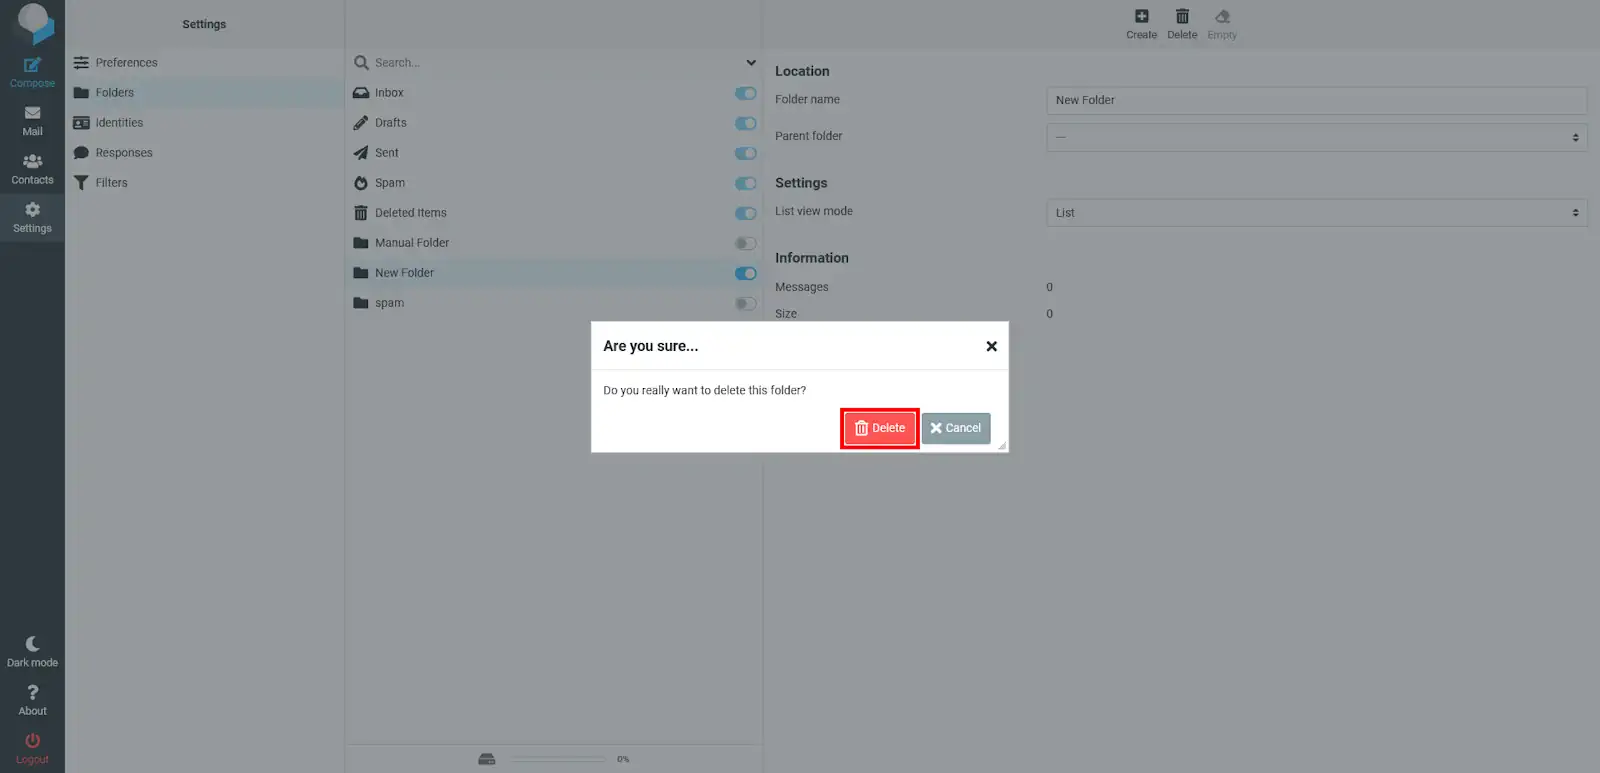
To delete a folder you will need to enter the configuration tab.
Then, go to the "Folders" section, there you can see all the folders you have. To delete a folder you simply select the folder you want to delete and click on the button on the right side of the page, which has the bin symbol.
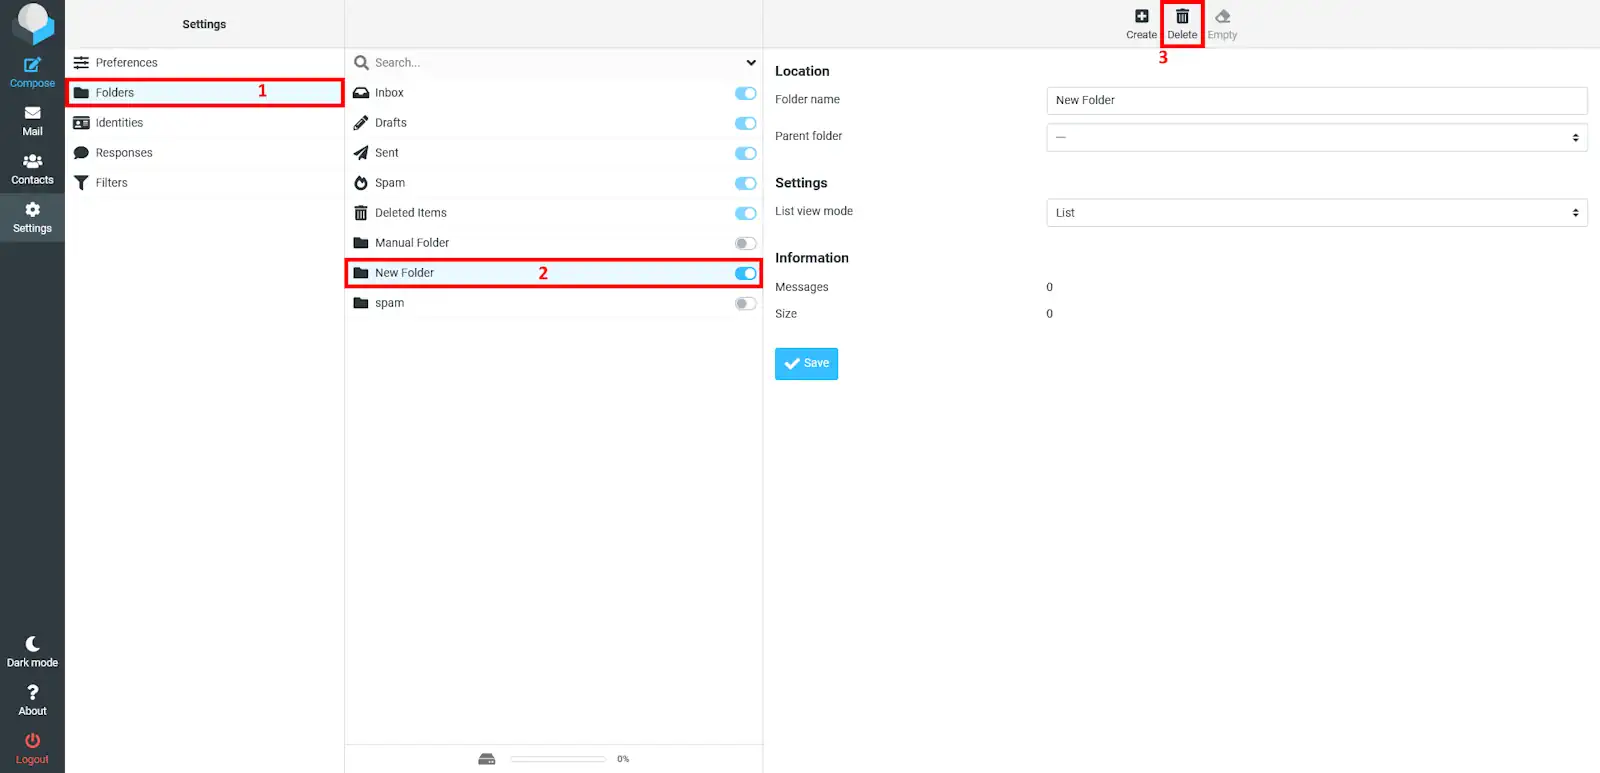
Finally, you will be asked f you really want to delete the selected folder. If , press on the Delete button.