In this manual we will show you the basic concepts of your SWPanel. To access it, you must enter in the URL of your browser: go.swpanel.com and enter your username and password.
Once inside, this is what you will see:
info_capture The screenshot is for guidance only. It was taken on version 2024.07.0132 with date 20/10/2024. It may differ from what the current version of SWPanel displays.
*The SWPanel will vary depending on the type of services you hire (if you have Cloud servers, support, security, etc.), but the most basic actions are performed in the same way regardless of the services you have.
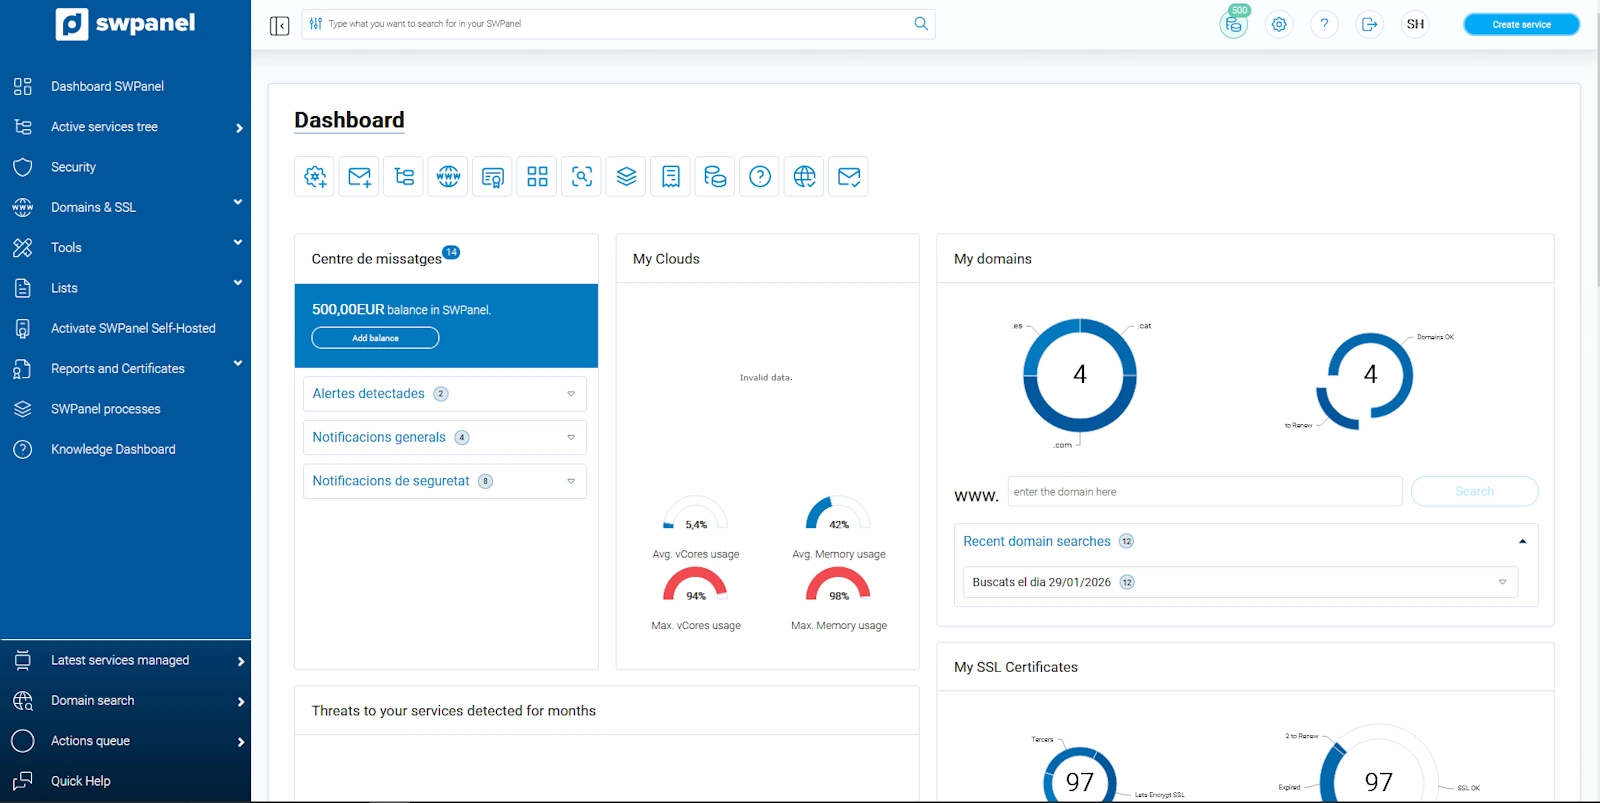
In the main dashboard you can see a summary of the services/domains contracted, the queries made on the support wall, available certificates...
info_capture The screenshot is for guidance only. It was taken on version 2024.07.0132 with date 20/10/2024. It may differ from what the current version of SWPanel displays.
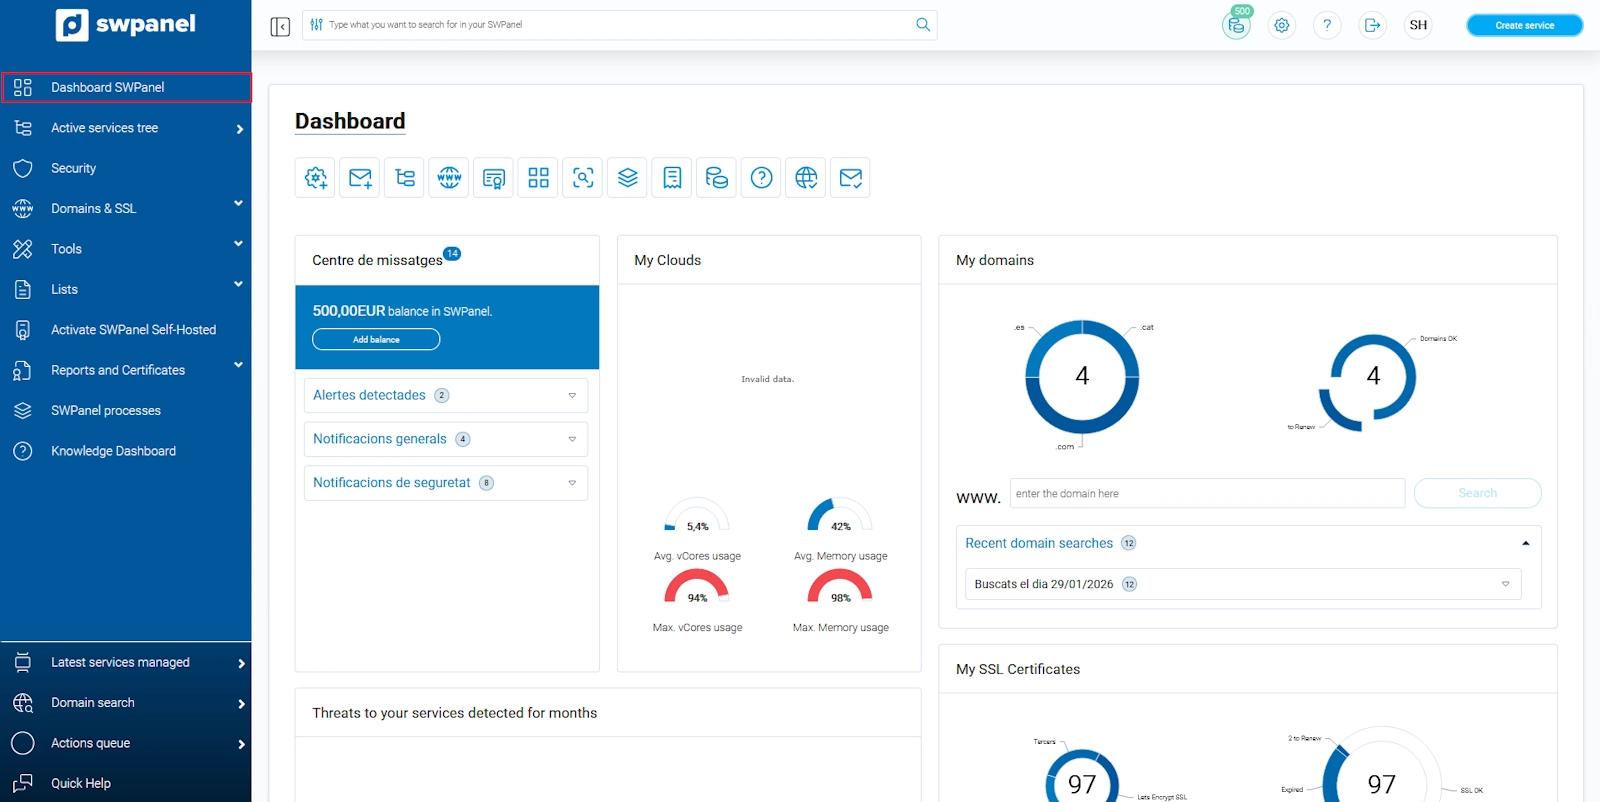
Without the need to access any other section of the management panel, we can perform basic actions on them (as long as you do not use organizational containers), from here you will be able to create another service quickly and easily or manage the available services (customize it, change service level, request cancellation, etc.). You can also register or transfer domains or create new SSL certificates for them:
info_capture The screenshot is for guidance only. It was taken on version 2024.07.0132 with date 20/10/2024. It may differ from what the current version of SWPanel displays.
If your payment method is "SWPanel credits" you will be able to see the current balance available and, also by clicking on the icon, add balance to your customer account:

info_capture The screenshot is for guidance only. It was taken on version 2024.07.0132 with date 20/10/2024. It may differ from what the current version of SWPanel displays.
Through the left side menu in blue, you can access the different sections offered by this control tool, the most basic ones are the following:
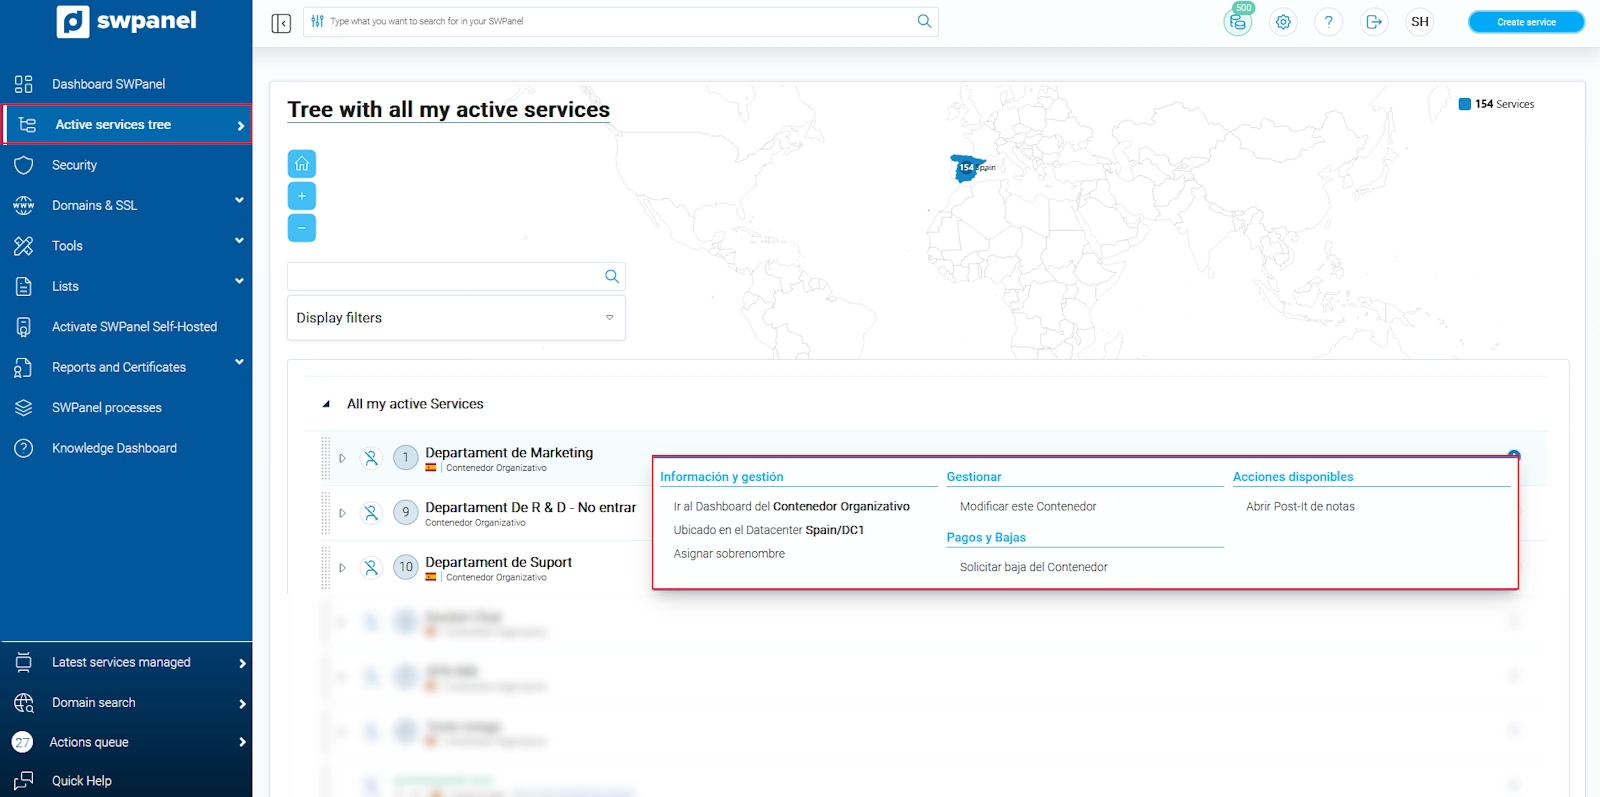
All my active services: List of all your available services. To the right of each one there is a button [...] "Manage" to perform basic actions on them:
info_capture The screenshot is for guidance only. It was taken on version 2024.07.0132 with date 20/10/2024. It may differ from what the current version of SWPanel displays.
Domains and Certificates: By deploying this option you will be able to access your domain portfolio to visualize all available domains, register or transfer others, manage contacts, hostnames, activate the surveillance of a specific domain, check your domain prices or manage SSL certificates:
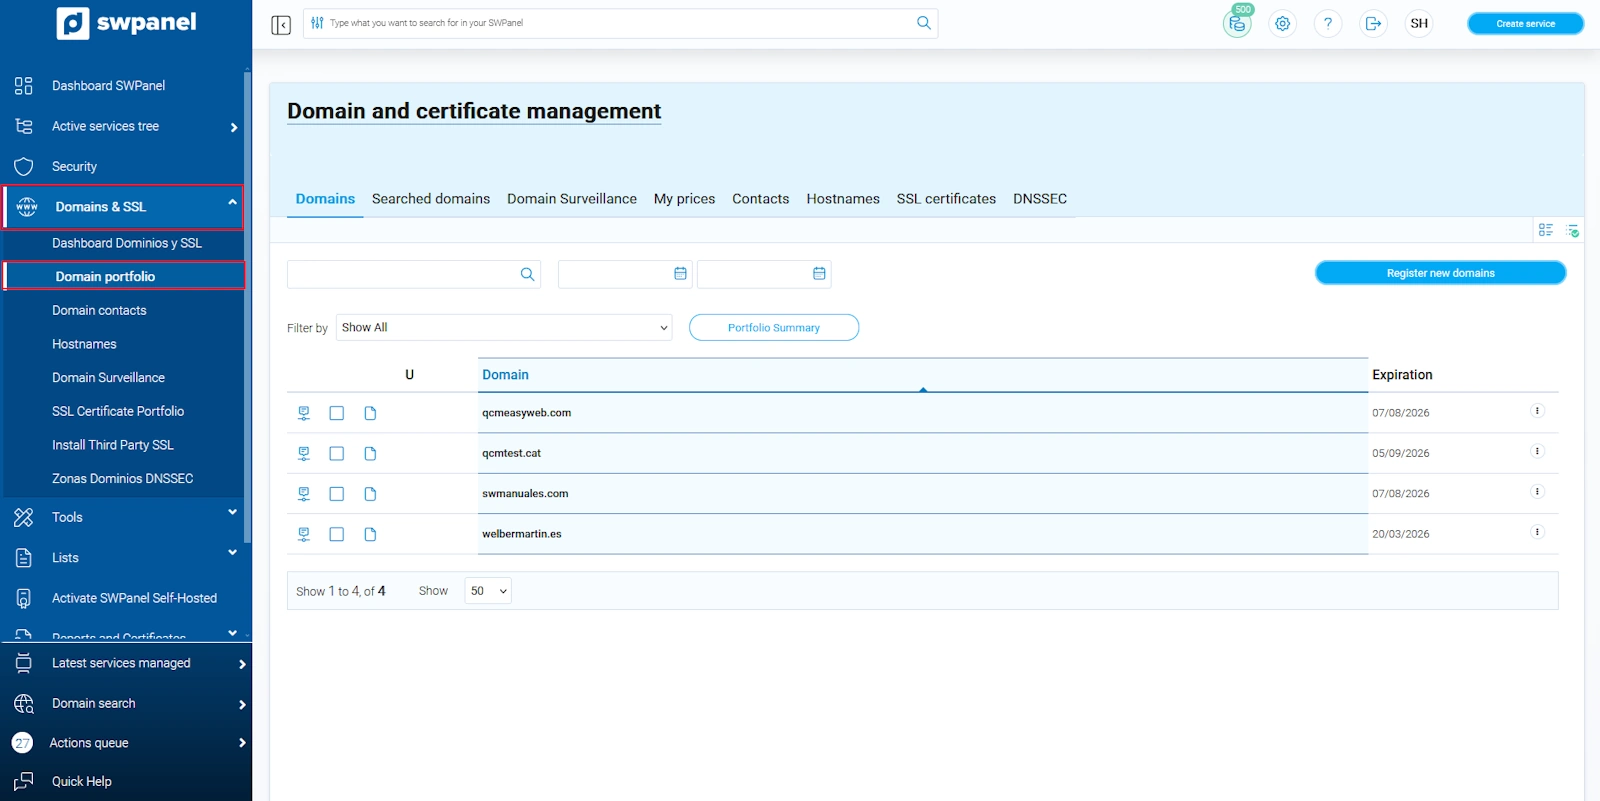
info_capture The screenshot is for guidance only. It was taken on version 2024.07.0132 with date 20/10/2024. It may differ from what the current version of SWPanel displays.
SWPanel queues: You can see the process or action queue. If there is any queue that has been stopped or blocked you can restart it from here:
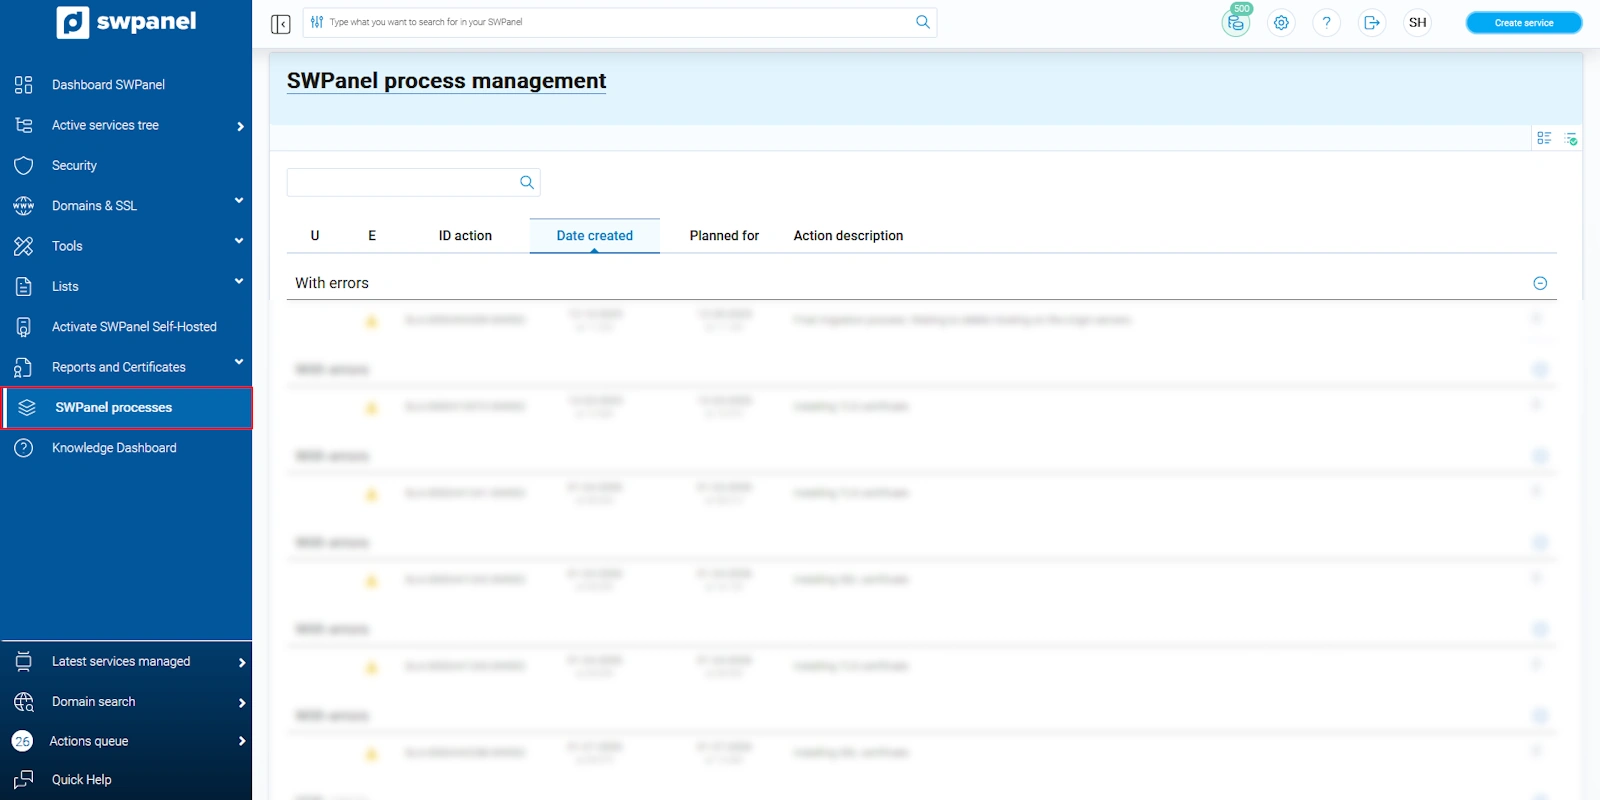
info_capture The screenshot is for guidance only. It was taken on version 2024.07.0132 with date 20/10/2024. It may differ from what the current version of SWPanel displays.
From the top right hand side of your SWPanel, by scrolling down the tab where your logo is displayed, you will be able to go to your customer dashboard, invoices, your commercial offers, SWPanel history and logout:
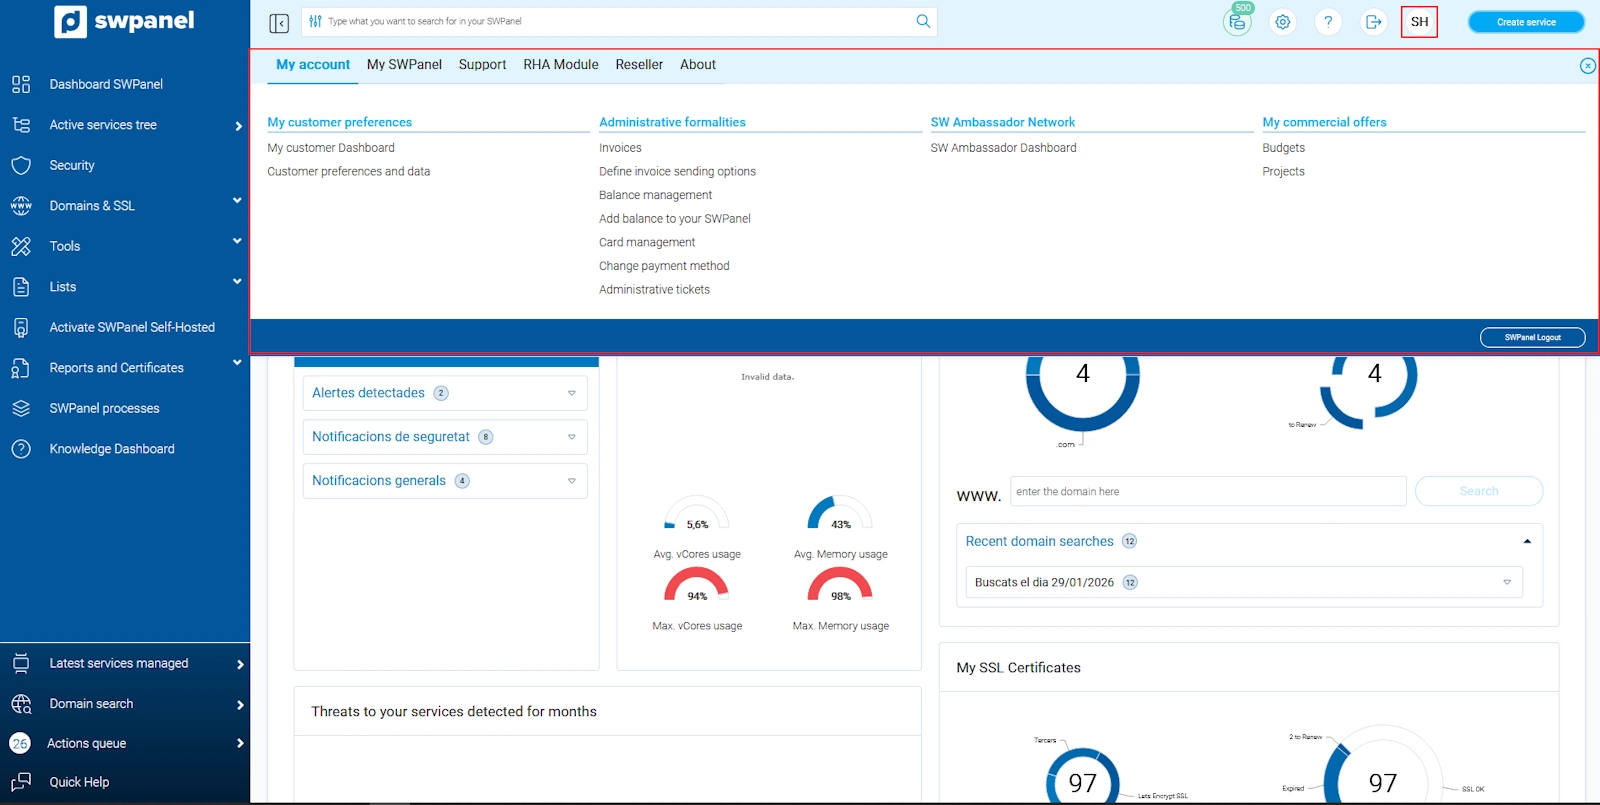
info_capture The screenshot is for guidance only. It was taken on version 2024.07.0132 with date 20/10/2024. It may differ from what the current version of SWPanel displays.
Customer Dashboard:
a) Customer data and preferences: Update customer data. Consult the manual ? Customer data and preferences.
b) Change of payment method: Choose the payment method that suits you best. Consult the manual ? Change payment method.
c) Change of access password. Consult the manual ? Change of access password.
d) Definition of invoice sending. Consult the manual ? Define the sending of electronic invoices.
e) Affiliates network: Be part of our affiliates network and earn money capturing clients for SW Hosting. For more information, please consult the manual ? Affiliate network.
Invoices: You will be able to visualize your invoices, send them to the e-mail of your choice or download them in pdf format; check the balance management, manage your credit cards and check the 347 model of the year of your choice. For more information, please consult the manual ? Billing.
Your commercial offers: Manage the budgets or projects you have generated.
SWPanel history: You will be able to see the history of actions performed in your SWPanel and the history of emails sent from the system to your email address. To learn more, see this manual ? SWPanel History.
Logout from SWPanel: Logout to close the SWPanel session.
Another important section within your SWPanel is Support. Through this tab you will be able to create queries through the free support ? Talk to support with Quick Help, 24 hours a day, 365 days a year.
You will be able to create Administrative Tickets ? How to create an Administrative Ticket
Finally, you will have at your disposal a knowledge database where you will find a series of manuals and tutorials that will guide you and help you to perform any action through your management panel.
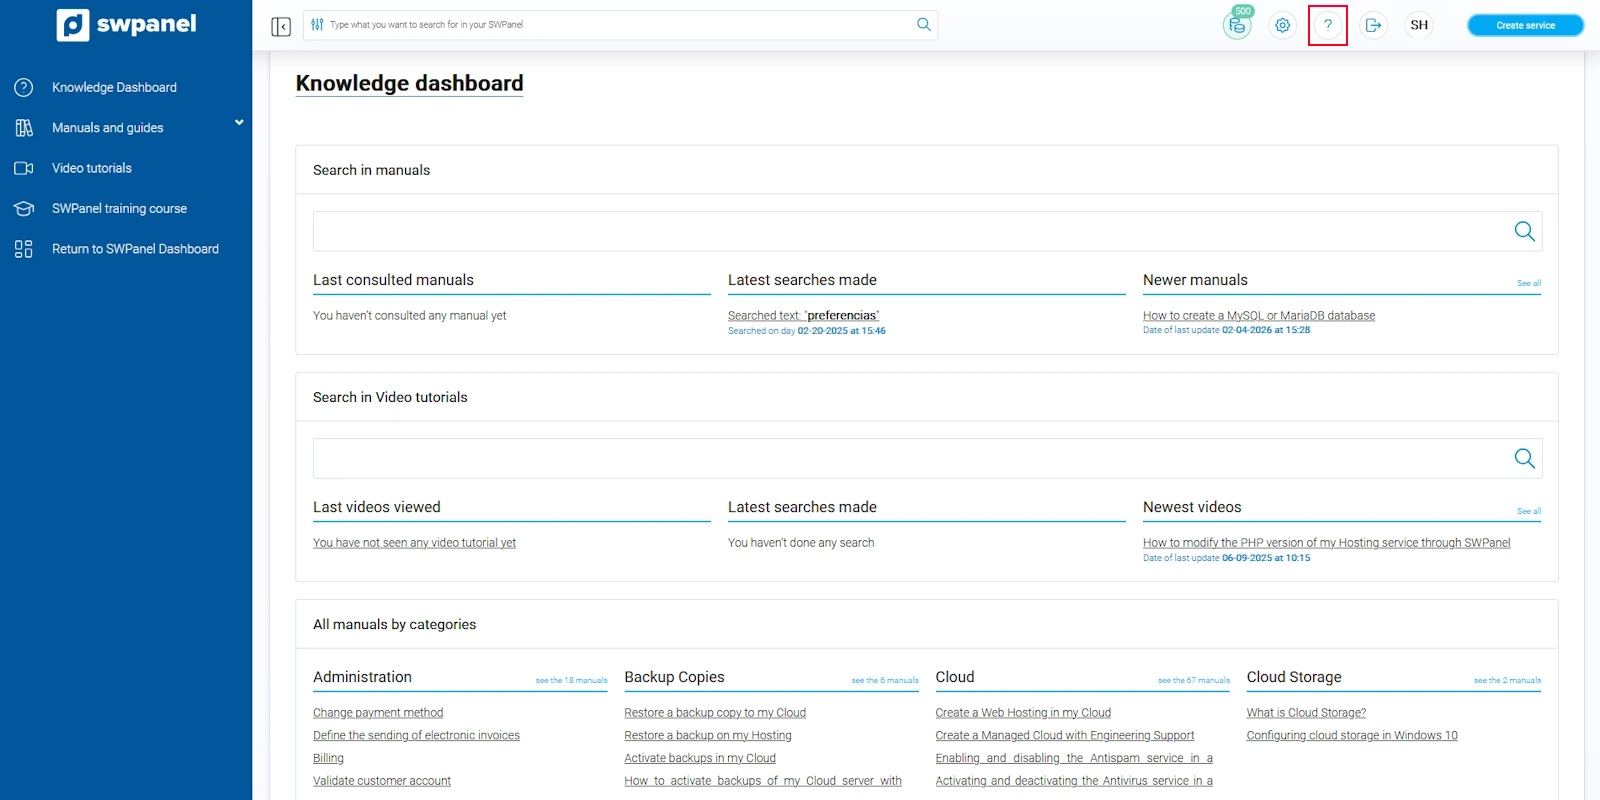
info_capture The screenshot is for guidance only. It was taken on version 2024.07.0132 with date 20/10/2024. It may differ from what the current version of SWPanel displays.
Finally, you always have a quick button to easily and immediately create a service in your customer account:
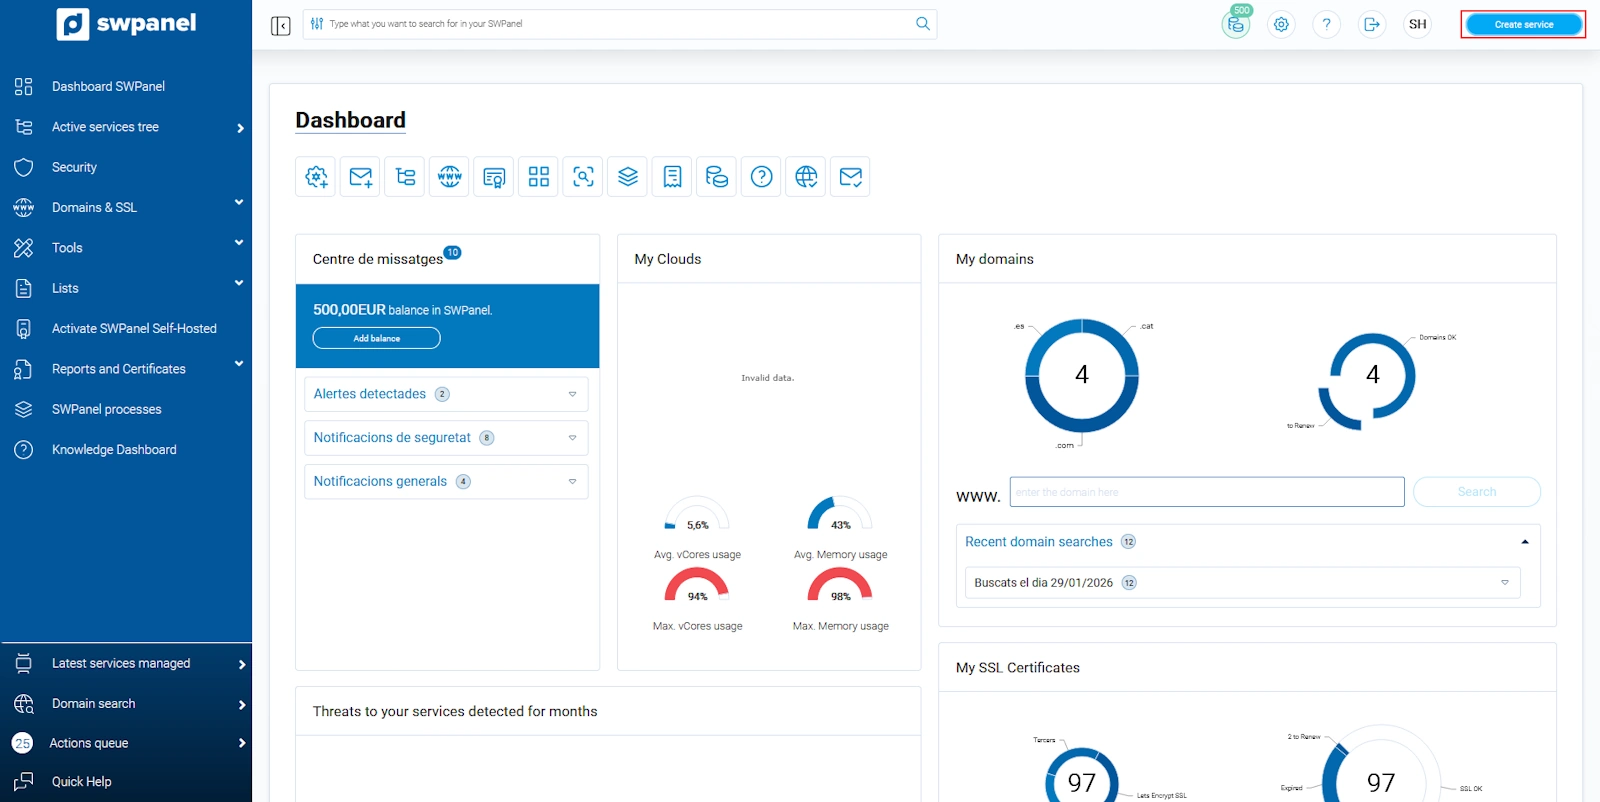
info_capture The screenshot is for guidance only. It was taken on version 2024.07.0132 with date 20/10/2024. It may differ from what the current version of SWPanel displays.